DUCK CONFIT FOR A SPECIAL OCCASION

It is hard to beat duck confit when you want to have a memorable meal. I will never forget the first time I had it, actually. I was all alone in Paris (my first trip to Europe!), having flown from Brazil to take part of a scientific workshop sponsored by The World Health Organization. The 2-week workshop launched the sequencing of the whole genome of Mycobacterium leprae. In those days, sequencing DNA was a cumbersome, slow, and painful process, nothing to do with what it is today. I was one of the lucky people invited to participate of that initial workshop. I knew very little about automated DNA sequencing, but even less about duck confit. On my first evening, very tired and a bit insecure to walk around town, I crossed the street and bravely entered a restaurant near Institut Pasteur (Le Pot au Feu). The special of the day was duck confit, so that’s what I ordered. I thought I had died and gone straight to heaven, arriving at dinner time. Unforgettable experience, even if all alone sitting at my table, staring at couples in love all around me. Or so it seemed…  Paris and romance go always hand in hand.

I made duck confit twice in the past, before my blogging years. Even though both meals turned out great, the process was not very pleasant: a lot of fat to deal with, and a pretty intense smell lingering in the house for way too long.  This time, I used sous-vide to cook the duck legs and I have one word to describe it: WOW! I go as far as saying that buying the Anova circulator is worthy it just to make duck confit.  Easy, very little fat needed, no lingering smell, and once the duck legs are cooked, they can go still in the bags to the fridge and stay there for 2 to 3 days until showtime.  Cannot get much better than that…

Duck Confit1


DUCK CONFIT
(from the Bewitching Kitchen)

3 tablespoons salt
2 cloves garlic, smashed (optional)
1 shallot, peeled and sliced
6 sprigs thyme (I used dried thyme)
4 sage leaves
Coarsely ground black pepper
4 duck legs with thighs
4 tablespoons duck fat

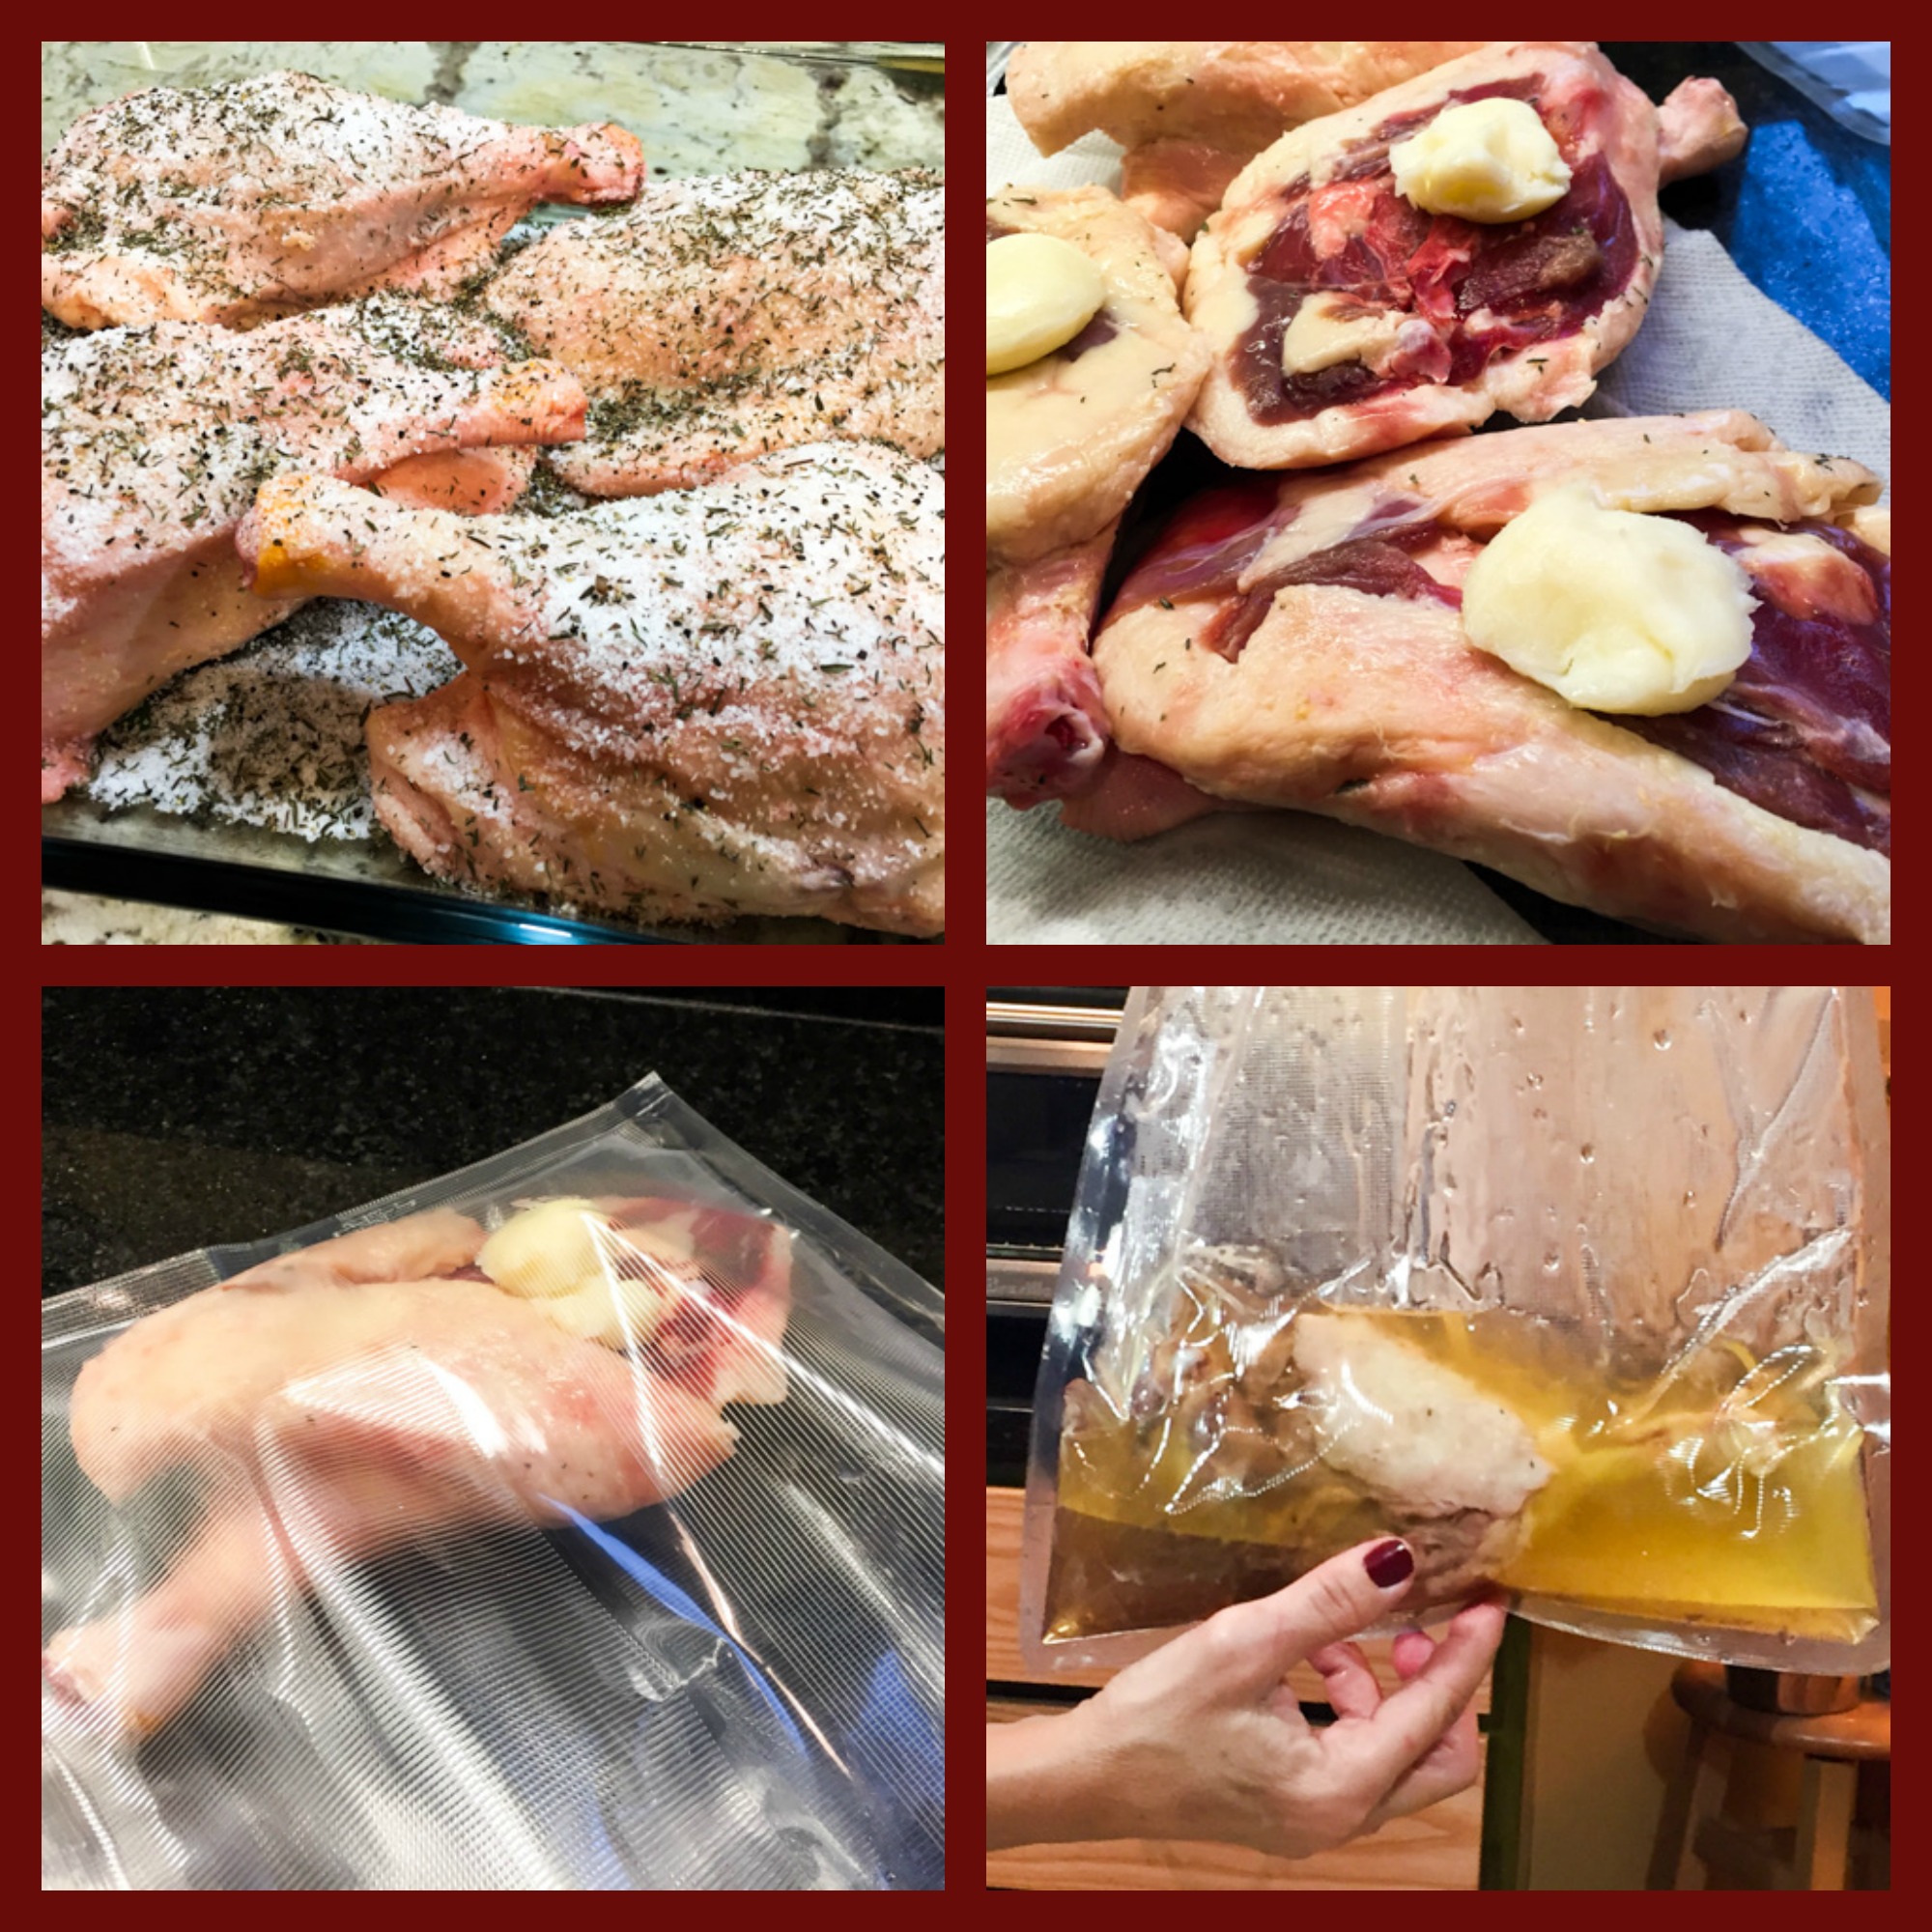
Sprinkle 1 tablespoon of salt in the bottom of a dish or plastic container large enough to hold the duck pieces in a single layer. Evenly scatter half the garlic, shallots, and thyme in the container. Arrange the duck, skin-side up, over the salt mixture, placing one sage leaf underneath each piece of duck. Sprinkle with the remaining salt, garlic, shallots, and thyme and a little pepper. Cover and refrigerate for 24 to 48 hours.

Rinse the duck pieces well, to remove the coarse salt. Dry the meat with paper towels. Place each piece in a plastic bag, adding 1 tablespoon of very cold duck fat inside, vacuum-seal the bags.  Submerge the sealed bags in a water-bath set at 82 C (180 F) for 10 hours.  When the time is up, chill the pieces in an ice bath and place in the fridge, still sealed.

About 45 minutes before dinner time, remove the duck from the fridge, open the bag and scrape off most of the congealed fat. Place in a roasting pan, skin side up, cover with aluminum foil and warm up in a 375 F oven for about 30 minutes. Before serving, place the pan under the broiler to crisp up the skin. Alternatively, you can warm up the pieces and then sear the skin on a blazing hot skillet.

ENJOY!

to print the recipe, click here


DuckConfitcomposite

Comments: I made this recipe for a very special dinner. First, it was my beloved’s Birthday, and since it falls very close to Christmas, it’s tricky to have a party for him.  Most people are away visiting family, or too busy with the holidays. But, it turns out that two VERY special friends made a trip all the way from Brazil to be here with us on that special day!  And they are amazing cooks, so the pressure was high on me to deliver a nice meal. Needless to say, I did a lot of research on duck confit sous-vide before settling on the method I shared here.

Several things are important. The duck itself. The best kind to get is Moulard duck, so I special ordered it from d’Artagnan (remember my latest IMK post?). Then, the salting to cure the meat before cooking. Some sous-vide methods advise you to do that step in vacuum-sealed bags, but the meat can turn out overly salty. I decided to salt the pieces in a baking dish in the fridge for 36 hours, then rinse the meat well before cooking it. The sous-vide step is another major consideration. I visited a discussion forum (eGullet), and read everything I could find on duck confit before settling on my choice of 10 hours at 82 C (180 F).  As to the amount of fat to use, one tablespoon is enough, but you could even omit adding any extra fat. If you look at the last photo on the composite picture above, you’ll notice that there was a lot more than one tablespoon of fat in each bag. The fat rendered from the leg itself will be more than enough to properly coat it during cooking. So, if you rather  not render duck fat or buy pre-rendered fat, simply go from the salting step to vacuum-sealing. It will work like a charm. Of course, you could get by with olive oil too. The main goal is to cook the meat submerged in some type of fat, duck fat being the best one for flavor.

I feel that I hit the jackpot with that combination of time and temperature, would not change it in the future.  Finally, the last consideration is how to warm up the meat before serving.  I did not want to deal with a hot skillet and searing the skin, making a huge mess right before our meal, so I went with a regular oven. First 375 F for about 30 minutes, then running the pieces under the broiler to crisp up the skin.  Would not do it any other way, it was spectacular!  The meat had the exact texture I remember from my first duck confit enjoyed in Paris! Not too salty, not too greasy, simply perfect!

plated2

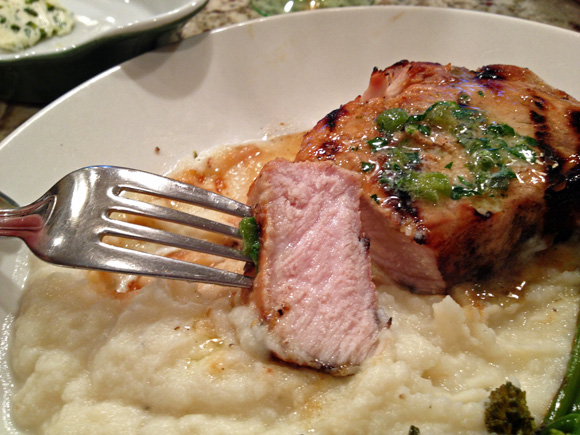
Dinner is served!  Duck confit and gratin of potatoes…
Life is good!

bday

ONE YEAR AGO: Ken Forkish’s Warm Spot Sourdough 

TWO YEARS AGO: Bran Muffins, Rainbows, and a wonderful surprise!

THREE YEARS AGO: Salmon Wellington

FOUR YEARS AGO: The Green Chip Alternative

FIVE YEARS AGO: Weekend Pita Project

SIX YEARS AGO: Let it snow, let it snow, eggs in snow

HOW ABOUT SOME COFFEE WITH YOUR STEAK?

Have you missed the 6th anniversary of my blog?
Only a few days left to enter my giveaway!
Click here to join…

If you’ve never used coffee in marinades or dry rubs for meat, you are missing a great opportunity to enjoy its mysterious flavor added to usual suspects such as herbs, peppers, and spices.  I’ve blogged before on a take on pork tenderloin that I still think is one of the best recipes I have in the blog, and that uses coffee as one of the ingredients.  But today I’ll switch gears and apply a coffee-based dry rub to beef. The recipe, published by The New York Times,  was recommended by our very dear friend, Marijo, who happens to be a great cook, so when she raves about something, I am all ears. And taste buds. It did not take me too long to jump on it, although it is taking me a long time to share it here.  What else is new?  That’s the way Sally rolls…

Steak_Coffee

ALL-PURPOSE CALIFORNIA BEEF RUB
(as published in The New York Times)

2 tablespoons finely ground coffee
1 ½ tablespoons kosher salt
1 ½ tablespoons granulated garlic
1 heaping teaspoon black pepper
1 tablespoon brown sugar
¼ teaspoon cayenne pepper
¼ teaspoon ground cloves
¼ teaspoon cinnamon

Combine all ingredients and store in an airtight container.

Rub on the meat you intend to grill and leave it for at least one hour, overnight works too.

Grill to medium-rare, or to the level of your choice (hopefully not well-done!)

Allow the meat to rest for 10 minutes before slicing.

ENJOY!

to print the recipe click here

Comments: I’ve made this recipe quite a few times, with flank steak, flatiron steak, tri-tip, and even bison rib eye steaks. For the bison rib eye, I adapted it to sous-vide and it turned out spectacular, but the photos not so much, so I won’t dedicate a special blog article for it.

SOUS-VIDE METHOD: Apply the rub, and seal the meat in a plastic bag (vacuum is fine, water replacement method will work too). Leave the meat in the fridge for one hour or more, whatever is convenient with your schedule.   Place the bag in the water-bath set for 134 F (medium-rare) for a minimum of 3 hours.  I left mine for almost 6 hours, as I started cooking it at lunch time and we enjoyed the meat at dinner time that evening.  Once the meat is cooked, open the bag, discard the liquid accumulated inside, pat-dry the surface with the meat with paper towels.  Sear on a blazing hot grill or cast iron pan.

To our taste, the sous-vide was by far the best method for bison steaks. Same applies to flatiron. For flank and skirt steak, we think there is not much improvement by going the sous-vide route, both cuts of meat cook perfectly fine on the grill. Whatever your method of cooking, this rub is money!  Give it a try…

Marijo, thanks for sending this recipe our way,
looking forward to many more!

ONE YEAR AGO: Celebrate Wednesday with a Spiral Kick!

TWO YEARS AGO: Carrot Flan with Greens and Lemon Vinaigrette

THREE YEARS AGO: Granola Bars

FOUR YEARS AGO: Awesome Broccolini

FIVE YEARS AGO:  A Twist on Pesto

SIX YEARS AGO: Ciabatta: Judging a bread by its holes

COOKING SOUS-VIDE: TWO TAKES ON CHICKEN THIGHS

I am still having fun and getting more and more comfortable with my Anova sous-vide gadget. Many recipes tried, some will go un-blogged due to photos that did not turn out well. A lobster tail, for instance, was quite spectacular cooked sous-vide, but the pictures did the recipe no justice whatsoever.  I shall re-visit that in the future to share the method in the Bewitching.  But here I am today to show you two ways to deal with chicken thighs. The first preparation uses boneless and skinless pieces, a departure from the classic Chicken Cacciatore that I found on this site, great source for sous-vide cooking tips and recipes. Before I share my recipes, I invite you to take a look at this recent post  from my friend Maureen, at The Orgasmic Chef.  Beautiful caramelized onions, without having to stand by the stove baby-sitting them.  She got her sous-vide toy not too long ago, so I guess we are both newbies at this. Sous-vide sisters!

chicken-cacciatore11


CHICKEN CACCIATORE
(slightly adapted from SVKitchen)
 .
3 tablespoons olive oil
1 large shallot, finely chopped
1 garlic clove, thinly sliced
1 can (28.2-ounce) cherry tomatoes  (or regular canned tomatoes, coarsely chopped)
¼ cup chopped fresh basil leaves, plus extra for final garnish
4 tablespoons mascarpone
Salt and pepper to taste (about ½ teaspoon each)
6 boneless, skinless chicken thighs
 .
Preheat the water bath to 152°F (67°C).
 .
Heat the olive oil in a sauté pan over medium heat and add the shallot and garlic. Cook until soft and translucent, about 8 to 10 minutes, being careful not to brown. Remove the pan from the heat and add the tomatoes, stirring to combine. Gently stir in the basil and the mascarpone. Season to taste with salt and pepper. Set aside to cool slightly.
 .
When the sauce has cooled, place about a third in a 1-gallon zip-lock bag. Add 3 of the chicken thighs. Add another third of the sauce, the other 3 thighs, and then the remaining sauce. Seal using the water displacement method.
 .
Cook for 2 to 4 hours.
.
If serving immediately, transfer the chicken and sauce to a oven-proof dish or ramekin large enough to easily hold all the ingredients. Heat a broiler to high. Place the casserole under the broiler for a couple of minutes, watching closely, just to brown the sauce.
.
ENJOY!

to print the recipe, click here

served1

Dinner is served! Chicken sous-vide, spaghetti squash, and roasted asparagus…

And now, for a second method, in which the chicken thighs are cooked with skin and bone-in. As the sous-vide will cook the meat perfectly but leave you with mushy skin, all recipes include a final step to crisp the skin up. If you search the net, you’ll certainly stumble on a recipe by Michael Voltaggio that is described by many as “the best chicken thigh ever”. I tried it, I really did, and the mess it made on my stove left me on the verge of tears.  Plus, the whole house smelled like fried chicken for weeks.  Ok,  for 18 hours. Chicken thighs were not going to meet the Anova gadget for as long as I was in charge of cooking.  But, certain ordeals tend to be forgotten as time goes by.  Since I really liked the texture of the meat, I decided to give it another try, using a very hot oven for the final step of crisping up the skin.  Worked like a charm!  The inspiration came from this cookbook by Jason Logsdon, which I own in its Kindle version, but I modified the recipe quite a bit, so I feel ok about sharing it with you. In his version, he crisps the skin on a cast iron pan, evidently, I didn’t.

Neat-freak + Drama-Queen = Cast-Iron-Repudiation

RoastedTomatoSalsa

CHICKEN THIGHS WITH ROASTED TOMATO SALSA
(inspired by Sous-Vide Help for the Busy Cook)

for the chicken:
6 chicken thighs, bone-in
salt and pepper to taste
New Mexico chile powder
1 lemon, juiced

for the tomato salsa:
7 Roma tomatoes, very ripe
2 tablespoons olive oil
salt and pepper to taste
dried thyme, about 1 teaspoon
2 tablespoons apple cider vinegar
2 tablespoons brown sugar

Prepare the roasted tomatoes in advance, they will keep for several days. Cut the tomatoes in half, mix them with the olive oil, season with salt and pepper, and roast in a 325 F oven for 2 hours. Transfer to a bowl and refrigerate.

Set your Anova or other sous-vide apparatus at 148 F. Remove excess skin and fat from the chicken thighs. Season with salt and pepper, sprinkle chile powder, and squeeze a little lemon juice over the flesh. Place inside plastic bags and vacuum-seal, three pieces of chicken per bag. Place in the water-bath and cook for a minimum of 2 hours. I like to cook chicken thighs for 5 to 6 hours.

Turn your oven to 450 F.  Remove the chicken pieces from the bags, pat dry.  Place in a baking dish and roast until the skin is brown and crispy to your liking. You can also run them under the broiler for a few minutes if you prefer.  As the chicken roasts, transfer the previously prepared tomatoes to a skillet, cook for a couple of minutes,  add the vinegar, brown sugar, and adjust the seasoning.  Mash the tomatoes lightly with a potato masher or a fork if you like it chunky.  You can also transfer to a blender or food processor, if so inclined.  I prefer my salsa to be on the chunky side.

Serve the crisped up chicken pieces with the salsa alongside.

ENJOY!

to print the recipe, click here

Crisped

Comments:  So as I promised, here you have two completely different takes on the same type of meat using the Anova sous-vide. If you want to enjoy a saucy, stew-type meal, go for boneless chicken thighs, cooking them in liquid from the beginning. Obviously, in this case you’ll need to use the water displacement method, as vacuum won’t be feasible.  If crispy skin is more what you are looking forward to, season the pieces with dry rubs, and use your oven in the end. The meat will be perfectly tender, very moist, and the skin super crispy.

platedDinner is served!  Chicken sous-vide, cauliflower-spinach puree, and a salad…

I highly recommend Jason Logsdon’s book “Sous-Vide Help for the Busy Cook”.  The recipes are all geared for people who work all day and want to maximize the use of sous-vide to get a nice meal at dinner time.  The main advantage of this cooking method is the flexibility of timing: if you are late to arrive home from work, no problem, two or three more hours at the target temperature will not affect your dish.  Seafood is a bit more delicate and you should probably save that for weekends or weeknights in which you have a couple of hours to devote to dinner preparation.

compositetomatoes
I cannot resist including this photo of my oven-roasted tomatoes, they were absolutely delicious, with intense flavor, but not the unpleasant texture I find in most commercially available sun-dried tomatoes.   In Jason’s recipe, he uses a quicker method to deal with the tomatoes, so if you are at all interested, stop by amazon.com and click away!   😉

ONE YEAR AGO: Miso Soup: A Japanese Classic

TWO YEARS AGO: On my desk

THREE YEARS AGO: A must-make veggie puree

FOUR YEARS AGO: Vegetarian Lasagna

FIVE YEARS AGO:  Brazilian Pão de Queijo

CHICKEN IN GREEN PIPIAN SAUCE, SOUS-VIDE STYLE

This classic Mexican recipe was featured in Marcela Valladolid‘s show on Food TV, Mexican Made Easy. It pairs a delicious sauce of cooked tomatillos and pumpkin seeds with boneless chicken breasts.  I decided to adapt her recipe for sous-vide cooking, and was very happy with the outcome.  The meat ended up perfectly cooked, not a hint of dryness.  The sauce is simply to die for, if you are a vegetarian, skip the bird, but make the sauce. Roasted cauliflower would be amazing paired with a little pipian…

ChickenPipianSauce2
CHICKEN SOUS-VIDE WITH GREEN PIPIAN SAUCE
(adapted from Marcela’s Mexican Made Easy)

for the chicken:
4 boneless chicken breasts
4 little pats of butter (probably ok to skip it)
1 large lemon, sliced
Salt and freshly ground black pepper

for the sauce:
1 + 1/4 cup green pumpkin seeds (pepitas)
1 pound tomatillos, husked and rinsed
1 Serrano chile, stemmed
1/2 medium white onion, roughly chopped
1 + 1/2 cups chicken broth, warmed (I used a lot less)
1/4 cup loosely packed fresh cilantro leaves
1 teaspoon sugar
Salt and freshly ground black pepper

Season the chicken breasts with salt and pepper, place them in sealable plastic bags, add a tiny pat of butter and a few slices of lemon over each breast. Seal the bags. Place in the water-bath set at 140 F for three hours.

While the chicken cooks, prepare the sauce (can be made a couple of days in advance). Preheat a large, heavy skillet over moderate heat until hot. Toast the pumpkin seeds, stirring constantly, until they have expanded and begin to pop, 3 to 5 minutes. Transfer the seeds to a plate to cool. Reserve 2 tablespoons for garnish.

In a medium, heavy saucepan, simmer the tomatillos, Serrano and onions in salted water to cover until the tomatillos turn a dark green color, about 10 minutes. Using a slotted spoon, transfer the tomatillos, Serrano and onions to a blender and puree with the chicken broth, cilantro, sugar and toasted pumpkin seeds until smooth (the sauce will be a little coarse). Season with salt and pepper.

To serve, slice the chicken crosswise on the bias. Transfer to a serving plate. Spoon the green pipian sauce on top and garnish with the reserved toasted pumpkin seeds.

ENJOY!

to print the recipe, click here


composite

Comments: I am having a great time with my Anova sous-vide gadget. Most recipes I tried were big hits, a few disappointed me, but isn’t that true for any type of cooking?  You cannot win them all. For boneless chicken breasts, it is hard to come up with a better cooking method. I included butter in the bag, but it would probably be just as nice and tender without it. With sous-vide, you will never get the beauty of grill marks or that copper, enticing tone that roasting or broiling would offer.  But, in a recipe such as this one, in which the meat will be served under a sauce, the cosmetic aspect will be taken care of.  Imagine a very delicately poached chicken, boosted with the flavor of a spicy sauce with the crunchy pepitas on top: Mexican heaven, in sous-vide form! No sous-vide around?  Check Marcela’s original recipe using a regular oven.  I am sure it will be amazing too…

ONE YEAR AGO: Classic Shrimp Gobernador Tacos (another Marcela Valladolid’s recipe!)

TWO YEARS AGO: A Walk Towards the Sunset

THREE YEARS AGO: In My Kitchen

FOUR YEARS AGO:  Heavenly Home-made Fromage Blanc

FIVE YEARS AGO:  A Perfect Sunday Dinner

SOUS-VIDE PORK CHOPS WITH ROASTED POBLANO BUTTER

Cooking certain cuts of pork in the Bewitching Kitchen can be a bit tricky. No matter how many chefs, cooks and food bloggers recommend cooking pork medium or even medium-rare claiming that it’s safe and tastes better, we prefer our pork to be fully cooked, approaching well-done.  Sorry, folks, it’s a matter of taste… At that point, the less marbled pieces will end up dry.  So, I pretty much abandoned center-cut pork loin chops in favor of other cuts. Pork tenderloin is my number one choice, and for braises and low-roasting I go with pork shoulder.   Let’s bring sous-vide to the scene.  Now I can cook the meat to the point we enjoy it, ending with a piece of meat that is both tender and juicy.  This recipe, by the way, was the one that really sold the sous-vide concept to Phil.  He was amazed by how perfectly cooked these turned out!

Pork sous vide


PORK LOIN CHOPS WITH ROASTED POBLANO BUTTER
(from the Bewitching Kitchen)

for the compound butter:
2 sticks of butter at room temperature
1 small poblano chili, roasted and peeled, seeds removed
1 Tbsp minced cilantro
zest of 1/2 lime
1/2 teaspoon salt
black pepper to taste

for the brine:
2 cups water
2 Tbs salt
1 Tbs sugar

for the meat:
4 center cut pork chops, boneless
1 tablespoon butter (probably a bit less)
grated ginger to taste
2 Tablespoons soy sauce
2 Tablespoons honey
1 teaspoon mustard
1 teaspoon lime juice

Make the compound butter earlier in the day or several days before. Mix all ingredients well, form the butter into a log shape over parchment paper, rolling it tightly.  Place the roll in the fridge for several hours, cut in slices when ready to use.  Freeze leftover slices in a plastic bag.

Make a brine by dissolving the salt and sugar in 2 cups of cold water.  Place the pork chops in the brine, refrigerate for a couple of hours.  Remove the meat from the brine, rinse briefly and pat dry.  Add a little bit of butter and grated ginger on top of each piece of pork, and place two chops inside each sealable bag.

Seal the bags and place in a sous-vide bath set for 140F for 6 hours.

When the time is almost up, mix the soy sauce, honey, mustard and lime juice in a small bowl.  Remove the meat from the bag, brush the pieces with this mixture and grill very quickly on a hot grill just to char the surface, a couple of minutes per side.

Serve with a piece of compound butter on top.

ENJOY!

to print the recipe, click here

composite

If you’ve never made compound butter, that’s a nice cooking project for a Saturday afternoon. You can flavor it with many different fresh herbs, the traditional kind uses minced parsley.  I went with a lot of roasted poblano, a small amount of cilantro and some lime zest. Using a bench scraper helps a lot to get the butter shaped as a nice roll, but next time I will add a layer of plastic wrap underneath the paper. The butter must be very cold when you serve it, so that it slices easily. It is hard to make compound butter using less than 2 sticks, so you will have plenty of slices to save in the freezer for later. Just remove what you will use a few minutes before dinner time.

composite
We both really loved this meal. Take a look at how juicy the slice of pork turned out! We served it with mashed cauliflower and sautéed broccolini.  A perfect way to end a Sunday!

Sliced

If you do not have a sous-vide, the exact same recipe can be made on the grill, simply brine it before, brush with the soy mixture (add the ginger to the rest of the ingredients) and grill, preferably with indirect heat to prevent the surface from burning too fast. If you are anti-butter, I feel a bit sorry for you, but the sous-vide pork will be ok on its own.    😉

ONE YEAR AGO: Roasted Strawberry Buttermilk Sherbet

TWO YEARS AGO: Amazing Ribs for the 4th of July!

THREE YEARS AGO: Baby Back Ribs on the 4th of July

FOUR YEARS AGO: Blueberry Muffins

FIVE YEARS AGO: A Pie for your 4th of July