PUMPKIN PIE, LIGHT AS A FEATHER


My first Thanksgiving was in 1986, the date that also marks my first encounter with a pumpkin pie. Not knowing exactly what to expect, I overindulged in the turkey, the dressing, the mashed potatoes AND the gravy, so that by the time dessert arrived, I was absolutely full. Not to be rude to my hosts, I accepted a small piece, but even that was not easy to negotiate, as the pie was heavy and sweet.  For  years I avoided pumpkin pie, until my husband convinced me to give it another chance.   He makes it from the recipe in the second edition of the Joy of Cooking, but he’s adamant about the use of fresh pumpkin in the filling.

This year was the first time I made it all by myself. If you think “light-as-a-feather pumpkin pie” is an oxymoron, then think again and give this one a try.    Now I can’t conceive of a better way to finish Thanksgiving dinner.

PUMPKIN PIE
(adapted from Joy of Cooking, second edition)

2 cups cooked pumpkin (see comments)
1 + 1/2 cup evaporated milk
1/4 cup brown sugar
1/2 cup white sugar
1/2 tsp salt
1 tsp cinnamon
1/2 tsp ground ginger
1/4 tsp ground nutmeg
2 slightly beaten eggs

Heat the oven to 425F.
Mix all the ingredients very well and pour the mixture into a pie shell. Bake for 15 minutes, reduce the heat to 350F and continue baking for at least 45 minutes longer, until a toothpick or a knife blade inserted in the center comes out clean. Serve with slightly sweetened whipped cream.


to print the recipe, click here

PIE CRUST
(from Cook’s Illustrated)

2 1/2 cups all-purpose flour
1 tsp salt
2 Tbs sugar
12 tablespoons very cold unsalted butter, cut into small cubes
1/2 cup cold vegetable shortening, cut into 4 pieces
1/4 cup cold vodka
1/4 cup cold water

Mix the flour, salt, and sugar in a large bow. Place the very cold butter and shortening on top and quickly incorporate them into the flour using a pastry cutter, until they have the size of small peas. Add the vodka and water over the mixture and with a rubber spatula fold the mixture pressing it down to form a dough that sticks together. Divide the dough into two balls, flatten them into a 4-inch disk, wrap them separately in plastic and refrigerate for at least 45 minutes, or up to 2 days.

Remove one of the disks from the fridge, roll it out in between two plastic sheets, place it inside a pie dish. For the pumpkin pie, only one disk will be used, the remaining can be frozen.

jump for comments

CHOCOLATE CHIP COOKIES

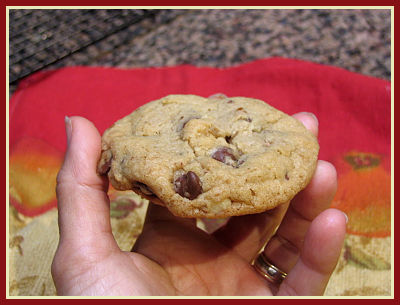
Talk about an American classic… I’ve seen so many recipes for chocolate chip cookies, and one of the major issues is… do you like nuts in your cookies?    Purists want the flavor of  chocolate, and little else.  Others enjoy the scrumptious crunchiness of walnuts or pecans, and without them, something is missing.  My beloved falls in the second category, and he’s set in his preference.  I don’t care that much,  as long as the cookies are chewy.    Please, no dunking in milk, as my stepson loves to do,  it grosses me out, and he dunks them right in front of me!  🙂  In fact, the first thing he said after my naturalization was:   “now that you’re an American, you’ve got to start dunking some cookies in a tall glass of milk“….

Whether you are a purist or not, or a “dunker” or not, I’ll bet you’ll enjoy these cookies.  I’ve made them several times since I first saw the recipe at Smitten Kitchen.   In this batch my only adjustment was to chop some of the nut pieces slightly larger.   These cookies will still please the purists, though…

thecookie2

CHOCOLATE CHIP COOKIES
(as posted in  Smitten Kitchen, original recipe from The Great Book of Chocolate)

(receita em portugues na segunda pagina)

100g  (1/2 cup)  granulated sugar
120g (1/2 cup) dark brown sugar
8 Tbs unsalted butter (1 stick), cold, cut into 1/2-inch pieces
1 large egg
1 teaspoon vanilla extract
1/2 teaspoon baking soda
175 g (1  + 1/4 cup)  all-purpose flour
1/4 teaspoon salt
200 g  (1 + 1/2 cup) good quality semisweet chocolate chips
130 g (1 cup) walnuts toasted and chopped

Heat the oven to 300F. Line a baking sheet  with parchment paper, or use a Silpat lining.

Beat the sugars and butters together until smooth. Mix in the egg, vanilla, and baking soda.  Stir together the flour and salt, then mix them into the batter. Mix in the chocolate chips and nuts.

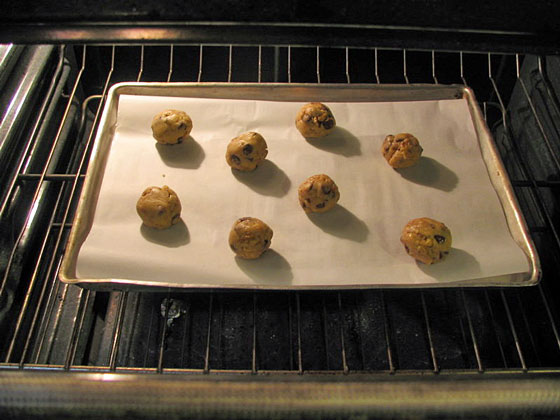
Scoop the cookie dough into 2T balls  and place them on a baking sheet separated by 3 inches.   Bake for 18 minutes, until pale golden brown. Remove from the oven and cool on a wire rack.

Makes 24 cookies.

to print the recipe, click here.

cooling

ingredients

baking

Comments:   You’ll notice that these cookies bake at a lower temperature than most recipes call for.  If you are like me, and enjoy chewy cookies, this is the best way to bake them.  I like to make the dough and rest it in the fridge for a couple of hours.  By doing so, the dough spreads less during baking, which also favors a chewy texture.

Toasting the nuts is an important preliminary step, but watch them carefully, because the difference between toasted and burned is just a few seconds!

withcoffeeMatch made in heaven:  a chocolate chip cookie with a mini-capuccino, served in a cup from one of our favorite cafes in Paris!

para receita em portugues, clique aqui

SUMMER’S FINALE

My favorite season is over.  Soon it will be time for “the move”:  summer clothes will go into storage, while long sleeves, sweaters and coats will return to my closet.   My sandals will be gone, and with them the nice tan on my feet… The poor babies will be hiding in socks and shoes for months!

To say goodbye to Summer, I picked a yellow watermelon and turned it into granita. Watermelon is my beloved’s favorite fruit.  His ritual is to sit on the couch with a huge slice dangerously balancing on a plate, and our dogs locked into full begging mode close by. The dogs are watermelon maniacs;  they can smell it from several rooms away.

Granita is a refreshing classic, conveying the essence of Summer’s bliss with each spoonful.

granita

WATERMELON GRANITA

Make a simple syrup
1 cup water
1/2 cup granulated sugar
Heat until sugar is completely dissolved; cool to room temperature.

Make the fruit juice
Watermelon pieces
1 T lemon juice
pinch of salt

Juice the watermelon (easier if using seedless fruit, but we prefer to buy the regular kind).   Measure the amount, you will need a minimum of 3 cups.

For three cups of juice, add the full amount of simple syrup made, the lemon juice and salt.  Mix well.

Make the granita:
Pour the mixture in a glass baking dish, 9×13 inches, or 8×8 inches.  Depending on how thick the layer is, the longer it will take to freeze.  Place it in the freezer, and every half an hour (or 45 minutes, depending on the size and shape of your dish), scrape it with a fork to destroy the ice crystals forming on the edges, then place it back in the freezer.  Do this several times, maybe 4 or 5 times,  until the mixture is completely frozen. It will  take from 3 to 6 hours.

To serve, scrape the frozen granita with the tines of a fork into a serving bowl. Decorate with mint (which you can also add to the juice, I normally do that, but forgot this time), and….

ENJOY!

To print the recipe, click here.

click for more photos e receita em portugues

WHEN LIFE GIVES YOU PEACHES…

MAKE A PEACH PIE!

peachpie1

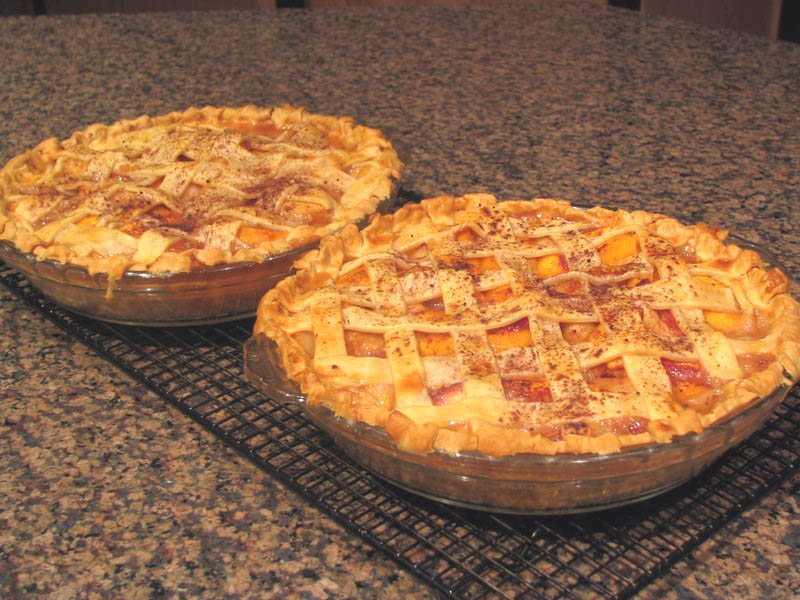
MAYBE TWO?

doublepie

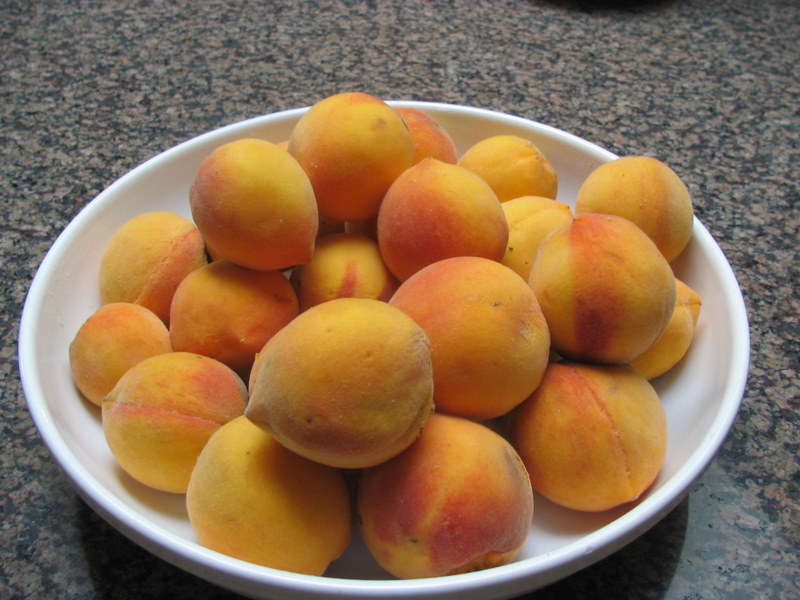
Actually, the title of this post should be “When friends give you a bushel of peaches….”   Our great friends (and neighbors) went for a long trip during the Summer, and asked us two important favors. “Use our swimming pool as often as possible” and “Harvest all our veggies and fruits and enjoy them”. !!!!!!

Yes, you are all allowed to be jealous, not everyone has the same good luck…   These friends are beyond special for many reasons, the pool and the fruits don’t even make it into the top five!

Besides being fantastic folks, they are great gardeners.   If my beloved husband and I would ask you to stop by to  “harvest and enjoy” our garden, you’d be lucky to leave with a skinny zucchini (Skinny Zucchini, too bad I already named my blog!), a few unripe tomatoes, and a tiny bunch of basil.  This is not the case with our neighbors, who mean business in the garden.  We had a major peach invasion of our home:  at least one hundred (probably  more, we stopped counting after a while) gorgeous pieces of fruit!

DH came to the rescue, as he usually does in fruity situations. As a matter of fact, if a pie has a lattice, then you can be sure I wasn’t involved.  This time I took a completely secondary role, washing the dishes and admiring my beloved’s skill producing two gorgeous pies after 10pm on a work day. Sorry, ladies, he’s definitely taken!   😉

PEACH PIE
(recipe adapted from Joy of Cooking, 2nd edition)

Para receita em portugues, visite o Cantinho Brasileiro na pagina seguinte

slice

10-12 peaches, white or yellow fleshed
1/2 cup brown sugar
1/8 tsp salt
1  + 1/2  Tbs cornstarch
1/4 tsp cinnamon
1/8 tsp nutmeg
1  + 1/2  T butter
1 Tbs lemon juice
1 tsp vanilla extract
1 egg yolk, beaten with a little water (egg wash)

1 recipe of pie crust (click here for my favorite) or store bought, good quality pie crust

Heat the oven to 450F.

Peel, core, and cut the pieces into slices and add to a large bowl.  Combine the brown sugar, salt, cornstarch, cinnamon, and nutmeg, and sift the mixture all over the fruit, mixing well.

Roll half of the pie dough to cover the bottom of a 9-inch pan, and add the fruit mixture to it.  Sprinkle lemon juice all over, and dot with butter.

Roll the second half of the dough, and form a lattice. Cover the pie, brush the crust with egg wash, sprinkle with a little cinnamon and sugar, and place it in the oven. After 10 minutes, reduce the temperature to 350F and bake for 35 to 45 minutes more, until the crust is golden, and you can see the juices bubbling through the opening.

Cool it over a rack, and serve with or without whipped cream (freshly whipped, of course!)

ENJOY!

Here are some photos of the pie in the making….

Gorgeous peaches, thanks to our dear neighbors

IMG_2120


Assembling the pies….

IMG_2138-1IMG_2141IMG_2142

Into the oven they both went…

IMG_2143
para receita em portugues, siga o link

SNICKERDOODLES WITH A TWIST

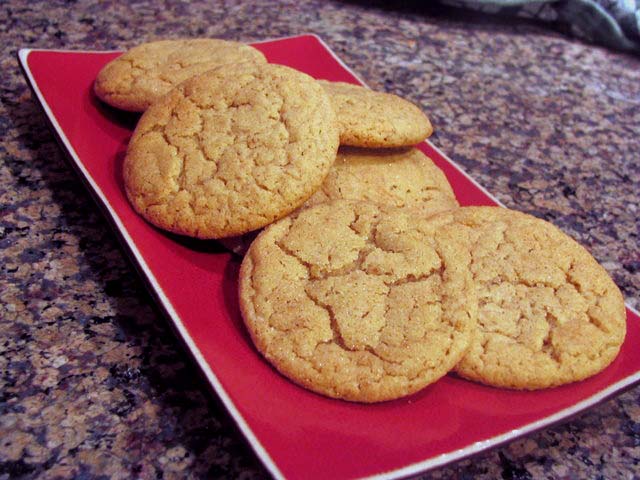
cookies1

For the record, I don’t have a sweet tooth. I can go for months without dessert, and my sweet cravings are satisfied by some yogurt with a little agave nectar and by bits of bittersweet chocolate every now and then. So, if I tell you that when I made these cookies I ate one and went back for three more…. trust me, you should fire up your oven!

I chose these cookies because I was mesmerized by their picture in this wonderful blog.  I am so glad I did, even though my photos don”t come close in terms of quality, the flavor of these babies is great: snickerdoodles with a twist…

For Brazilians and other foreign readers who may not know about them, snickerdoodles are a classic, probably of German origin, that have been around since the beginning of last century. They are very simple cookies, that get rolled in cinnamon and sugar right before going into the oven. The crinkled look is their trademark.

In this rendition, a little coffee powder is added to the dough. Normally, I don’t like changes in a classic recipe, but in this case, the results were awesome. Even if you’re not fond of coffee, give these cookies a try. The coffee flavor is subtle, and it’s wonderful with the cinnamon, making these cookies simply irresistible.

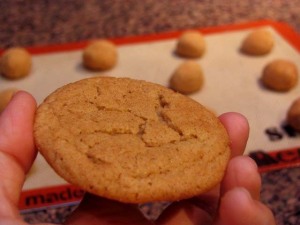
closeup

CINNAMON CAPPUCCINO COOKIES
(recipe adapted  from “A Kiss and a Cupcake“)

1 cup butter (two sticks), softened
1 + 1/4 cup granulated white sugar
1/4 cup light brown sugar
2 large eggs
2 + 3/4 cups flour
2 teaspoons cream of tartar
1 teaspoon baking soda
1/4 teaspoon salt
1 + 1/2 tablespoons powdered coffee (see comments)
granulated sugar + cinnamon (3:1)

Preheat oven to 350°.

Cream together sugar and butter whipping them with an electric mixer for about 2 minutes. Add eggs, one at a time, beating until smooth.  Add powdered coffee and beat until incorporated.

Combine remaining dry ingredients in a separate bowl. Add to butter mixture in three batches. Chill resulting dough for 20-30 minutes. Scoop out 1-inch balls of dough and roll them in sugar/cinnamon mixture; place on chilled cookie sheets 2 inches apart. Bake for 8-10 minutes or until centers are set.

Yield: 2 1/2 dozen.

click here for comments and additional photos