BEWITCHING BIRTHDAY!

One year of blogging! It passed with astonishing speed, proving that time flies when you’re having fun!   It’s surely been fun, sharing what happens in our kitchen with friends, family and lots of other folks, and getting acquainted (at least virtually) with new people and bloggers through comments and emails.

A cake is a mandatory birthday celebration!  Unfortunately,  cake and Sally don’t make a good match.   But in the name of this special occasion I faced my demons and baked a cake. Choosing the recipe wasn’t easy, but I decided by elimination: genoise was out of the question, I’d rather be tortured.   Any recipes involving the instructions “cream the butter with the sugar” were also excluded.  Then, browsing the latest issue of Bon Appetit, I spotted a layered chocolate raspberry cake and I was smitten: that was it! Luscious, beautiful, perfect… would you believe  that the recipe didn’t need an electric mixer?  Instead, two bowls and a whisk…. my kind of recipe!  Even the layering didn’t bother me (although it should have, … but  ignorance is bliss).

So, here it is, my first layered cake, in honor of my baby blog…
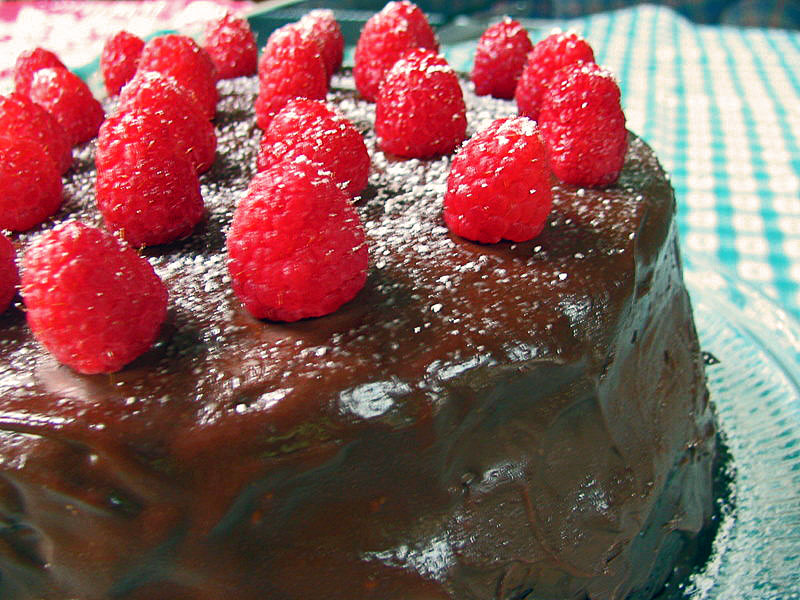
CHOCOLATE-RASPBERRY LAYERED CAKE
(from Bon Appetit, June 2010)

2 cups unbleached all purpose flour
1 + 3/4 cups sugar
3/4 cup unsweetened cocoa powder
2 teaspoons baking soda
1/4 teaspoon salt
1 cup water
3/4 cup buttermilk
3/4 cup vegetable oil
3 large eggs

18 ounces bittersweet chocolate (maximum 61% cocoa), chopped
2 + 1/4 cups whipping cream
6 tablespoons seedless raspberry jam, divided
resh raspberries
powdered sugar

Heat the oven to 350°F. Coat two 9-inch-diameter cake pans with nonstick spray. Line their bottoms with parchment paper rounds and spray the rounds. Sift the flour, sugar, cocoa powder, baking soda, and salt into a large bowl; whisk to blend and form a well in the center. Whisk 1 cup of water, buttermilk, oil, and eggs in a medium bowl to blend. Pour the wet ingredients into well in dry ingredients; whisk just to blend. Divide the cake batter between the prepared pans.

Bake the cakes for 30 minutes or until a toothpick inserted into center comes out clean.  Cool completely in pans on cooling racks.

for the ganache and raspberry topping;
Place the chopped chocolate in a medium bowl. Bring the cream to a boil in a heavy medium saucepan. Pour it over the chocolate.  Let stand for 1 minute, then stir until the ganache is melted and smooth. Transfer 1 + 1/4 cups of the ganache to a small bowl. Cover and refrigerate until the ganache is thick enough to spread, stirring occasionally, about 1 hour. Let the remaining ganache stand at room temperature to cool until  lukewarm.

Invert one cake onto a cardboard round or the bottom of 9-inch-diameter tart pan. Peel off the parchment paper and spread 3 tablespoons of raspberry jam over the top, then spoon dollops of chilled ganache over the surface, spreading it around.   Invert the second cake onto another cardboard round or tart pan bottom.  Peel off  its parchment paper. Carefully slide the cake off its round and onto the frosted cake layer.  Spread the remaining 3 tablespoons of raspberry jam over top of the second cake layer, and pour half of the lukewarm ganache over the cake, spreading it over the sides to cover.  Place the cake in the freezer until the ganache sets, about 30 minutes. Pour the remaining ganache over the cake, allowing it to drip down sides and spreading over the sides if needed for even coverage and smooth edges. Freeze again to set the ganache, about 30 minutes.

Arrange the raspberries in concentric circles atop the cake, then sift powdered sugar lightly over raspberries and serve.

ENJOY!

to print the recipe, click here

Comments: I wish that my cake-phobia was cured, but now I have a few more reasons to stick with breads and pizzas.   At first  my confidence grew as the batter behaved exactly as anticipated, filling two 9-inch cake pans and baking into beautiful brown cakes with only a slight dome in the center.  But the Cake Gods  weren’t quite finished with their conspiracy against me.   Spreading the ganache was nightmarish, to put it mildly. Thinking back, I realize that it wasn’t quite  hard enough to spread, so instead of forming a nice thick layer, it ran down the sides, but my cake-naivete made me go on, thinking  that eventually everything would be OK.

When I placed the second cake on top of the first, once all the slippage-fiesta stopped, the ganache layer had a big gap all around the edges, that stubbornly resisted my attempts to fill it.  In despair, I checked my cake pans, and was shocked and appalled to realize that they were not identical in size – a small difference from one brand of pan to another, which made my layers unequal. My last hope was that the “lukewarm icing” would solve all the problems and make a beautiful, smooth covering of all the boo-boos. But, this was not the case.  Not a chance.  To make a  long story short, my cake ended a bit like the Leaning Tower of Pisa in Italy.  Its sides had nothing to do with the “picture perfect” look in the magazine.    I had hoped to post a picture of my cake on a gorgeous stand with a nice candle in the center, but I settled instead for the only photo that showed more cake than boo-boos.

Cake, my friends, is not for sissies…But, even if its looks were not picture-perfect, it disappeared in an afternoon, devoured with gusto by hungry grad students!  The flavor was amazing: deep chocolaty, with a tangy background of raspberries, not overly sweet, but decadent.  I guess there might be hope for next year… 😉

Add to FacebookAdd to DiggAdd to Del.icio.usAdd to StumbleuponAdd to RedditAdd to BlinklistAdd to TwitterAdd to TechnoratiAdd to Yahoo BuzzAdd to Newsvine

One year ago…. Welcome to my blog!

ICE CREAM MELTS FOR MANGO

I grew up watching my family members eating mangos and making a huge mess in the process.  Some varieties of Brazilian mango are so fibrous that the “correct” way to eat them is to cut a small hole in the top and suck out the juices while compressing the fruit, which leaves your mouth, face, hands, and possibly even your clothes covered with juice and sticky mango bits.  Some people view this process as part of the fun, but both me and my Dad had nothing to do with it, and only enjoyed a mango if it was laying on a pristine plate, dissected by a knife and fork, with a napkin alongside.

This simple dessert would certainly receive the seal of  approval from my Dad.

MANGOS FLAMBE  (MANGAS FLAMBADAS)
(inspired by my friend Vanda)

4 ripe mangos
1 Tbs butter
2 Tbs granulated sugar (or more)
pinch of salt
1/4 cup rum (or Cointreau or a mix of both)
2 tsp fresh lemon juice

Cut the mango in medium-sized pieces.  Go take a quick shower (optional).  Come back and melt the butter in a large skillet over medium heat.   Add the diced mango, sprinkle sugar all over it, add the salt, and cook gently until the mango starts to get soft.   Taste a piece and decide if you need more sugar.

Carefully add the rum, heat it for a few seconds, and ignite with a match.  Wait until the flames die down, sprinkle a little lemon juice, taste again.   Serve over vanilla ice cream.

ENJOY!

to print the recipe, click here

Comments: You can change this basic recipe in many ways.  For example, you may first caramelize the sugar, and then add the fruit on top.  But, I prefer this preparation I’m posting because it’s simpler and the taste of the fruit is more pronounced.  You may also skip the alcohol with no major harm, but I like the extra flavor it imparts.   If you have leftovers (highly unlikely), they are delicious in the morning with yogurt and a little granola sprinkled on top.   You can prepare bananas in almost exactly the same way, or even along with the mango, but when making bananas flambe, I like to caramelize the sugar first.     My friend Vanda,  who makes risottos and souffles with her eyes closed and one hand tied behind her back, loves to prepare mangos this way.  After dicing the fruit, she usually grabs the pit and takes great pleasure in sucking all the mango-goodness clinging to it, standing next to the sink.   Unfortunately, I never seem to have my camera ready when that happens.  😉

Add to FacebookAdd to DiggAdd to Del.icio.usAdd to StumbleuponAdd to RedditAdd to BlinklistAdd to TwitterAdd to TechnoratiAdd to Yahoo BuzzAdd to Newsvine

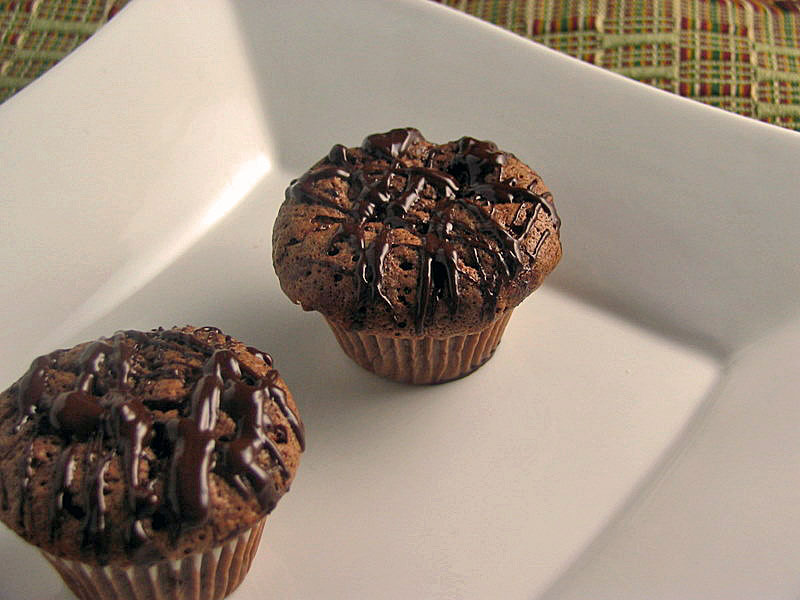
BITE-SIZED CHOCOLATE PLEASURE

Giada’s show can hit or miss with me, but the moment I saw her making these small chocolate meringue cupcakes I knew that my husband and I, and our entire lab group were going to profit from it in our  early morning meeting.

MINI CHOCOLATE-MERINGUE CUPCAKES
(from Giada de Laurentiis)

2 large egg yolks
1/4 cup vegetable oil|
2/3 cup sugar, divided
2 Tbs cocoa powder (I used natural)
1 tsp vanilla extract
1/2 tsp cinnamon
1/8 tsp sea salt
1/2 cup semisweet chocolate chips, melted
1/4 cup cake flour
3 egg whites

for the topping:
1/2 cup semisweet chocolate chips, melted
1/2 Tbs vegetable oil

Heat the oven to 350F.
Line a 24-count mini-muffin pan with paper liners (1.25 inch diameter).

Beat the egg yolks, vegetable oil, 1/3 cup of the sugar, cocoa powder, vanilla extract, cinnamon, and salt, at high speed until smooth, about 2 minutes. Mix in the melted chocolate chips and stir until smooth (mixture will be very thick).

In a separate bowl,   beat the egg whites at high speed until they hold soft peaks, about 3 minutes. With the machine running, gradually add the remaining 1/3 cup sugar and continue to beat until the mixture holds stiff peaks, about 2 minutes.  Stir a small amount of the beaten egg whites into  the chocolate, to lighten it up. .Using a spatula, fold the remaining egg white mixture.  In batches, sift the flour over the batter and fold it in using a spatula. Fill each paper liner to the top with batter and bake for 12 minutes until puffed. Remove from the oven and let cool for 15 minutes.

For the topping: In a small bowl, combine the melted chocolate chips and oil. Stir until smooth.

Using a fork, drizzle the chocolate mixture over the cupcakes. Allow the topping to harden for at least 1 1/2 hours at room temperature before serving.

ENJOY!

to print the recipe, click here

Comments: This  recipe really was a “piece of cake” in two ways:  it was simple, and it produced cupcakes that look dense, but were light and moist in your mouth.   The chocolate drizzle, which according to Giada should harden in a couple of hours, refused to cooperate.  Even the next morning it was still sticky to the touch, making the cupcakes quite messy to eat.    A brief stay in the fridge (about 15 minutes or so) helped a little bit, and also made it easier to remove the paper.

I’d make these again at the drop of a hat,  but using  a different recipe for the drizzle, to achieve the crunchy texture on top.    Their size was perfect: people who are not wild about sweets will be happy with one; chocoholics may return for more. And more…. and more… 😉

Add to FacebookAdd to DiggAdd to Del.icio.usAdd to StumbleuponAdd to RedditAdd to BlinklistAdd to TwitterAdd to TechnoratiAdd to Yahoo BuzzAdd to Newsvine

receita em portugues na proxima pagina…

pagina seguinte

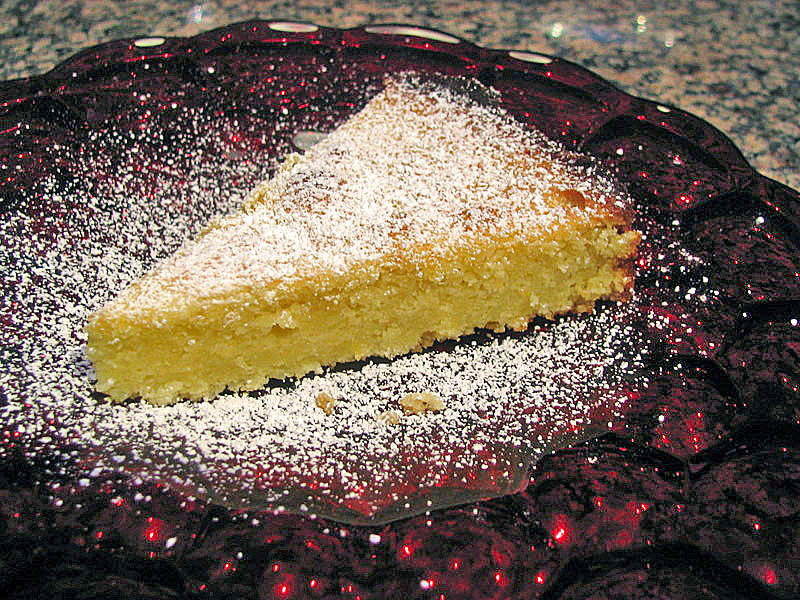
TORTA DI LIMONE E MANDORLE

Italian is such a beautiful language! Most Italian phrases sound poetic, warm, and enticing… For example, this title translates as “lemon and almond cake,”  but by sticking with the original Italian, I can pretend that it’s not really a cake, and therefore, it is doable. 😉    This recipe came from Fer’s blog (Chucrute com Salsicha), where I find a lot of inspiration, and she convinced me to ignore my cake-phobia and give it a try.

Done!  I can’t say it was painless, but it wasn’t as horrible as some of my past cake experiences.

TORTA DI LIMONE E MANDORLE
(recipe adapted by Fer, original found in Twelve: A Tuscan Cookbook)

125 g softened butter
125 g granulated sugar
3 eggs, separated
125 g almond flour
60 g all purpose flour, sifted
1 tsp baking powder
juice and zest of 2 lemons
powdered sugar (optional)

Heat the oven to 355F / 180 C.
Prepare a springform pan (8 inches diameter) by coating it with butter and dusting with flour.   Take a deep breath and beat the butter with the sugar until it forms a cream.  Hope that the stars are correctly aligned so that the elusive cream stage appears in recognizable form. Take another deep breath and add the egg yolks, one by one, beating after each addition.   Calm yourself, collect yourself, and move away from the Kitchen Aid mixer. In a large bowl, combine the flours with the baking powder,  mix them well together, and add  the dry ingredients  to the egg mixture. Add the lemon juice and zest and mix to incorporate. Stop hyperventilating. Beat the egg whites until soft peaks form,  and  fold them into the cake batter, trying to avoid deflating the egg whites too much.  Cross your fingers for sustained alignment of the stars.

Spoon the batter into the prepared pan, and hope it will be enough to cover its whole surface, as cake batters tend to dissipate into thin air and never ever fill the pan called for in the recipe (which is very annoying!). Bake for 30 to 40 minutes (mine baked for 43 minutes and 19 seconds), until the cake is lightly golden.   Allow it to cool  before opening the springform pan.  If desired, dust with powdered sugar.

ENJOY!

to print the recipe, click here

para receita em portugues, siga esse link…

Comments: This was a lovely cake, I’m so glad that I made it! If you have Meyer lemons, use them, as Fer recommended.  The almond flour brings an interesting texture: a little more dense, but it quickly melts in your mouth, with a bright lemony finish. It sure brightened up our lab meeting last Friday… 😉

Add to FacebookAdd to DiggAdd to Del.icio.usAdd to StumbleuponAdd to RedditAdd to BlinklistAdd to TwitterAdd to TechnoratiAdd to Yahoo BuzzAdd to Newsvine

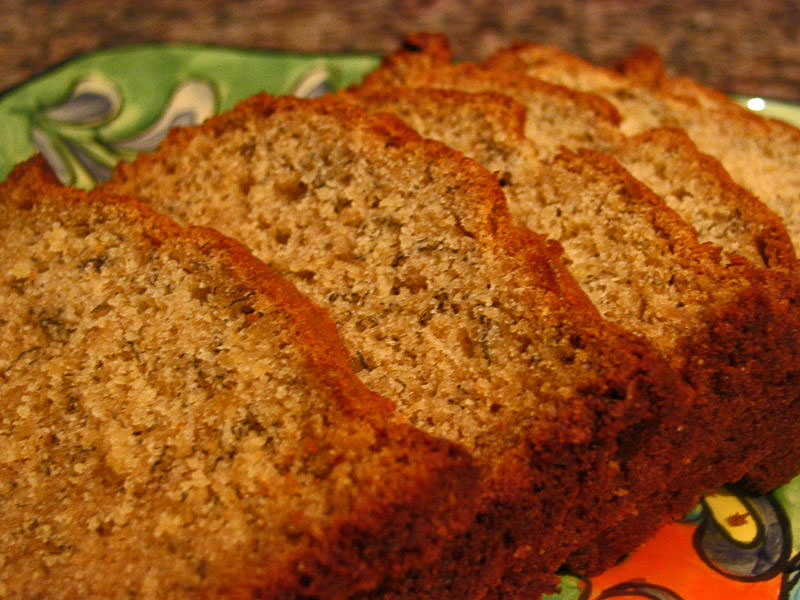
BANANA BREAD

I realize  the world has no shortage of banana bread recipes, as a quick google produces 5,580,000 hits!   You’ll find all shapes and styles: moist, classic, healthy, vegan, gluten-free, low-calorie (!?!?), with nuts, chocolate chips, blueberries, cinnamon, with sour cream or pumpkin…. if you dream it, chances are someone already made it and spread the word about it. Once I hit “publish”, you’ll have at least 5,580,001 options!   I am sure you will sleep better tonigt… 😉

This recipe comes from cookbook author extraordinaire (and very dear net-friend), Glenys Morgan, and makes a moist, very pure, dense but not heavy, banana bread. She doesn’t recommend using this recipe to bake muffins, so stick to a regular loaf pan.

GLENY’S BEST BANANA BREAD
(from Glenys Morgan)

1 cup mashed bananas (2 large or 3 medium, very ripe bananas)
1/3 cup buttermilk
1 teaspoon baking soda
3/4 cup dark brown sugar
1/2 cup unsalted butter
1 egg
1 + 1/3 cups flour
1 teaspoon baking powder
1 teaspoon vanilla or dark rum (optional)

Heat the oven to 375F.

Mash or purée the bananas and buttermilk until smooth. Add the baking soda and mix.
Cream the brown sugar and butter together until smooth. Beat in the egg. Add the banana purée and combine. The mixture will seem curdle.

Add the baking powder to the flour, mix well. Gradually add it to the banana mixture. Stir just enough to combine evenly.   Add the vanilla or rum.

Pour into sprayed or greased 8 1/2 x 4 1/2-inch pan, filling the pan to 2/3 full of its capacity. Bake for 45-50 minutes until a wooden skewer inserted in the center of the cake comes out clean. Leave in the pan for 10-15 minutes before turning out. Do not leave in the pan as the loaves sweat and become soggy.

ENJOY!

to print the recipe, click here

Comments: The most important thing in this recipe is to use very ripe bananas, those that are black, soft, begging to be put out of their misery.  Usually I peel them, mash lightly and stick in a zip-lock bag (writing on the bag how many bananas are inside).   You can also freeze the bananas whole, but sometimes they can be tricky to peel.  Some people like nuts and other bells and whistles in their banana bread, I am more of a purist, and find this recipe absolutely perfect.  Our graduate students seemed to agree, as the loaf was gone in minutes!   😉

Add to FacebookAdd to DiggAdd to Del.icio.usAdd to StumbleuponAdd to RedditAdd to BlinklistAdd to TwitterAdd to TechnoratiAdd to Yahoo BuzzAdd to Newsvine

receita em portugues na pagina seguinte!

Continue reading →