THE QUASI-VEGAN QUICHE

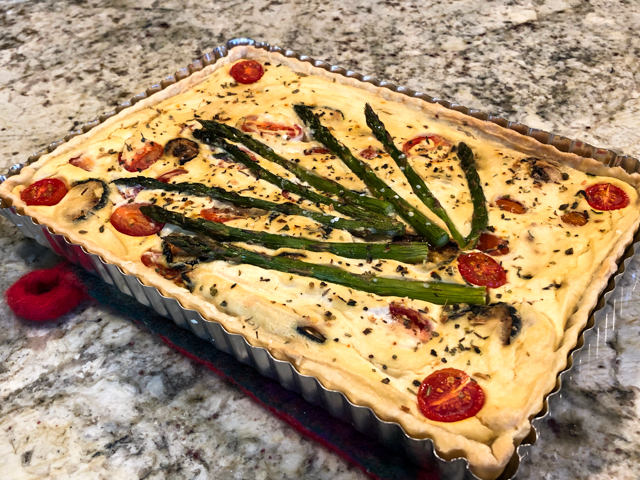
As you know, we are members of the Omnivores Without Guilt Club, but what you probably don’t know is that I own many cookbooks on Vegan cooking. I like the concept and the challenge of preparing food that tastes great but is more limited in the ingredients used.  I had very good intentions to make a fully vegan quiche for our dinner, but ended up adding 1 egg to the filling. Oh, well. It turned out very good, and even the resident critic, who considers tofu to be penitence, loved it!

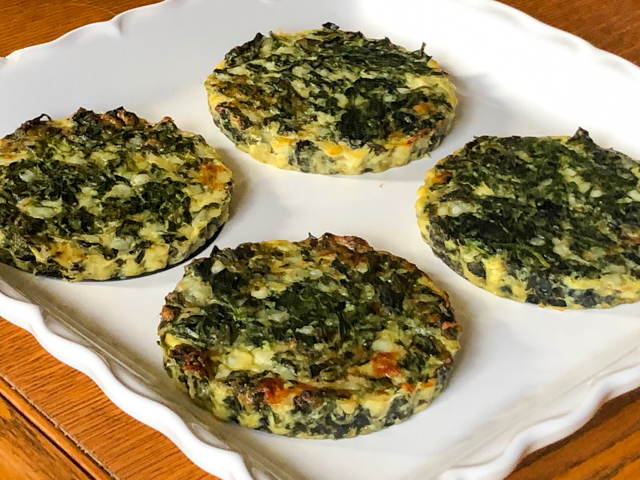
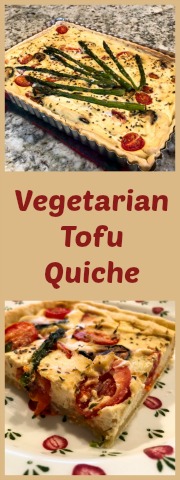
ALMOST VEGAN TOFU QUICHE
(inspired by The Minimalist Baker)

1 rectangular pie pan, 8 x 11 in

for the olive oil crust:
for the pie crust:
250g all-purpose flour (260 grams)
1/8 teaspoon salt
50g olive oil (50 grams)
125 g cold water

for the filling:
12.3 ounces extra-firm silken tofu (patted dry)
2 Tbsp nutritional yeast
3 Tbsp hummus
Sea salt and black pepper (to taste)
1 egg
2 medium zucchini (thinly sliced)
1 Tbs olive oil medium diced onion per 2 leeks)
3/4 cup cherry tomatoes (halved)
1 stalk asparagus
Herbes the Provence (as much as you like)

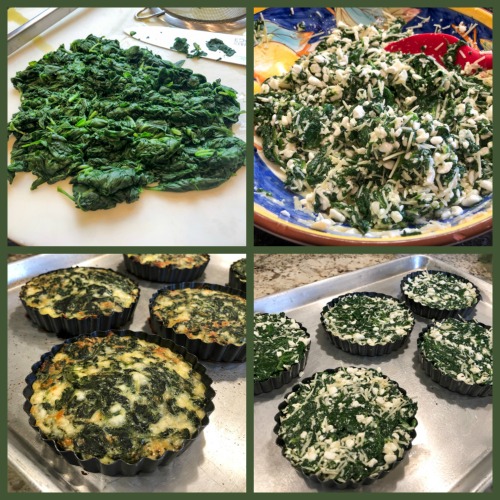
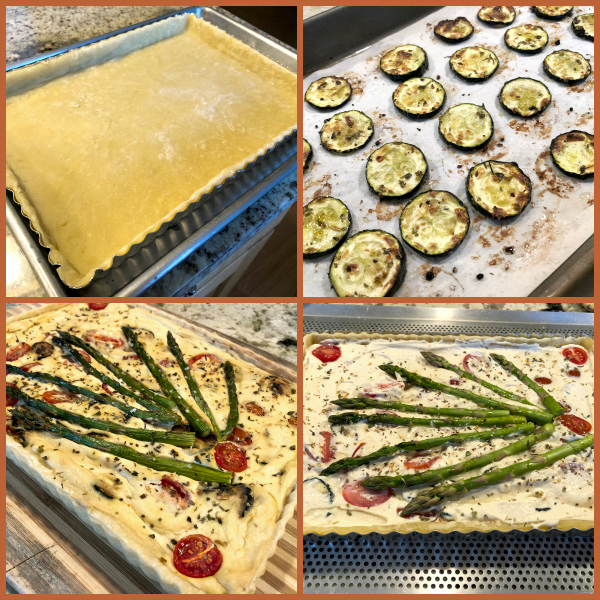
Make the crust. Whisk together the flour and salt in a large bowl, then add the olive oil, stir with a fork until the flour gets coated with it, forming a crumbly ness. Slowly add cold water and knead gently just until the dough starts to comes together.  Wrap the dough in plastic and refrigerate one hour before using.

Roll it over plastic wrap lightly coated with flour, then use it to cover a rectangular pie pan (8 x 11 in) with removable bottom (or a 9-inch round quiche pan). Reserve in the fridge until you have the filling ready to bake. No need to blind-bake.

Make the filling. Roast slices of zucchini coated with olive oil and seasoned with salt and pepper for about 15 min in a 420F oven. Reserve. Add drained tofu to a food processor with nutritional yeast, hummus, egg, and a heaping 1/4 tsp each sea salt and black pepper. Process until fully smooth.

Spread the zucchini slices in the bottom of the pie crust. Spread the hummus mixture, gently spreading it over it with a small offset spatula. Distribute the cherry tomatoes over the filling, then the asparagus (if they are too thick, sprinkle them with water and microwave for 60 seconds to soften ever so lightly).

Bake quiche at 375 degrees F total of 30–40 minutes or until the top appears golden brown and firm. If the crust begins to get too brown, loosely tent the edges with foil. Let cool for 10 minutes before slicing.

ENJOY!

to print the recipe, click here

Comments: If you remember my previous post on a pie using olive oil crust, you will notice that I blind-baked it at that time. Now I tried without this step, and was quite pleased with the result. Omitting the blind baking makes this dish even easier to bring to the table. You can roll the crust hours earlier, or even a day before and keep it in the fridge, protected with plastic wrap.

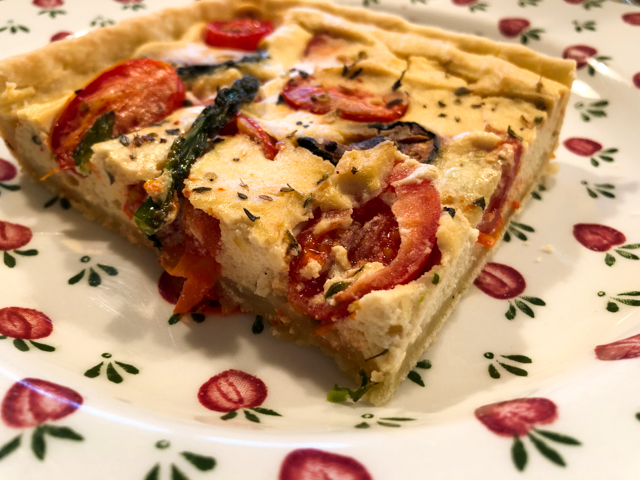
I promise you, there is no “tofu-taste” in the filling. Until I added the egg, it seemed a bit too coarse and grainy, but the egg smoothed things out and I guess made it all a bit lighter during baking. If you want to make it fully vegan, just omit the egg. One interesting idea to lighten it up but keep it vegan could  be folding into the tofu mixture some whipped aquafaba. Hummmm… something to try. Leftovers were delicious on day 2 and day 3. After that? After that they were gone.

ONE YEAR AGO: Not Quite Moqueca

TWO YEARS AGO: Roasted Butternut Squash with Cashew Nuts

THREE YEARS AGO: Mississippi Roast and the Open Mind

FOUR YEARS AGO: Walnut-Raisin Bran Muffins

FIVE YEARS AGO: A Star is Born!

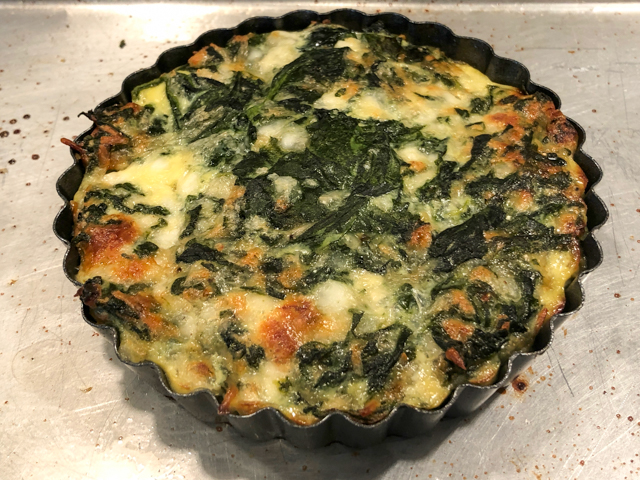
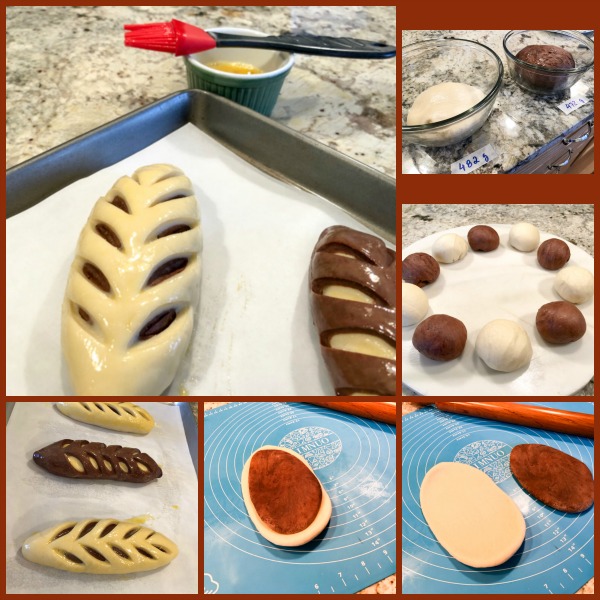
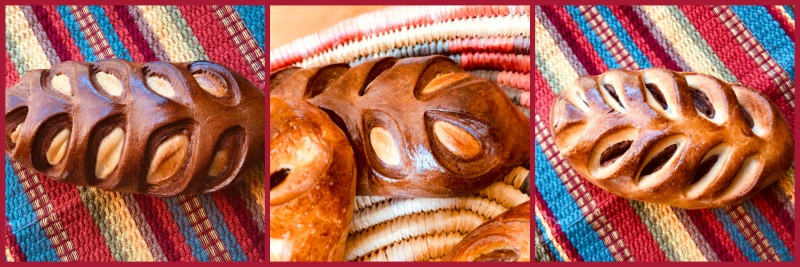
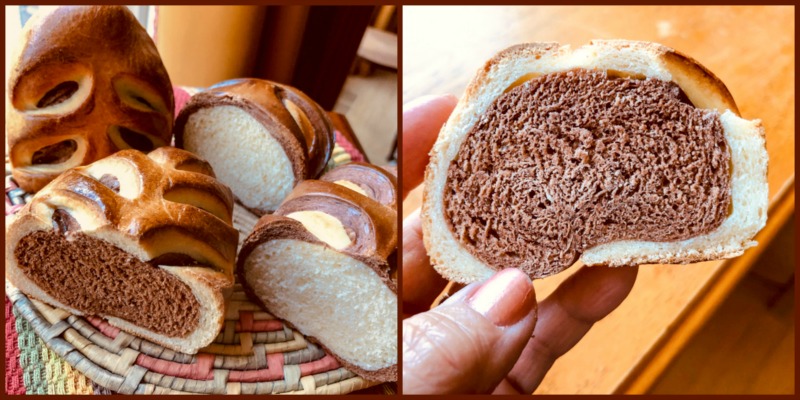
SIX YEARS AGO: Chestnut Flour Sourdough Bread

SEVEN YEARS AGO: Kinpira Gobo and Japanese Home Cooking

EIGHT YEARS AGO: Walnut Sourdough

NINE YEARS AGO: Thai Chicken Curry

TEN YEARS AGO: Zen and the art of risotto

HOT CROSS BUNS

Until this year, I’ve been a Hot Cross Bun virgin, as I had never even tasted one. They did not exist in Brazil as I was growing up, but are very popular in many places of the world, United Kingdom, USA, Australia, New Zealand. They are usually served on Good Friday, to mark the end of Lent. They are marked with a cross to represent the Crucifixion of Jesus, and contain spices that were said to be used to embalm his body. Some point their origin to the year 1361 in a monastery in St Albans, England. But that is debatable. What is not debatable is how delicious they are, and how much I regret having waited so long to make them.

HOT CROSS BUNS
(very slightly modified from Global Bakes)

for the buns:
180 mL milk warmed to 110 degrees F
1 tsp granulated sugar
2 1/2 tsp active dry yeast (I used osmo-tolerant yeast)
100 grams light brown sugar
2 Tablespoons greek yogurt, at room temperature
70 grams (5 Tablespoons) unsalted butter, at room temperature
2 eggs, at room temperature
1 tsp salt
1/2 tsp ground cinnamon
1/2 tsp ground cardamom
1/4 ground nutmeg
1/4 tsp ground allspice
460 grams all-purpose flour, divided
40 g dried figs, finely minced)
100 g raisins
zest of 1 large orange

for the flour cross:
3 tablespoons flour
1/8 tsp baking powder
2 tablespoons cold water

for the glaze:
3 tablespoons milk
3 tablespoons sugar

Make the Buns
Whisk together the warm milk, yeast, and granulated sugar in the bowl of your stand mixer fitted with a dough hook.  Allow to sit for 5 minutes until yeast becomes frothy.

Add to the bowl the brown sugar, butter, yogurt, eggs, salt, cinnamon, nutmeg, allspice, cardamom and 125 grams (1 cup) of the flour. Beat on low speed for 30 seconds or stir by hand. Scrape down the sides of the bowl with a rubber spatula, then add the remaining flour, the dried fruit, and the orange zest. Beat on medium speed until the dough comes together and pulls away from the sides of the bowl, about 2 minutes. The dough should be a little sticky and soft. If it’s too sticky and not pulling away from the sides of the bowl, mix in additional flour 1 Tablespoon at a time just until it comes together and pulls away from the sides of the bowl. Knead in the machine for about 4 minutes in low-speed, then transfer the dough to a greased bowl and allow it to ferment for 2 hours at room temperature.

Butter a 9×13 inch baking pan.  When the dough is ready, punch it down to release the air. Weigh the dough and divide it into 15 roughly equal pieces (my pieces were 77g each).  Shape each piece into a smooth ball, pinching it on the bottom to seal. Arrange in prepared baking pan. Cover shaped rolls and place in the fridge overnight.

Remove the shaped buns from the fridge and let them sit at room temperature for 2 hours. Heat the oven to 350°F.  Whisk the cross ingredients, adjusting consistency with water or flour so that it is thick enough to form a stable design. Spoon paste into a piping bag. Pipe a line down the center of each row of buns, then repeat in the other direction to create crosses.

Bake for 20-25 minutes or until golden brown on top, rotating the pan halfway through. If you notice the tops browning too quickly, loosely tent the pan with aluminum foil. Five minutes before they are done, make the glaze by boiling milk and sugar until sugar is fully dissolved and the glaze thickens slightly.

When they buns are baked, remove from the oven and immediately brush with the warm glaze. Allow to cool slightly and enjoy still warm or at room temperature.

ENJOY!

to print the recipe, click here

Comments: Tanya was my source of inspiration, she actually made those for the first time also this year, and I just tagged along. I did not have many different kinds of dried fruits in our pantry, so I used just raisins and dried Mission figs. The whole batch went to the homeless meal that happened to fall exactly on Good Friday, but Phil and I decided to share one because I really had to know how they taste.

I loved it! The bread is soft, reminds me a bit of a cinnamon roll, but not as decadent.  I like the addition of baking powder to the flour paste, which I saw in Celia’s blog post of years ago. I think it makes it a bit lighter.

Making them was a very nice, trouble-free process (discreet knock on wood, don’t want to upset the baking gods, as I intend to make macarons in the near future).  I hope you give Tanya’s recipe a try, in her site you can see how to do it in a single day.

Thank you Tanya (globalbakes.com), for your constant inspiration!  Stay safe, stay healthy, stay home… and let’s bake!

ONE YEAR AGO: Avgolemono Soup, My Way

TWO YEARS AGO: Sourdough Chocolate Twist Bread

THREE YEARS AGO: Dan Lepard Times Three

FOUR YEARS AGO: Turkey Portobello Burger

FIVE YEARS AGO: Raspberry Ricotta Cake

SIX YEARS AGO: In My Kitchen, April 2014

SEVEN YEARS AGO: Whole-Wheat Pasta with Lemony Tomatoes and Spinach

EIGHT YEARS AGO: Blood Orange Duck: A work in progress

NINE YEARS AGO: Grilled Mahi-mahi with citrus marinade

TEN YEARS AGO: Memories of Pastéis

OMG SPINACH PIES

Staying safe in Corona virus time: read the guest blog post by Phillip Klebba here. A video summarizing important tips can be found here

SPINACH PIES… Please, do not run away from me, I cannot take it. Times are stressful, I need your company. Hate spinach? Hate anything green? Fear not, this was quite likely THE tastiest savory recipe I tried this year. I know, it’s just April, but it’s a year that feels like a lifetime passing by. I will ask you to steam a ton of spinach and you might be a bit annoyed by that step. But once that’s done, you are basically there. Ready to enjoy one amazing side dish or fancy brunch item. Locked inside with no guests? Fancy Brunch for Two. Go with the flow…

SPINACH PIES
(slightly modified from The Washington Post)

(5 to 6 tartlet pans, about 4.5 inches in diameter)

20 ounces fresh baby spinach, rinsed
1 medium shallot, chopped
2 large eggs, beaten
10 ounces small-curd, low-fat cottage cheese
10 ounces grated Parmigiano-Reggiano cheese
1/4 teaspoon freshly ground black pepper
1/4 teaspoon freshly grated nutmeg

Set a steamer basket above simmering water. Place half of the spinach in the steamer. Cover and steam until just wilted, then drain and coarsely chop. Press with paper towels to remove as much moisture from the spinach as possible, then transfer to a large bowl. Repeat with the remaining spinach.

Heat oven to 350 degrees. Use cooking oil spray to grease the tartlet pans, then arrange them on a baking sheet. Add the diced shallot to the spinach, along with the eggs, cottage cheese, Parmigiano-Reggiano, pepper and nutmeg; stir to blend well. Divide evenly among the tartlet pans. Bake for 30 to 35 minutes, until browned on the edges and set in the center.

Wait 5 minutes before removing the little pies from the pans. Serve warm or at room temperature.

ENJOY!

to print the recipe, click here

Comments: Credit should go for the husband who noticed the recipe in The Washington Post and sent me the link. It was part of an article on Irish cooking, published right around St Patrick’s Day.  We were so impressed by these pies, not only tasty the day I made them, but two days later, very gently warmed in a low oven. I normally don’t care for low-fat cottage cheese, but it worked perfectly in this preparation. If using low-fat goes against your principles, by all means grab the regular kind.

I used tartlet pans from Wilton that have a loose bottom, so it’s easy to push them out to serve. The original recipe mentioned you could make 6 tartlets, but using these pans I made only 5. The same type of filling could work well as a real tart, over a crust (like the olive oil crust of my recent past), but this version is as light as it is flavorful.

I hope you make these pies. It is possible that it would work well with frozen spinach, but I much prefer the brighter taste that you get once you steam it yourself and use right away.

ONE YEAR AGO: Avgolemono Soup, My Way

TWO YEARS AGO: Sourdough Chocolate Twist Bread

THREE YEARS AGO: Dan Lepard Times Three

FOUR YEARS AGO: Turkey Portobello Burger

FIVE YEARS AGO: Raspberry Ricotta Cake

SIX YEARS AGO: In My Kitchen, April 2014

SEVEN YEARS AGO: Whole-Wheat Pasta with Lemony Tomatoes and Spinach

EIGHT YEARS AGO: Blood Orange Duck: A work in progress

NINE YEARS AGO: Grilled Mahi-mahi with citrus marinade

TEN YEARS AGO: Memories of Pastéis

BRIOCHE PEPIN

Brioche + Pastry Cream + Chocolate. Do I need to say anything else? This is the stuff that dreams are made of. And we all need good dreams at the moment. Rich, decadent, but pretty straightforward to bake, I promise you. My recipe is a slight modification of the one from a book I adore: Duchess Bake Shop. Make the dough and the pastry cream the evening before you want to bake them, for a super easy baking day, with almost no work involved.

BRIOCHE PEPIN
(slightly modified from Duchess Bake Shop)

for the brioche dough:
9g osmo-tolerant yeast (or regular yeast)
30g whole milk, slightly warm
280g all-purpose flour
30g sugar
1 tsp salt
3 large eggs
140g unsalted butter at room temperature

for pastry cream:
370g whole milk
1/2 tsp vanilla paste
80g sugar
80g egg yolks
15g cornstarch
1/4 tsp salt
30g unsalted butter

to finish:
1 cup mini-chocolate chips
1 egg yolk

The day before… Make the brioche dough. Dissolve the yeast in warm milk. Add all ingredients except butter to the bowl of a Kitchen Aid mixer, and knead with the dough hook for about 4 minutes, until smooth. Add the butter in small pieces, kneading in low-speed, and waiting until each added piece is incorporated before adding more. Once all butter is added, knead until very elastic and smooth, about 15 minutes, always at low-speed.  Place the dough in a bowl coated with oil, leave at room temperature for 90 minutes, then transfer to the fridge overnight.

Make the pastry cream. Heat the milk and vanilla paste in a saucepan until small bubbles form around the edge of the liquid. As the  milk heats, vigorously whisk the egg yolks with sugar in a bowl. Add the cornstarch and salt and continue whisking until there are no lumps.  Slowly add the hot milk/vanilla mixture, tempering the yolks. Once all the liquid is added, transfer it back to the saucepan and bring to a boil. Boil for about 5 minutes, in low-heat, whisking constantly and removing the pan from the heat if it starts to thicken and bubble too furiously. Pass the mixture through a fine sieve, add the butter, and place a plastic film on the surface. Refrigerate overnight.

On the following day. Roll out the dough. Remove the dough from the fridge and allow to sit at room temperature for about 30 minutes. Roll it out on a lightly floured surface to a rectangle measuring about 20 x 10 inches. Add the whole amount of pastry cream on the surface of the dough, spreading it uniformly. Sprinkle chocolate chips all over. Fold both long sides of the rectangle to meet in the center (see composite photo of my post). Cut the dough in half lengthwise exactly where the edges meet. You will end up with two long and thin rectangles about 20 x 5 inches.  Cut each of those in 8 pieces, so that you have a total of 16 small pieces.  Place them over parchment paper and cover with a light cloth. Proof at room temperature for 1 hour or until doubled in size.

Heat the oven to 380F. Brush each brioche with egg yolk and bake for about 20 minutes, until golden brown. Some filling might spill to the sides, just clean it up after baking.
.
ENJOY!

to print the recipe, click here

Comments: I was inspired by my friend Nancy (the one who gave me the pyramid shaped mold) to make these babies. She baked a batch last week and raved about them. I can see why. Truly delicious, although I must confess we just shared a very small one for quality control. The whole batch went to the project Common Table (meals for homeless). They are having a tough time now, instead of a sit-down dinner it is take-out. Everything has to be individually wrapped and a volunteer comes to our door and picks up the stuff I bake, so we have no direct contact. Odd times. Scary times.

Anyway, this was a fun bake. I wanted to make as many as possible from a single batch, so I changed the way the dough is shaped and cut. I managed to have 16 little brioches instead of only 8 bigger ones. To that I added two batches of a Chai Tea cake, and hopefully they had enough to share.

Brioche is a dough I would not attempt without a KitchenAid, because you must knead it extensively. I like to add all ingredients except the butter, work the dough until it starts to get smooth, then add the butter little by little. Once all the butter is in, take your time and let the machine work its magic at low-speed, until the dough is smooth, and if you pull it, it does not rip apart, instead it stretches beautifully. If you pay attention to this simple rule, you will have perfect brioche buns.

As the brioche baked, some filling oozed out from most of them. The same happened to Nancy, and I am not sure you can avoid it, although if some of my reader have experience with it, please leave me a comment. When leakage takes place, that stuff can be scraped gently and placed on a spoon. I advise waiting a few minutes to avoid burning your mouth. And pups cannot have it, no matter how pretty they stay sitting, like angels, because… chocolate.

ONE YEAR AGO: Sakura Buche du Printempts

TWO YEARS AGO: Clay Pot Roast Chicken

THREE YEARS AGO: In My Kitchen, April 2017

FOUR YEARS AGO: Secret Recipe Club: Chicken Korma and a Bonus Recipe

FIVE YEARS AGO: Josey Baker’s Olive Bread

SIX YEARS AGO: Almonds, A Cookbook Review

SEVEN YEARS AGO: Pomegranate-Molasses Glazed Carrots

EIGHT YEARS AGO: Codruta’s Rolled Oat Sourdough Bread

NINE YEARS AGO: Roasted Corn and Tomato Risotto

TEN YEARS AGO: Light Rye Bread


YIN & YANG VIENNOISE BREAD

Staying safe in Corona virus time: read the guest blog post by Phillip Klebba here

During difficult times we often see the best coming out of people. Acts of kindness, generosity, and love try to counteract the fear and uncertainties that surround us. This bread, with its dual nature of darkness and lightness brings this image to my mind. I enjoyed the process of making it, and hope you consider baking a batch in your kitchen, trying to focus on all the positive things we do have.


YIN & YANG VIENNOISE BREAD
(slightly modified from Bake-Street)

300 g bread flour
200 g all purpose flour
3 g osmo-tolerant yeast (or regular instant dry)
255 g milk
40 g egg (whisk one egg and weigh the amount needed)
50 g granulated sugar
75 g butter, at room temperature
10 g salt
20 g cocoa powder + 15 g brown sugar
1 egg, beaten + pinch of salt

Add the flours, yeast, egg, salt, and 3/4 of the milk to a KitchenAid type bowl.  Using the dough hook, mix until the ingredients are incorporated, then decide if you need to add the rest of the milk. Once the milk is added, with the machine still running, add the sugar in two additions. Knead for about 4 minutes at low-speed, then add the butter, one tablespoon or so at a time.  Wait until each  piece disappears into the dough before adding more butter. Knead until you get good gluten development, probably 4 to 5 minutes longer. The dough should stretch smoothly without tearing.

Divide the dough in two portions, one weighing 40 g less than the other. To the smaller batch, add the cocoa powder and brown sugar and knead by hand or in the machine until the cocoa is fully distributed. It will take a little time and effort. Place both balls of dough in separate oiled bowls, and allow them to proof at room temperature for 2 and a half hours.

Divide each dough in five portions, each between 90 and 95g. Form each as a little ball and let rest for 10 minutes. Roll each as a long oblong shape about 4mm thick. Place different colors of dough on top and bottom, form as little loaves, seam at the bottom.  Use a very sharp blade to make slashes on the surface, being very determinate. Any hesitation and the cut won’t be sharp enough. You need to see the different color of dough showing underneath. Place the shaped and cut loaves over parchment paper and let them proof at room temperature for 1 hour and 15 minutes.

Heat the oven to 400F.  Paint each loaf with an egg wash, and bake for about 16 minutes. Cool completely on a rack before slicing.

ENJOY!

to print the recipe, click here

Comments: The most interesting aspect of this bread is how the cocoa powder affects texture and resulting oven spring. The white dough is very smooth, stretches easily, and wraps around the dark dough like a soft blanket. The cocoa-containing dough resists rolling a lot more and has a dry feel to it. When it is inside, it will have less oven spring, so the outer dough is not going to open as dramatically as when the dough placement is reversed. As far as taste goes, it will depend on your goal for the bread. If you will enjoy it plain or with a little butter, the light dough inside is the way to go. But if you toast it and enjoy it with jam (orange jam would be awesome according to Eva from Bake-Street), the cocoa kind will be hard to beat.


Yin and Yang. Focus on the positive. We know how to deal with this pandemic. Imagine what it was like on the times of the Black Death, when not only people were dying left and right, but nobody knew why. Nobody knew what to do. Focus on the positive. Do everything you can to maintain social distance and to keep your personal environment clean.

The bread is soft, the cocoa crust slightly harder than the lighter version, but not much. These little loaves would be perfect for a brunch on a Sunday morning, or with a nice cup of tea as the sun sets. Focus on the positive, we will beat this.

I am very fond of Eva’s blog Bake-Street, having made quite a few of her recipe over the past few years, they are very detailed and always work as expected. Make sure to stop by and subscribe, you will be glad you did!

ONE YEAR AGO: Extreme Chocolate Cupcakes

TWO YEARS AGO: Sunflower Seed Kamut Sourdough

THREE YEARS AGO: The Joys of Grating Squash

FOUR YEARS AGO: Auberge Pecan-Walnut Bread