BBA#24: PANETTONE

Here we are, at bread number 24 of the Bread Baker’s Apprentice Challenge, started by Nicole from “Pinch My Salt“. Read all about it here.

Panettone, the traditional Italian fruit bread, is very popular in two of my former homes, Sao Paulo and Paris, during Christmas.  I wish I could say it brings back fond memories of childhood, but the truth is that I never cared for it. In my memory, panettone was a dry, chalky bread with hardened pieces of fruit in the crumb.  What can I say?  I was a difficult child. 😉

Nevertheless, Peter Reinhart says that this recipe, which is more involved than most, produces the best panettone in the world.  I was a bit skeptical, but gathered up all the ingredients and hoped for the best.

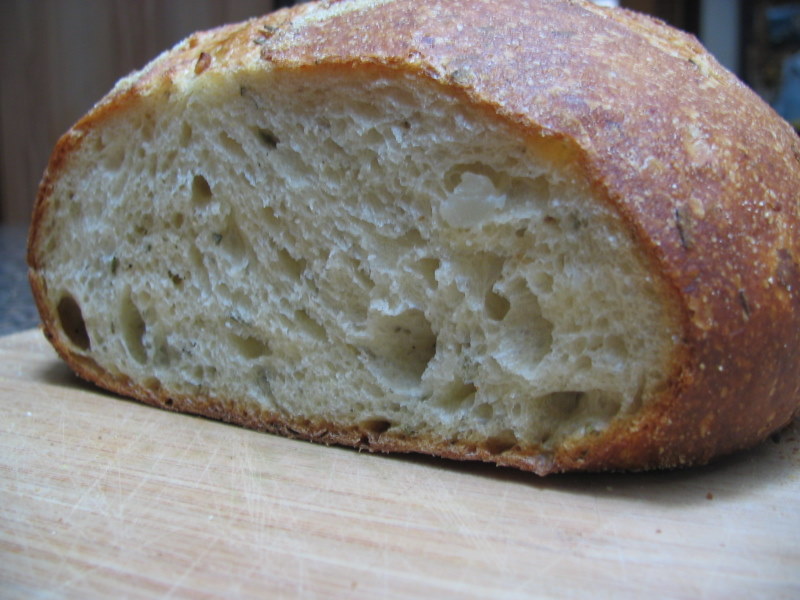
Was it good?  Oh, YESSS!  The best in the world?  Well, I haven’t sampled that many, but my husband considers himself a panettone connoisseur, and he and I agreed that this was the best we’ve ever had, by far. The crumb was moist and velvety, with the right amount of fruit and sweetness, plus that unmistakable hint of “fiori di Sicilia“, the extract that gives panettone its characteristic holiday flavor. It was impossible to eat just a single slice of this bread…and we shouldn’t have brought out the butter…in a few minutes nearly half the loaf was gone!  The other half will make some graduate students very happy tomorrow!

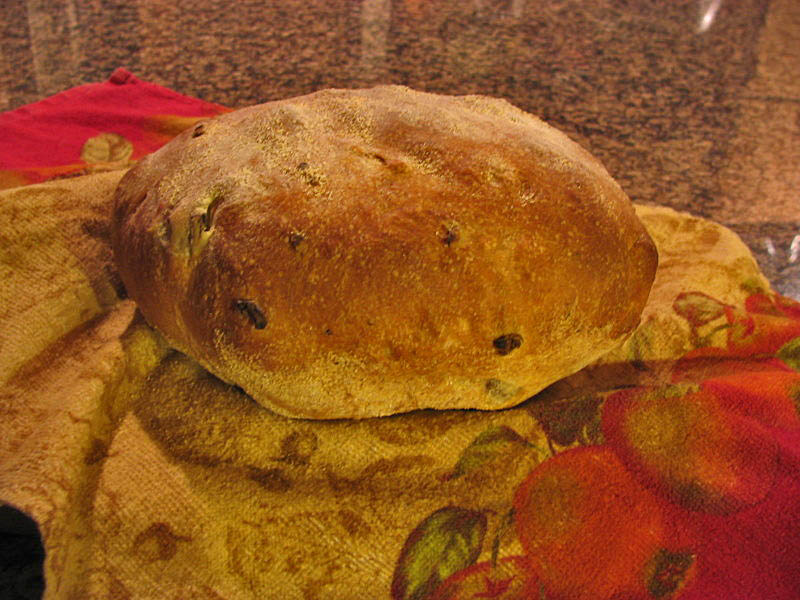
This is it!  The panettone for this year’s holidays!

crumb

The recipe needs advance planning, as it uses a wild yeast sponge (mixture of water, flour, and a sourdough starter) as part of the final dough.  The fruits soak in rum, orange and fiore di sicilia extracts overnight.  The process went smoothly, my loaf is a little shallow because since I didnn’t have a 6-inch pan, mine was 7.5 inches in diameter.

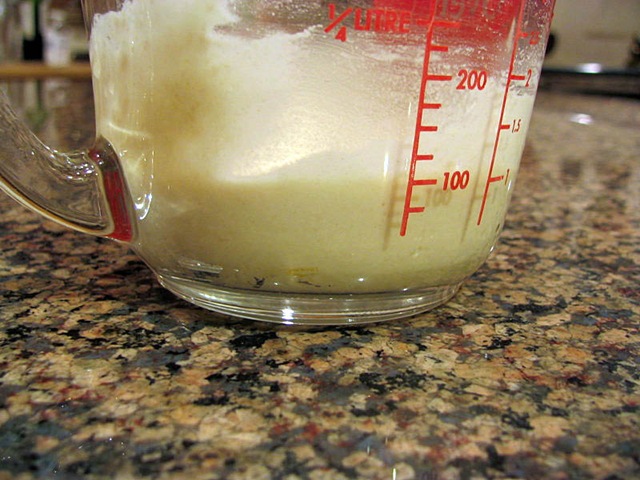
This is the wild yeast sponge ready to go into the dough…. sponge2

Dried fruits soaking in rum, orange and fiore de sicilia extracts

IMG_2623

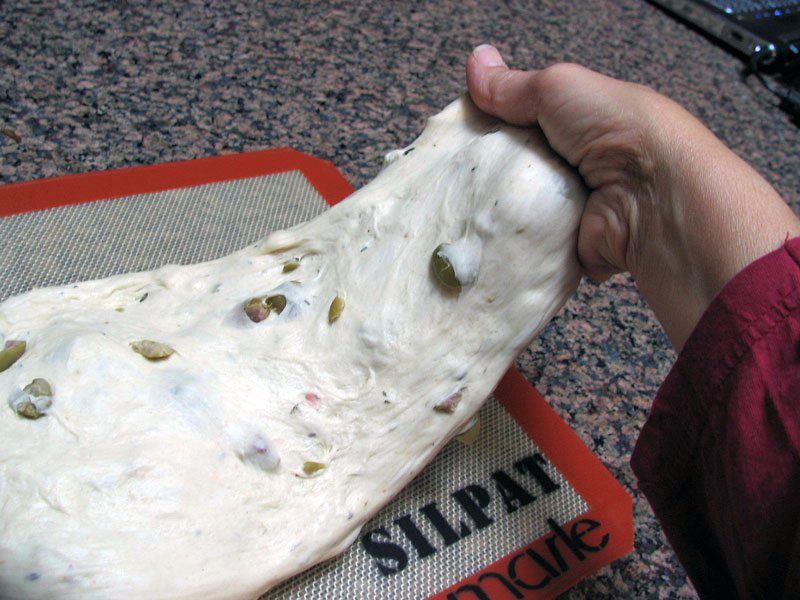
The dough smells wonderful from the very beginning….

dough1

dough2

dough3

Ready to go into the oven…

dough4

Just out of the oven…

baked1

Check out the panettone posts by other bakers following along the Bread Baker’s Apprentice Challenge:

Oggi, from I Can Do That

Mags, from “The Other Side of Fifty”

TxFarmer, from Sina.blog

BRAZILIAN PAO DE QUEIJO: Love at first bite!

cheesebread1

If you happen to know any Brazilians leaving abroad, ask them to name the five foods that they miss the most. I’m willing to bet that “pao de queijo” (little cheese bread) makes the list. Some might even shed a tear or two thinking about it.


Originally from the beautiful state of Minas Gerais, they are made with a farmer’s type cheese, quite unique (Minas’ cheese, read about it here).   Brazilian cheese bread  is so popular that nowadays you can buy it in stores all over the country called ‘Casa do Pao de Queijo” (Home of the Cheese Bread),  or as a dry mix, in colorful bags available at most grocery stores. I’ve lost track of how many such bags we’ve stuffed in our luggage coming back from annual trips to visit family and friends.

Last year I found a recipe for pao de queijo  published by Fer,  in her blog Chucrute com Salsicha. She is  a  Brazilian-American like myself, and she raved about them. When things like pao de queijo are on the line, Brazilians attentively listen to each other… At least three Brazilian bloggers back this recipe.  Try it, you’ll love it

BRAZILIAN CHEESE BREAD
(adapted from Fer, original recipe from Neide)

1/2 cup milk
1/4 cup vegetable oil
1 egg
1 cup tapioca starch
1/4 cup farmer’s cheese (see comments)
1 T Parmigiano Reggiano cheese, grated
1/2 tsp salt

for topping (optional)
fresh rosemary leaves, chopped
kosher salt

Add all ingredients, except those for the topping, into a blender.  Blend very well at full speed, stopping a couple of times to scrape the surface of the blender’s cup, making sure no bits of tapioca starch are left unmixed.

The mixture will be a little thinner than pancake batter.  Pour the batter in mini-muffin tins, to no more than  3/4 of their capacity,  as shown here.  The recipe makes 24 little cheese breads.

tray

Add a little bit of salt and rosemary on top, place in a 400F oven, and cook for 20 minutes.

outofoven

Most will come out right away without sticking.  If some stick slightly, allow them to cool for a few minutes and probe them out gently with the tip of a knife.

ENJOY!


to print the recipe, click here


Comments: In the original recipe, Neide was trying to mimic little cheese breads she had at a restaurant in Rio de Janeiro. She used exclusively Parmigiano cheese in the batter.   I’ve  made this recipe many times,  and now settled on a combination of two cheeses: a melting type, preferably Mexican, and a small amount of Parmigiano to sharpen the taste.  Of course, depending on the type of cheese, adjust the salt.  In this batch I did not add any rosemary, but please do so, it is perfect with it.

They resemble popovers in texture, but are gluten-free, so folks with gluten allergies can still enjoy them!

Now, allow me to share a couple of photos sent by Mia, a reader of my blog who just made a batch!  In her version, the mixture ended up with a firmer texture, so she was able to roll them as little balls, which I must say made them a lot more “authentic-looking”.   Awesome job!

image

image-2

Mia, thanks so much for trying one of my favorite Brazilian recipes, and for sending the photos and allowing me to publish them…   Now I am craving “pão de queijo” again…..

BBA#23: PANE SICILIANO

I’ve made this bread about a year ago, and it didn’t turn out very good, so I was not exactly thrilled to make it this weekend for the BBA Challenge.  It takes three days from beginning to end, on the first day you make a pate fermentee, on the second day you make the dough and shape the bread, put it in the fridge overnight and bake next morning.
Siciliano1

My pictures tell you two things: first, I had problems shaping the dough, instead of a nice S shape, it got kind of bulky. Second , the bread had almost zero oven spring (a term used by bakers referring to how much the bread rises during baking).  My loaves ended up quite small, a problem that also happened to Paul (you can check his website following a link at the end of my post).

It tasted ok, but not great, a little too dry for my taste. I don’t think I’ll be making it again.

doughCrumb

Check out the loaves made by my virtual friends ahead of me in the BBA Challenge:

Paul….

Carolyn

Oggi

Joelen

Mags

and TxFarmer

Next in this baking journey: panettone! Looking forward to it…

OCTOBER 16th is WORLD BREAD DAY

Sometimes I wonder if I could live without certain foods.  Rice….potatoes…. pasta?  Possibly. Cheese?  The thought makes me  weak in the knees.    Bread?  That’s preposterous,   NO WAY!

I love baking bread almost as much as eating it, so I had to bake bread on World Bread Day. Bakers around the world bake or buy their favorite bread and talk about it.

Please read all about it here

To celebrate this event I chose a sourdough loaf I’ve been contemplating for the longest time…   “Pain de Campagne”  from a recipe adapted by David, a great baker who shares his knowledge  at the forum “The Fresh Loaf

IMG_2579

PAIN DE CAMPAGNE
(adapted from David’s post )

100 g  active sourdough starter
450 g bread flour
50 g rye flour
370 g water
10 g salt
1/4 tsp instant yeast 

In a large bowl, mix the sourdough starter with the water to dissolve it. Add the flours and stir to form a shaggy mass. Cover tightly and let rest at room temperature for 20 minutes.

Sprinkle the yeast over the dough and mix by folding a few times. Then sprinkle the salt over the dough and mix.

Stretch and fold the dough 20 times, rotating the bowl slightly between each fold. Cover tightly. Repeat this stretch and fold procedure 20 minutes later and, again, after another 20 minutes. Place the dough in a lightly oiled container and rest it in the fridge for 21 hours.

Take out the dough and scrape it gently onto a lightly floured work surface. Gently pat it into a rectangle. Pre-shape for  a loaf  by folding  the near edge up just past the center of the dough and sealing it pressing with the heel of your hand.   Then, bring the far edge of the dough gently just over the sealed edge and seal it again the same way.

Cover the dough with  a kitchen towel and let it rest for 30-60 minutes, with the seams up.  Finish shaping the bread by folding the near edge of the dough and sealing it again, then taking the far edge of the dough and bringing  it towards you all the way to the work surface, sealing the seam with the heel of your hand. Gently rotate the loaf toward you 1/4 turn so the last seam formed is against the work surface and roll the loaf back and forth, to finish sealing the seam.

Place a baking stone (or baking tiles)  on the middle rack of the oven and heat it to 470F.   Fill a large roasting pan with hot water. Once the shaped loaf is just 1.5 times bigger (not quite doubled in size), slash the top with a single cut all the way along the bread, and place it over the tiles.  Mine proofed for only 35 minutes.  Empty the roasting pan, leaving the residual hot water just clinging to it, and flip it over to cover the dough.  Bake covered for 30 minutes, remove the cover and bake for 10-15 minutes more, until the internal temperature reaches at least 205F.

Remove the bread to a rack and cool it for 2 hours before slicing.

ENJOY!

IMG_2581

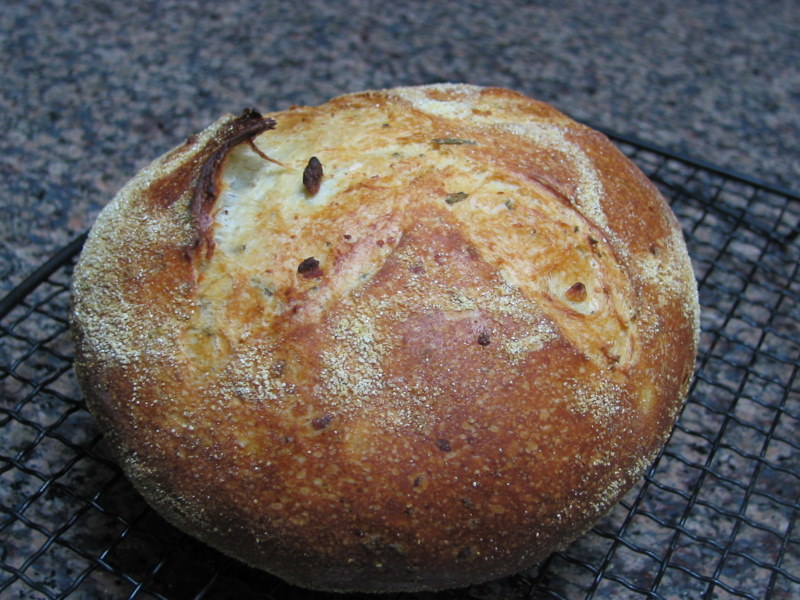
This bread is simply perfect.  The crumb is, as my husband described it  ” hearty but at the same time  silky in your mouth “.  David, thank you so much for a great recipe!

Let’s hope that everyone can enjoy a nice piece of bread today, World Bread Day…

Here are some photos of this loaf in the making.

The dough, after 21 hours in the fridge is airy, all bubbly… (21 hours in the fridge make this a perfect bread to bake during the work week: prepare it the day before, put it in the fridge and finish when you arrive from work the next day).

IMG_2569

The shaped loaf …

IMG_2572

Slashed….

IMG_2574

After removing the cover at 30 min ….

IMG_2575

Cooling…. (the hardest part is the waiting…. 😉

IMG_2580-1

BBA#22: PAIN DE CAMPAGNE

“Pain” in French has nothing to do with “pain” in English, but this bread gave me plenty of pain. Let’s start with the good news: the crumb.
Crumb1

I’d be embarrassed to meet Peter Reinhart after BBA#22. I managed to mangle the “epis” shape. In my defense, I couldn’t resist the challenge of shaping it, as one of our favorite boulangeries in Paris is called “Pain d’Epis“. I’ve now developed an increased sense of respect for their wonderfully shaped breads, baked to perfection, day in and day out.

Back to the recipe. It calls for pate fermentee, made the day before and refrigerated overnight. In the morning add all the other ingredients (I used rye flour as the whole wheat component), and complete the recipe. I folded the dough (3 times) instead of kneading.
doughprep

To make the “epis” shape, first form a baguette-type loaf …
formed
then make scissor-cuts in opposite directions.
cutepis

After one more hour of rising, into the oven it goes….
book

Well, well, well … hmmmm, something went wrong. I guess the cuts should be more parallel to the surface, and deeper. When properly cut, the lobes of dough can be moved further apart, because if not the dough will rise and join the “epis” together again.

I lost the battle, but not the war, because the bread was very tasty, with a good crumb, nice crust,  not as as hard as a sourdough’s crust, just right… I want to perfect this shaping of the epis, though, and if anyone has advice, ideas or suggestions, I’m all ears!

Twenty-two breads down, twenty-one to go!

Check some of the “pain de campagne” made by my fellow bakers (maybe they can give me some lessons!):

Carolyn, from Two Skinny Jenkins

Joelen, from “What’s Cookin’ Chicago?”

Oggi, from “I Can Do That” (and evidently she can do a fantastic job!)

Mags, from “The Other Side of Fifty

Paul, from “Yumarama Artisan Bread

Txfarmer from sina.blog (very nice step by step photos)