
This is my third attempt at covering sourdough with a thin layer of a cocoa-dyed wrap. I stumbled by accident on a youtube site that got me lost for a while in the many possibilities of sourdough fun. She does incredibly beautiful loaves, pushing the envelope with gilding the lily. This is my first adventure following her overall method. The Bubble Bread.
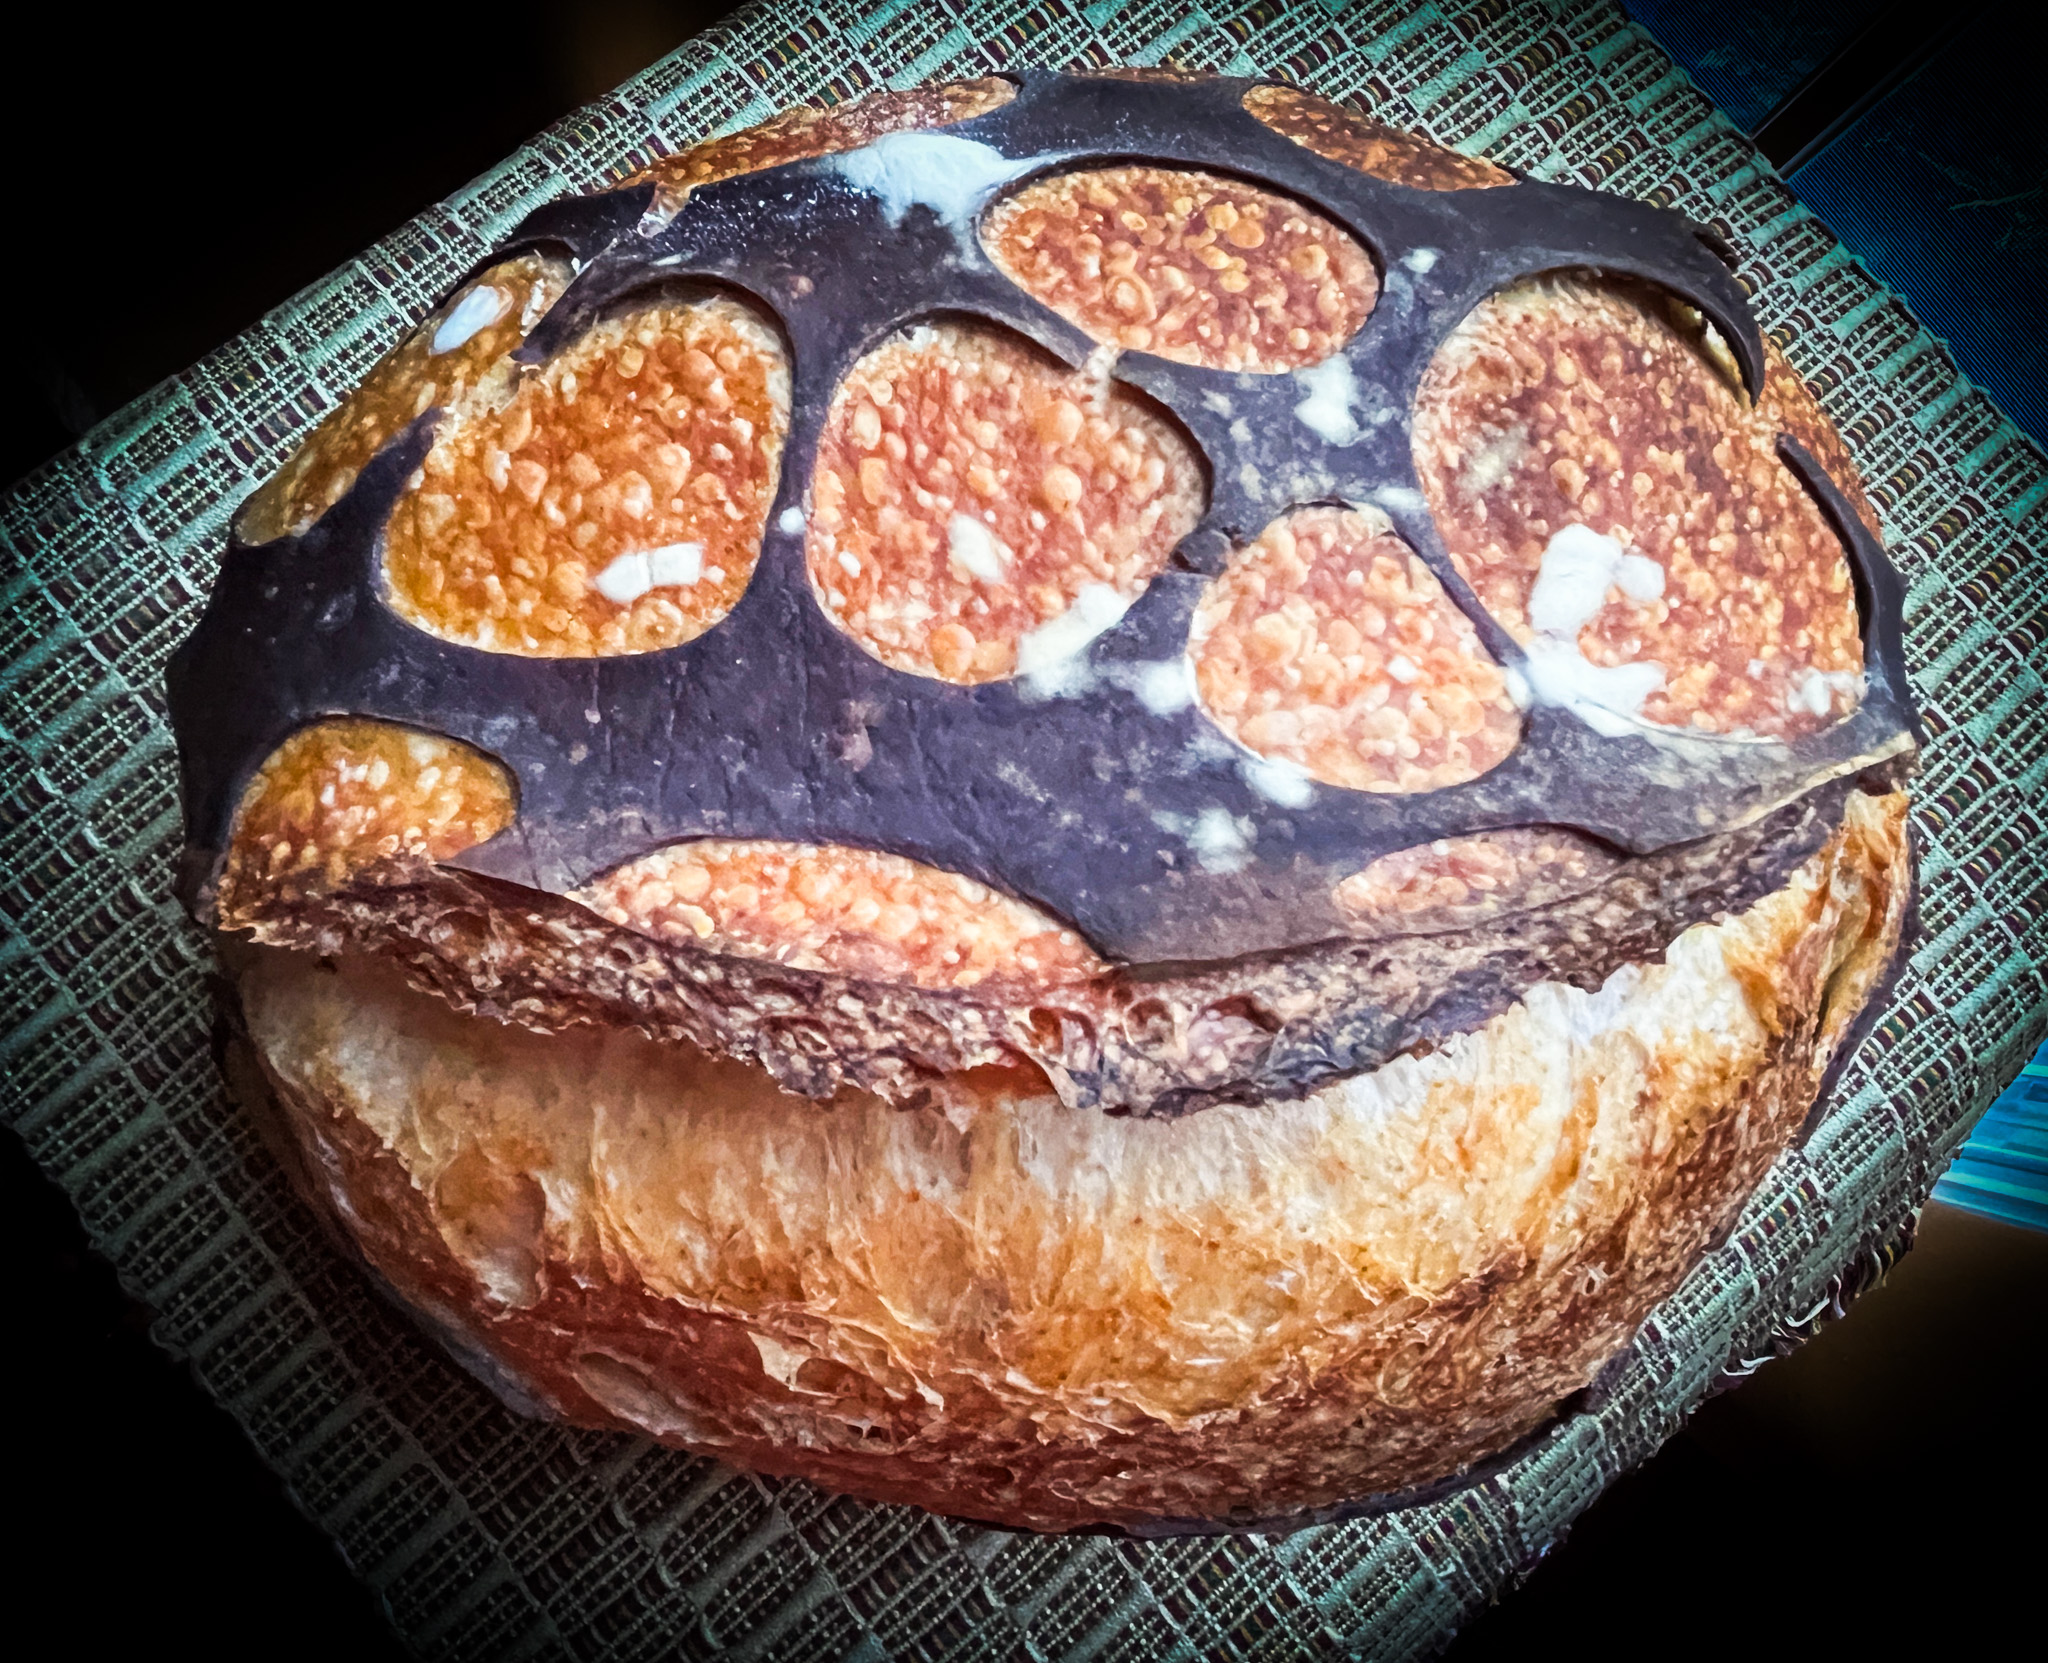
Contrary to my usual method, which I consider simple and straightforward, this one involved autolysis, adding the starter and salt at different stages, and a lamination step. I followed her recipe to a T, although I opted for making only one loaf instead of two. The real game changer was the way she handled the cocoa-dyed dough. That is a must!
SOURDOUGH BUBBLE BREAD
(slightly modified from Hungry Shots)
for the main dough:
88g sourdough starter (100% hydration)
388g bread flour
50g spelt flour
270g water
9g salt
for the cocoa-wrap:
85g discarded sourdough
85g all-purpose flour
30g water
7g cocoa powder
Mix water with the two types of flour until combined. Leave at room temperature, covered, for one hour. Add the starter and mix until combined. Leave for 1 hour at room temperature. Add the salt and mix by kneading gently for about 4 minutes until incorporated. Leave at room temperature for 1 hour.
Spray a little water on your countertop and place the dough over it. Do a set of stretch and folds, and let it proof for one more hour at room temperature.
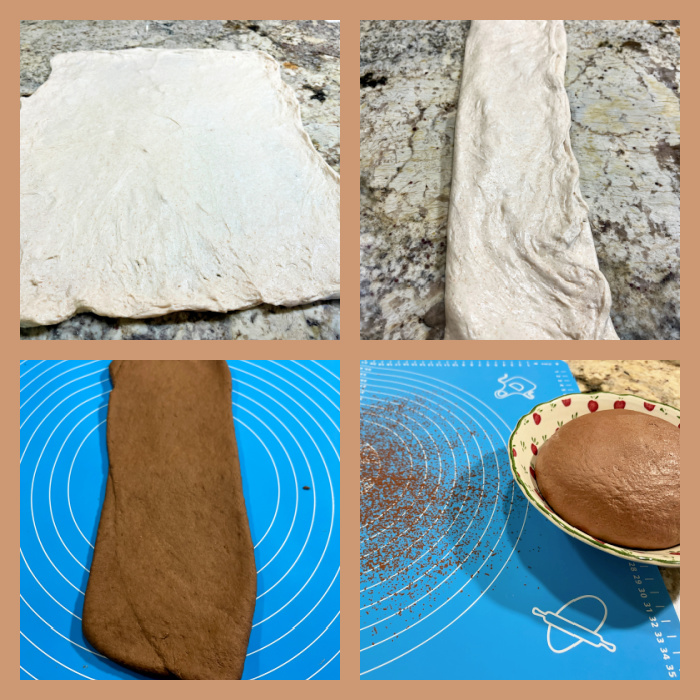
Laminate the dough (you can watch her youtube video if you have never done it). Allow it to rest for 90 minutes. Right after lamination, make the cocoa-dyed dough by mixing all the ingredients and kneading until fully smooth. To help with flexibility of the dough, roll it thinly with a rolling pin, fold it, and knead it again. Make sure the dough is very smooth and pliable before you form is into a ball and let it ferment at room temperature until you are ready to cover the dough with t.
Go back to the main dough: Do three sets of gentle foil colds (watch her video for details). Do the first one, wait 30 minutes to do the second one, 1 hour to do the third one. One hour after the third coil fold is done, you are ready to shape the dough and cover it with the cocoa wrap.
Roll out the cocoa dough to an extension that allows you to wrap the whole bread. Cut circles of different sizes with a cookie cutter. Shape the main dough as a batard (or round if you prefer), cover it with the cocoa dough, and place in the banneton. Proof for 30 minutes at room temperature, then place in the fridge overnight.
Next morning, heat oven to 450F. Invert the dough over parchment paper, make a deep slice off-center, and bake covered in a Dutch oven for 30 minutes, remove the cover and bake for 20 minutes more. Allow it to cool completely before slicing.
ENJOY!
to print the recipe, click here

.
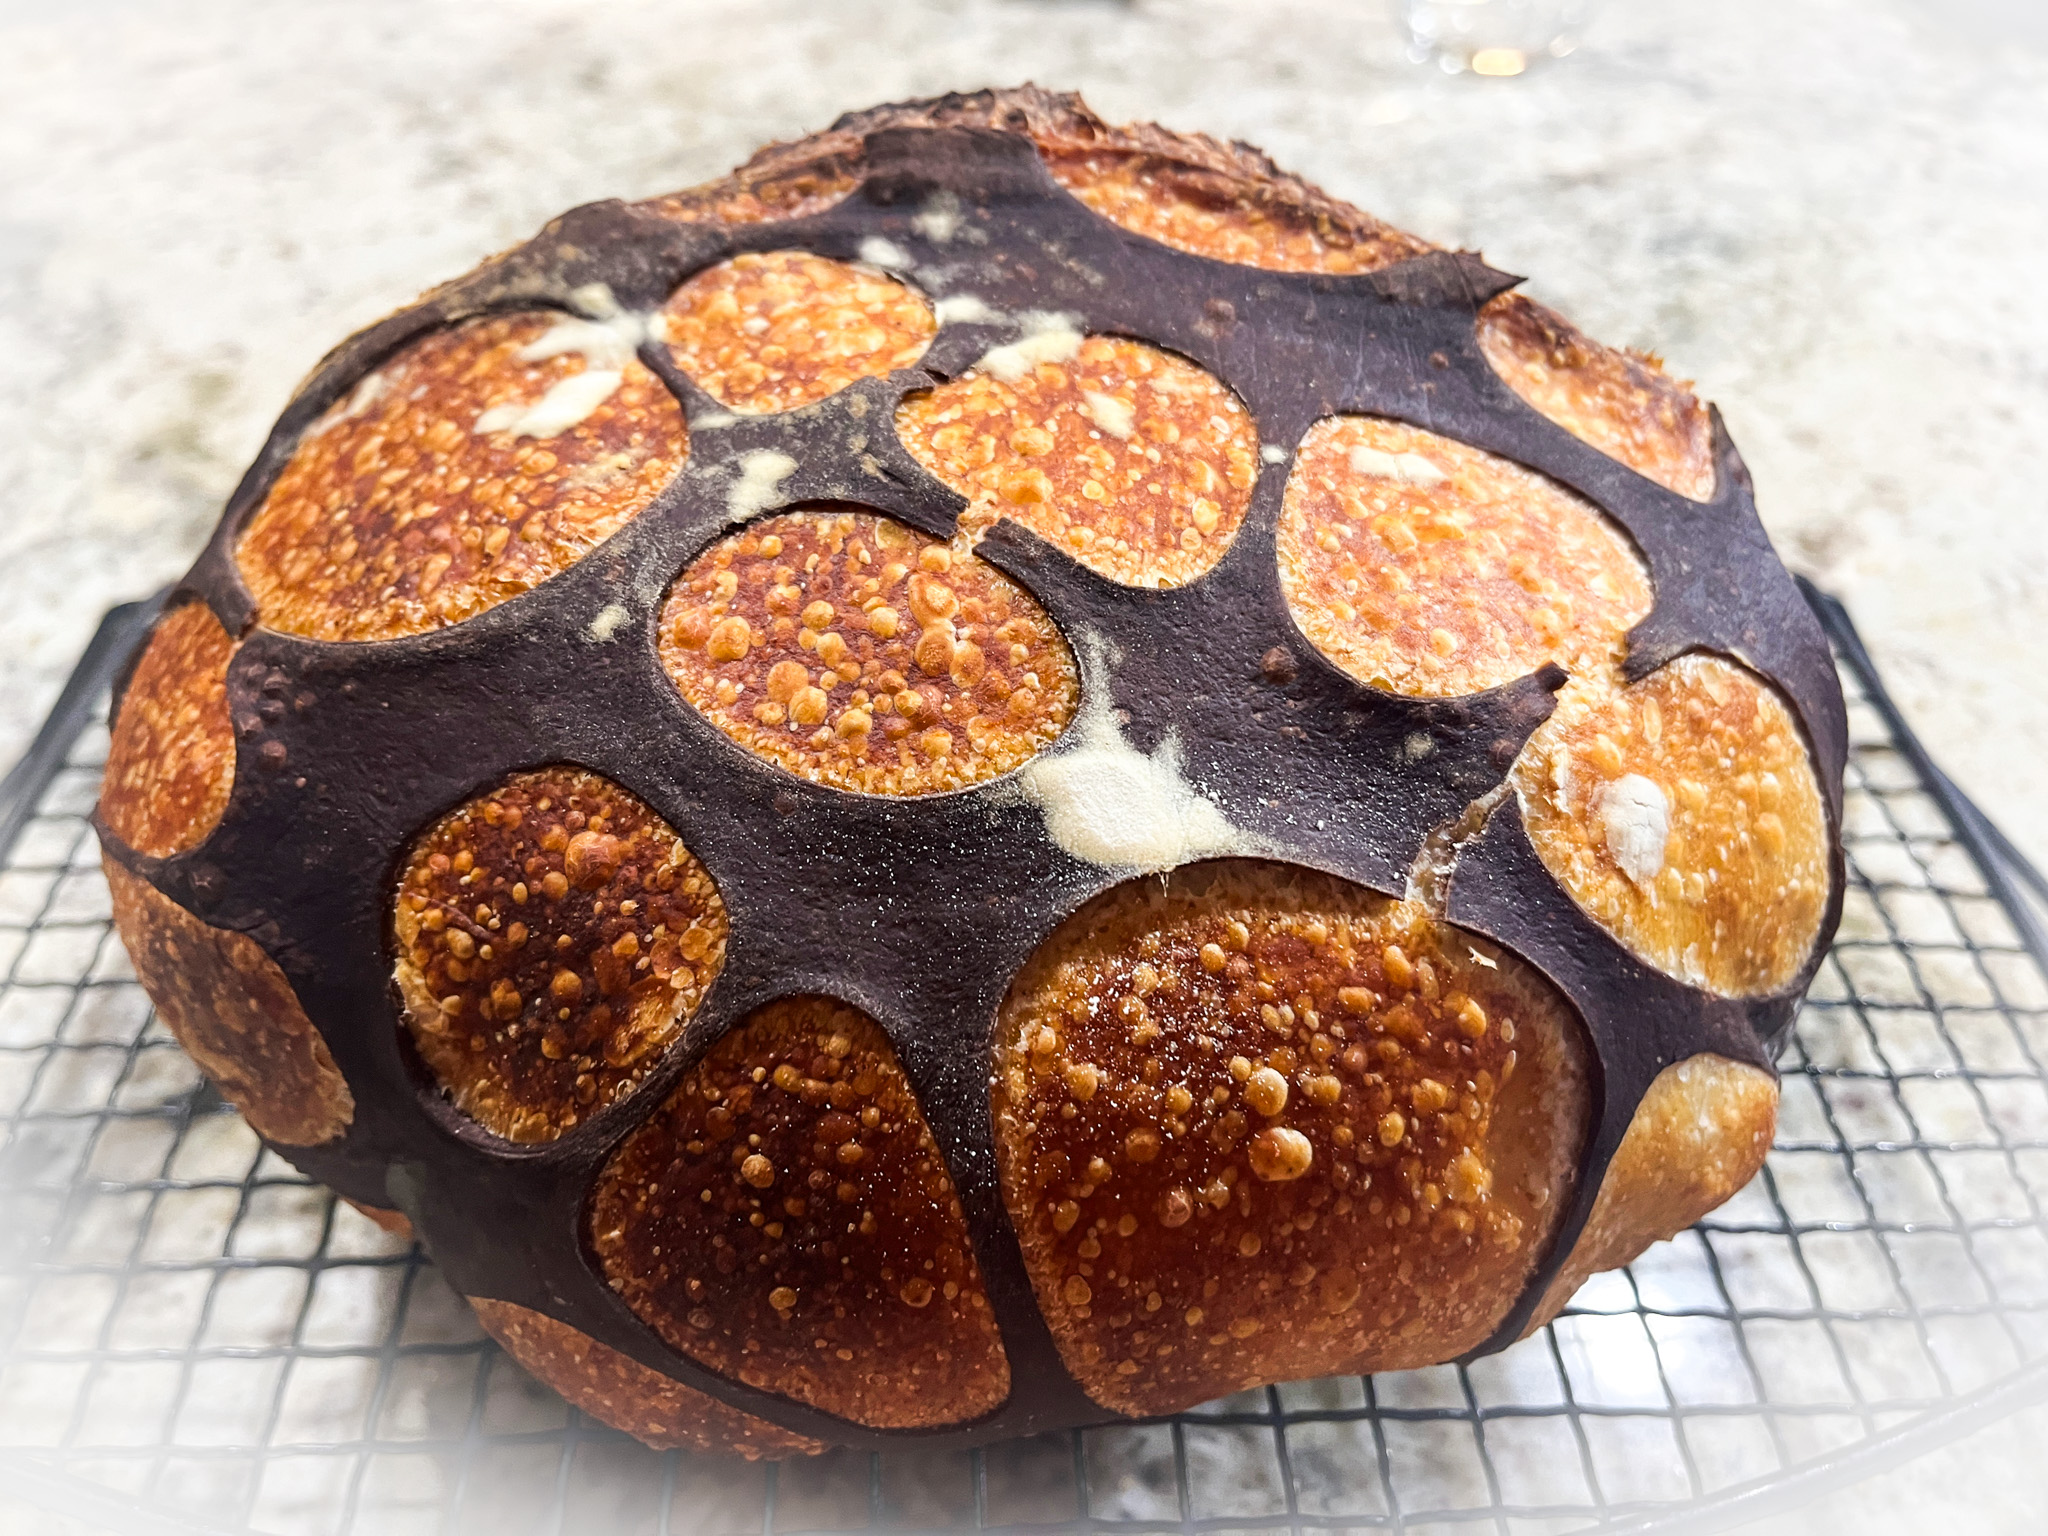
Comments: This was so much fun to make! I have tried to cover sourdough with a dark wrap using the pie lattice cutter, but I did not care for the way it turned out (see it on this post of my past). However, the key is making the dough extensible enough, and that is achieved by thorough kneading, rolling, kneading again. If you go through the process, your outcome will be much better.

I would cut holes of different sizes next time, some a lot smaller, like she did, but this time I was a bit too anxious and nervous about the whole thing, so I kept is simple. Used only two sizes of circles. I could not take pictures of the wrapping of the dough, as I was alone in the house and it was impossible to do it on my own, but her videos show it all in great detail. Check the bubble bread video here.
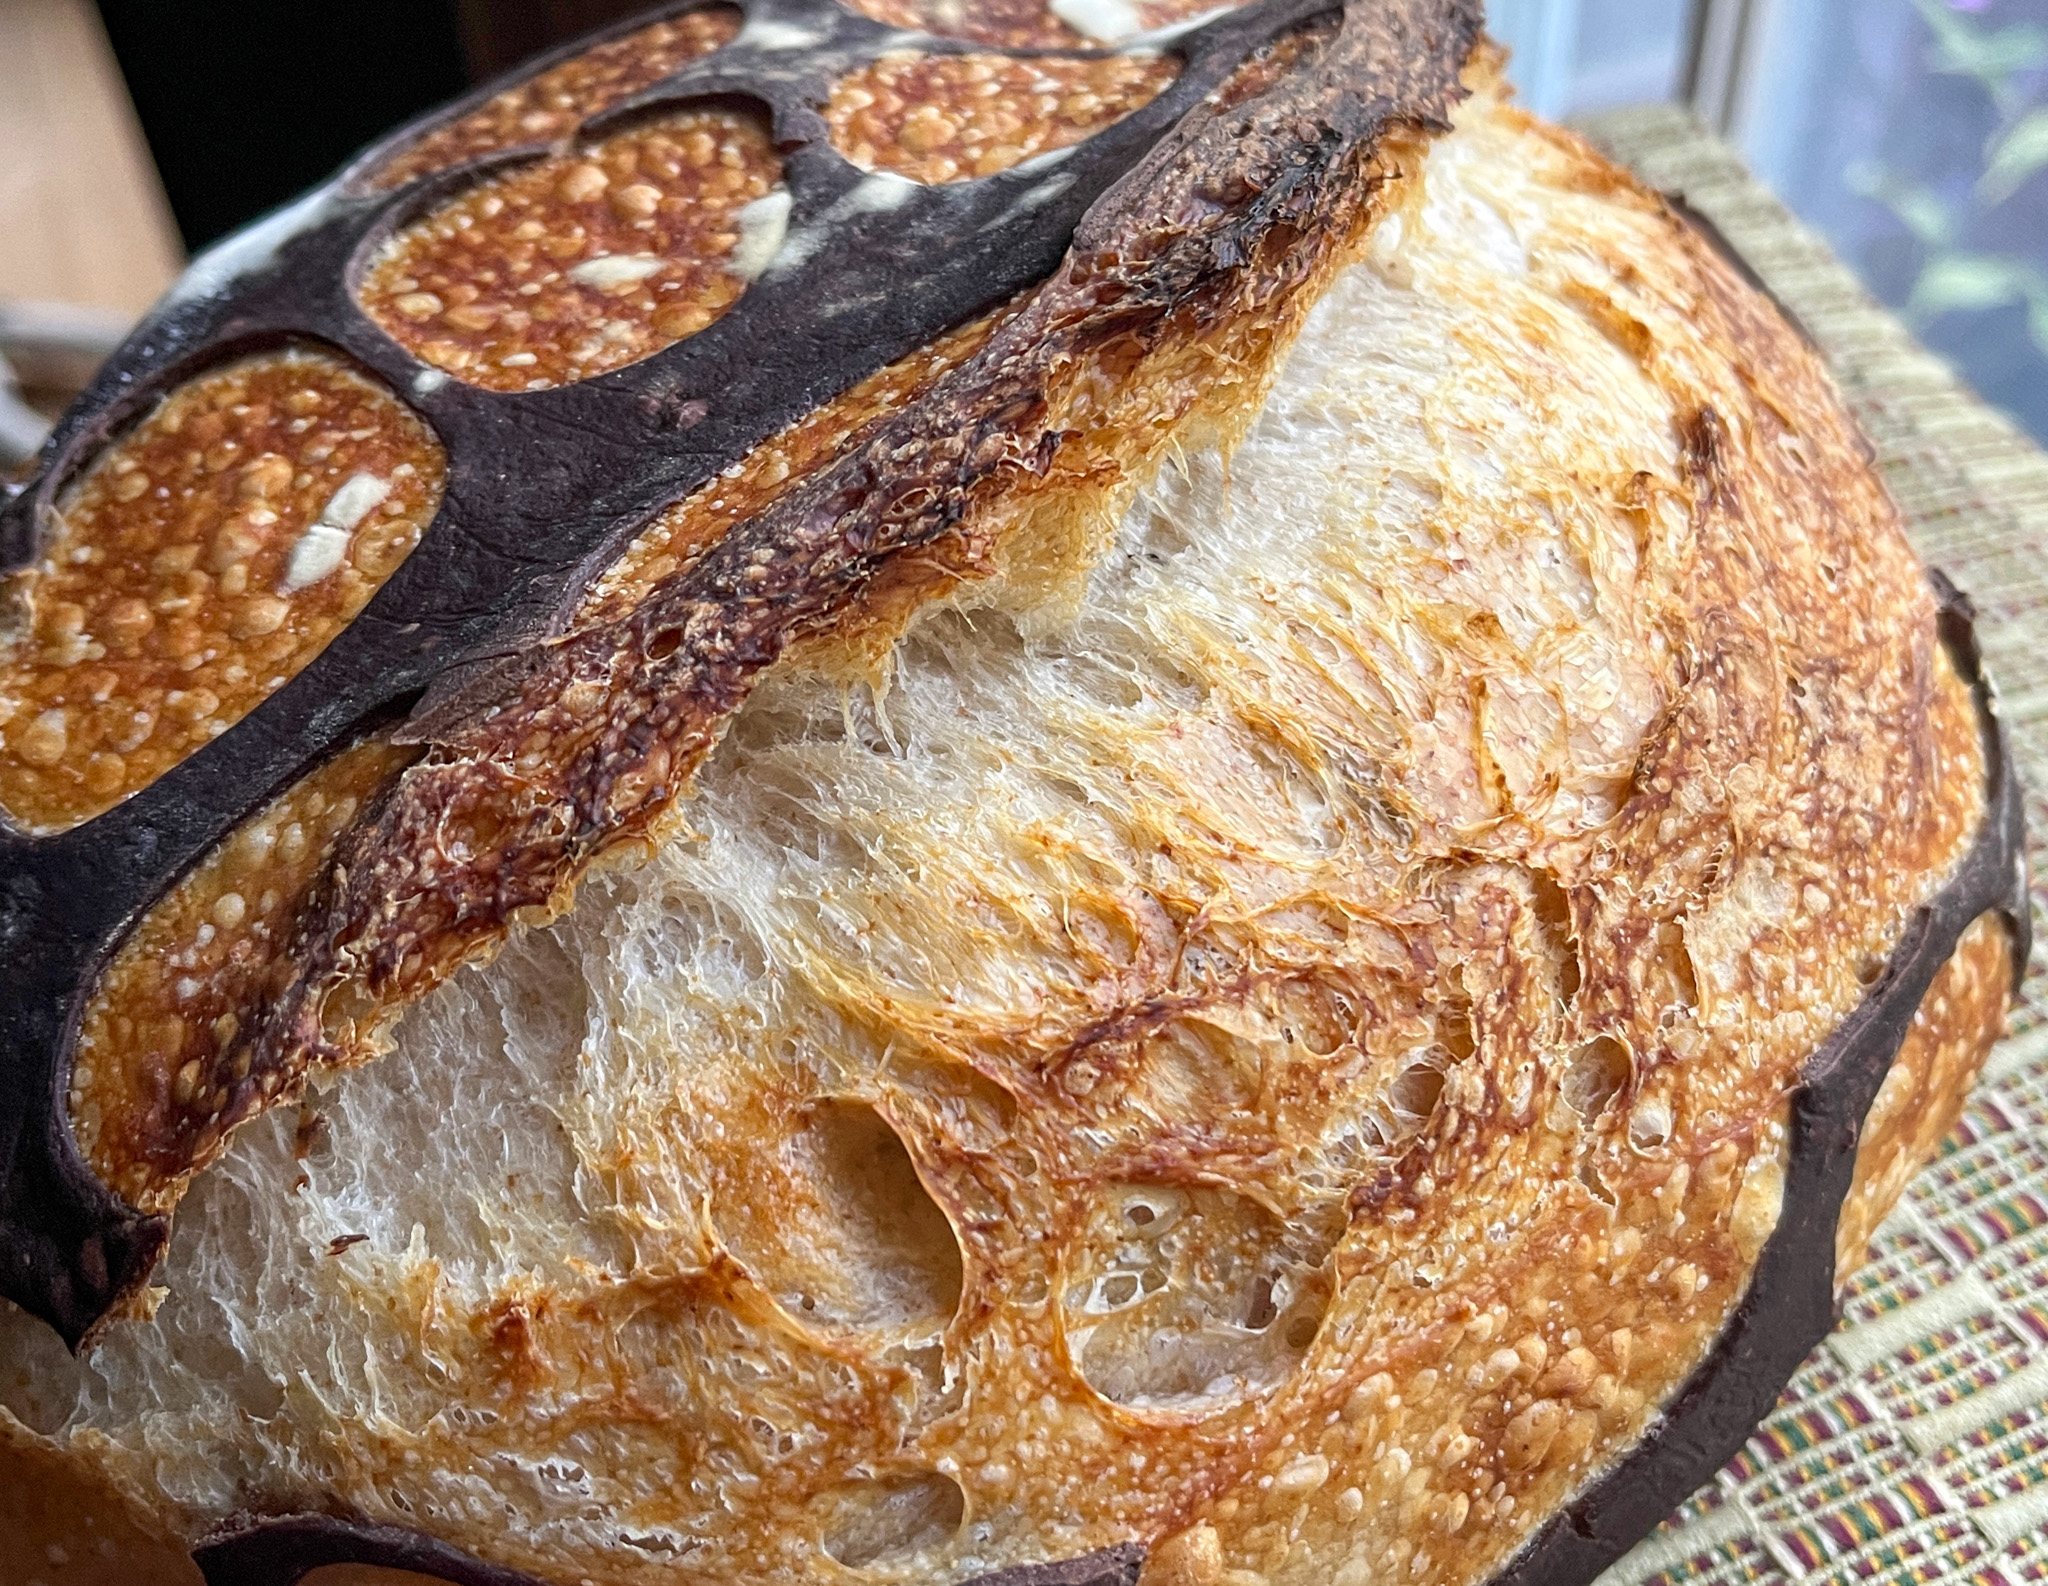
The bread had amazing oven-spring, particularly considering that the wrapped dough constrains it quite a bit. As to the crumb, it was very moist and tender, in fact the husband professed it to be his very favorite of this year! Can you say mission accomplished?

I am not convinced that the lamination and coil-folding are absolutely necessary to bake this type of bread, but definitely the handling of the cocoa dough will be key. I hope you give this method a try, it is so cool to see the outcome when you get that lid open after 30 minutes!
ONE YEAR AGO: Watermelon Salad
TWO YEARS AGO: Kashmiri Chicken Thighs
THREE YEARS AGO: A Vegan Trilogy
FOUR YEARS AGO: The Mystifying Hurricane Roll
FIVE YEARS AGO: Pop-Tarts with Strawberry Balsamic Jam
SIX YEARS AGO: Ptichye Moloko, a Russian Dessert
SEVEN YEARS AGO: Cheesy Low-Carb Zucchini Tarts
EIGHT YEARS AGO: Blogging Hiatus
NINE YEARS AGO: Apricots, Three Ways
TEN YEARS AGO: Up Close and Personal with Kale
ELEVEN YEARS AGO: Black Berry Cherry Sorbet
TWELVE YEARS AGO: Asparagus Pesto
THIRTEEN YEARS AGO: Chocolate and Chestnut Terrine
FOURTEEN YEARS AGO: Under the spell of lemongrass
FIFTEEN YEARS AGO: Greens + Grapefruit + Shrimp = Great Salad!

Interesting design 🙂
LikeLike
I love this: the bubbles look gorgeous.
LikeLike
Love that cocoa bubble coat 🤎🤎
LikeLike
The bubbles are intriguing.
LikeLike
I would say definitely mission accomplished. This is a brilliant technique.i have my standard way of making sourdough loaves, and generally leave the dough overnight in the warmth to proof and rise before the final stage. However with the cocoa layer I can see why you would leave it in the frig. Thanks so much, you have inspired me.
LikeLike