
Friends, this has been a bit of an ordeal to get to work. The basic idea is to use lace and rub charcoal-activated powder on top of it to create a design. A few posts and reels on Instagram guided me, but it quickly became obvious that every single detail matters and can make or break the outcome. The variables are many: what kind of fabric, how open the design is, and most important, how to make the lace glue to the bread but not too much. I have not hit Nirvana yet, but with this third loaf, I feel good enough to share it with you. Stay tuned for future experiments in which I hope to get all the details optimized.
You can use any sourdough recipe you are fond of. For this particular loaf I used my basic formula described in this post, adding 1 tsp Garam Masala to the dough.
From what I saw in Instagram, the favorite method is to add the lace to the bottom of the banneton, leave it there overnight in the fridge for final fermentation, then rub charcoal, pull the lace and score the top, in a way that the design won’t be too compromised. When I did that, I had two different outcomes, none of them very nice. In the first, I rubbed too much flour over the surface of the dough, and that prevented the charcoal from staying well enough. The second time, I skipped the rubbing of white flour before inverting the dough on the lace, and that was a catastrophic move: the lace glued to the bread, and when I pulled it, it ripped the surface, ruined the design, it was a complete and utter mess.

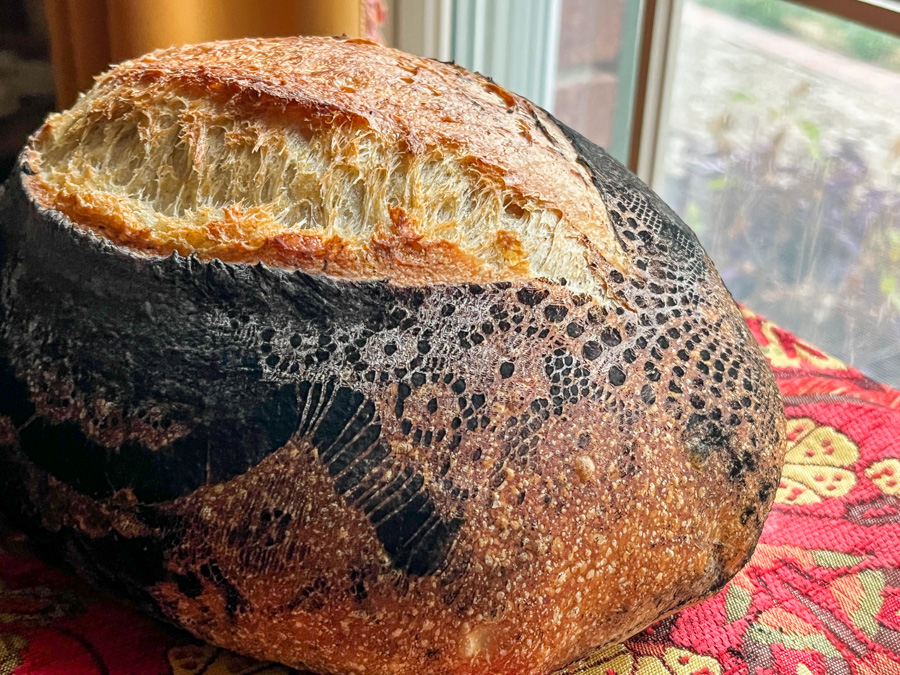
This time I allowed the bread to sit in the fridge overnight in the banneton, inverted it over parchment paper, placed the lace on top and pressed it as best as I could. Next I added charcoal and rubbed it in. My mistake was to mist the surface with water, a bit too much water went on top, and made the charcoal sip underneath the lace. So the top did not reveal the design, and got way too dark. I think it is easy to fix next time, so I am sharing with you this version and maybe you can play with it and hit the jackpot on you first attempt! Go ahead, make me proud!
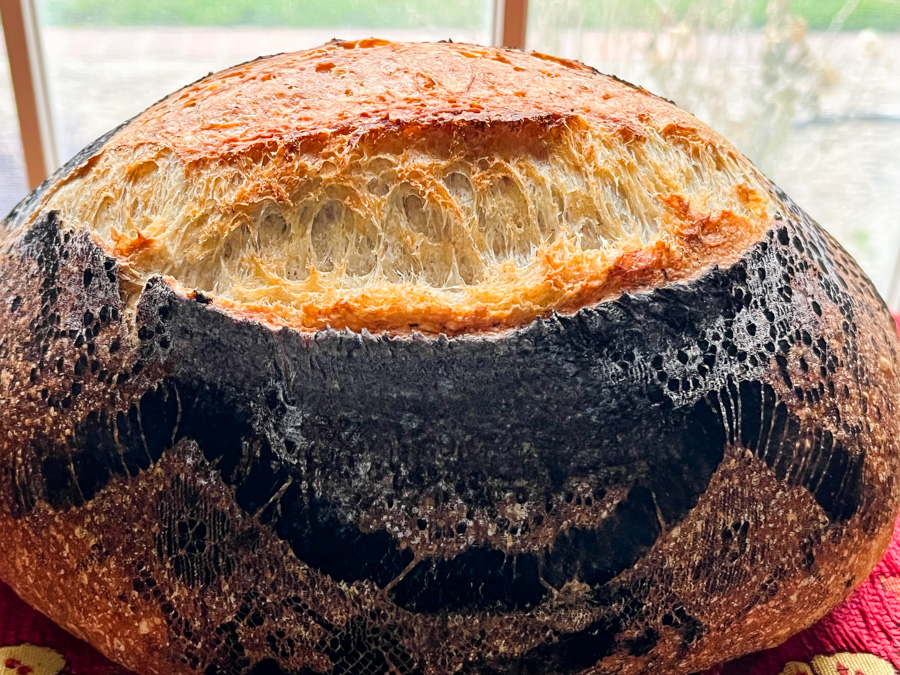
The bead had great oven spring, so if I had managed to get the design imprinted all over, it would have been pretty awesome… But, this is much better than my previous two attempts. My advice to you is, try this method if you like it, but don’t expect it to work on your first time, you might have to tweak things depending on the fabric you have, and the design itself. But no matter what, the bread underneath will always taste great, no major harm done if you don’t get it right. This is really a super fun technique and with a ton of possibilities…. Stay tuned for more soon!

ONE YEAR AGO: Incredibly Simple Carrots
TWO YEARS AGO: Sarah Bernhardt’s Cookies
THREE YEARS AGO: A Really Big Announcement
FOUR YEARS AGO: Stir-Fried Chicken in Sesame-Orange Sauce
FIVE YEARS AGO: Monday Blues
SIX YEARS AGO: A New Way to Roast Veggies
SEVEN YEARS AGO: Two Takes on Raspberries
EIGHT YEARS AGO: Spice Cake with Blackberry Puree
NINE YEARS AGO: Own Your Kitchen with Cappuccino Panna Cotta
TEN YEARS AGO: Chicken Parmigiana, the Thriller
ELEVEN YEARS AGO: Wild Mushroom Risotto
TWELVE YEARS AGO: Tartine Bread: Basic Country Loaf
THIRTEEN YEARS AGO: Pugliese Bread
