A NEW WAY TO ROAST VEGGIES

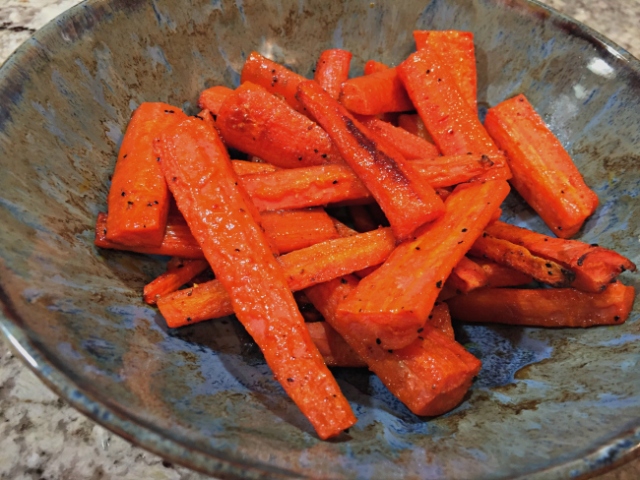
Fine Cooking is my favorite cooking magazine. I do like Saveur, but for some odd reason never cook anything from it, I like Food and Wine a lot, and have mixed feelings about Bon Appetit. In some ways, I think the magazine is going a bit heavy on the trendy, fashionable, hip. Maybe hip is a dated term already, but you catch my drift. Fine Cooking focuses on recipes, good cooking, tips and advice that help not only the novice cook, but those who feel comfortable around the kitchen. My success rate with Fine Cooking recipes is pretty close to 100%, so what’s not to like, right? The latest issue had a nice article on “A New Way to Roast Vegetables” and it’s at the same time simple and clever. They offer many examples of veggie combinations, but the basic idea is that whatever veggie you intend to roast, first you place it in the oven covered with aluminum foil, that will essentially steam the veggie and partially cook it. Next, you remove the cover foil and proceed with the roasting.  To make clean up even easier,  it is a good idea to line the baking sheet with aluminum foil too, so that during roasting whatever could stick to the pan will stick to the foil instead. Of course, you could steam the veggies in a regular pan first, or even pre-cook them in a microwave, but the simplicity of this method won me over.  I did not follow their recipe for carrots, but if you own the magazine take a look at it. They use smallish carrots with the tops still on, and serve them as the appetizer course with a yogurt-spice sauce drizzled all over. I opted for a more austere version, pairing carrots with paprika, not much else.

roasted-carrots

STEAM-ROASTED CARROTS WITH PAPRIKA
(inspired by Fine Cooking)

5 large carrots, cut any way you like
drizzle of olive oil to coat them
1/4 teaspoon paprika
salt and black pepper to taste

Heat the over to 440 F.

Place the cut carrots in a large bowl, drizzle with the olive oil, and sprinkle spices all over.

Mix well to coat.

Line a baking dish with aluminum foil to allow for easier cleaning later. Make sure to use a rimmed baking sheet, not a baking utensil with tall sides, that will prevent proper browning.  Arrange the carrots on a single layer, cover the baking sheet with a second sheet of aluminum foil, and place in the oven for 15 minutes.

Carefully remove the top aluminum foil (use tongs), and leave it in the oven for 20 to 25 minutes more, moving the pieces around after 10 minutes.  Serve right away.

ENJOY!

to print the recipe, click here

roasting

Comments: We absolutely loved the texture of these carrots. I normally find that roasted carrots need to be cut pretty small to allow for homogeneous cooking at high temperature, and even doing that I end up with some pieces that are too hard, some too soft.  This method delivers on all counts, texture and flavor. Of course, you can use all sorts of spices, maybe a bit of maple syrup or Sriracha together with the olive oil (I’ll be trying that combo soon),  and serve the carrots with a yogurt-based sauce, with tahini, lemon, whatever you crave at the moment.   As I mentioned, I opted for a very basic version, which is a real test for the method, no distractions. Cauliflower, potatoes, eggplant, turnips, they can all be roasted this way, for the most part all veggies have enough moisture to steam while covered.

roasted-carrots-with-paprika


Add to FacebookAdd to DiggAdd to Del.icio.usAdd to StumbleuponAdd to RedditAdd to BlinklistAdd to TwitterAdd to TechnoratiAdd to Yahoo BuzzAdd to Newsvine

ONE YEAR AGO: Two Takes on Raspberries

TWO YEARS AGO: Spice Cake with Blackberry Puree

THREE YEARS AGO: Own Your Kitchen with Cappuccino Panna Cotta

FOUR YEARS AGO: Chicken Parmigiana, the Thriller

FIVE YEARS AGO: Wild Mushroom Risotto

SIX YEARS AGO: Tartine Bread:  Basic Country Loaf 

SEVEN YEARS AGO:  Pugliese Bread

CIDER MINI-CHEESECAKES WITH CARAMEL SAUCE

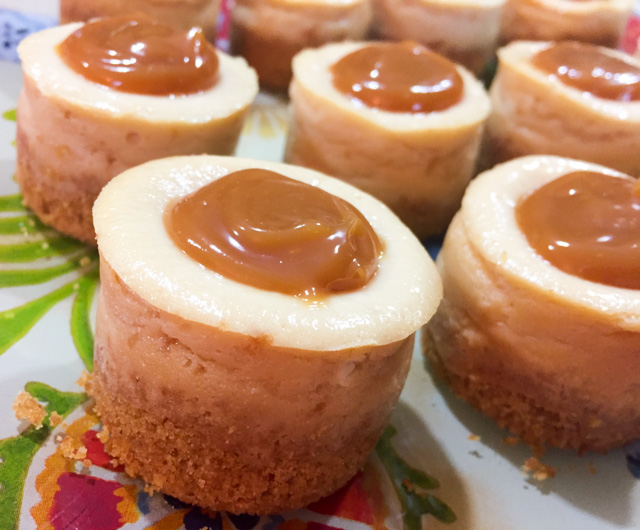
One of the blogs I follow is Karen’s Kitchen Stories, and more than once I’ve featured recipes from her site, independently of the assignment from The Secret Recipe Club (pause to dry a furtive tear).  We are also friends on Facebook and for some odd reason keep tempting each other with very important things such as new cookbooks (preferably related to bread, but not necessarily so), new cooking gadgets or ingredients. Our friendship certainly  has a positive impact on the economy of the US of A. Not too long ago, Karen blogged about impossibly adorable mini-cheesecakes. To make them, she used an equally adorable mini-cheesecake pan. I performed some quick calculations. We live 1,513 miles apart. It would be downright impossible to go borrow her pan on a whim. Corollarium #1: I had to order my own. Reluctantly, that’s what I did. Corollarium #2: I can now share with you my first batch of mini-cheesecakes. Corollarium #3: my readers shall be thrilled.

cider-mini-cheesecakes


CIDER MINI-CHEESECAKES WITH CARAMEL SAUCE
(adapted from Karen Kitchen’s Stories)

9 sheets of Graham crackers, crushed (about 1 1/8 cups)
1 1/2 tablespoons sugar
3 1/2 tablespoons salted butter, melted
16 ounces cream cheese, at room temperature
3/4 cup sugar
1 1/2 tablespoons all-purpose flour
2 large eggs
1 tsp vanilla extract
1/4 cup boiled cider
1/4 cup heavy cream

caramel sauce for topping (home-made is best, I sinned)

Heat the oven to 350 degrees F. Line a 12 cavity muffin pan with paper liners, or spray a mini cheesecake pan with spray oil. In a small bowl or the bowl of a mini food processor, mix together the crushed graham crackers, 1 1/2 T sugar, and melted butter. Divide the mixture among the cavities of the pan, and tamp it down into an even layer with some of the Graham cracker mixture coming up the sides. Bake the crust in the oven for 5 minutes. Remove the pan and let cool while you make the filling.

In a large bowl, mix the cream cheese and sugar with a mixer on low-speed until smooth. Stir in the flour. Add the eggs, one at a time, and mix until just combined. Add the vanilla, boiled cider, and heavy cream, and mix until combined. Tap the mixing bowl on the counter about 30 times to release any air bubbles.

If you are using a mini cheesecake pan, fill each one up to the top. You will have extra batter. If you are using a muffin pan, Divide the batter among the cavities to about 2/3 full.

If you are using a mini cheesecake pan, bake for 15 to 18 minutes, until the centers are slightly jiggly. If you are using a muffin pan, bake for 20 to 23 minutes. Remove from the oven and let cool for an hour. Once they are cooled, refrigerate, covered loosely with wax paper and plastic wrap, for at least 2 hours. They can also be frozen after chilling.

Right before serving, top with a small amount of caramel sauce, either homemade or purchased.

ENJOY!

to print the recipe, click here

compcheese


Comments: I adapted Karen’s recipe using another recipe for boiled cider cheesecake found at Food52. My friend Gary, patissier extraordinaire gave me some pointers, because as you know, I am a bit of a wimp for departing from recipes when it comes to baking. Interestingly enough, I ordered boiled cider after reading another post by Karen, so this is an example of virtual gastronomic convergence.

We took the cheesecakes to our lab meeting, because having only 12 in the batch would make it hard to take to our whole department. They turned out absolutely delicious!  Cheesecakes can be a bit bland, perhaps that’s why they normally have some type of topping. The boiled cider made them taste a lot more complex. I wish I had the energy to make the caramel sauce myself, but maybe next time. These will definitely go to my top 5 favorite desserts to make and enjoy.  Perfect size, beautiful to look at, and fun to eat. I can hardly wait to try other uses for my cute pan. Mini-quiches, for instance, mini-mousses… so many possibilities…  Small is definitely beautiful (wink, wink).

As I finished composing this post, I went to add the links to recipes in previous years, and to my amazement, exactly one year ago I posted not one, but two recipes from Karen’s blog, as her blog was my assignment in The Secret Recipe Club. And I made MINI-meatloaves… Can you imagine the odds of this? Too cool for words. 

cider-mini-cheesecakes-from-bewitching-kitchen

Add to FacebookAdd to DiggAdd to Del.icio.usAdd to StumbleuponAdd to RedditAdd to BlinklistAdd to TwitterAdd to TechnoratiAdd to Yahoo BuzzAdd to Newsvine

ONE YEAR AGO: Rustic Ciabatta and Mini-Meatloaves

TWO YEARS AGO: Green Rice

THREE YEARS AGO: Potato-Crusted Italian Mini-Quiches

FOUR YEARS AGO: Beetroot Sourdough for the Holidays

FIVE YEARS AGO: Cod Filet with Mustard Tarragon Crust

SIX YEARS AGO: Soba Noodles: Light and Healthy

SEVEN YEARS AGO: Potato-Rosemary Bread


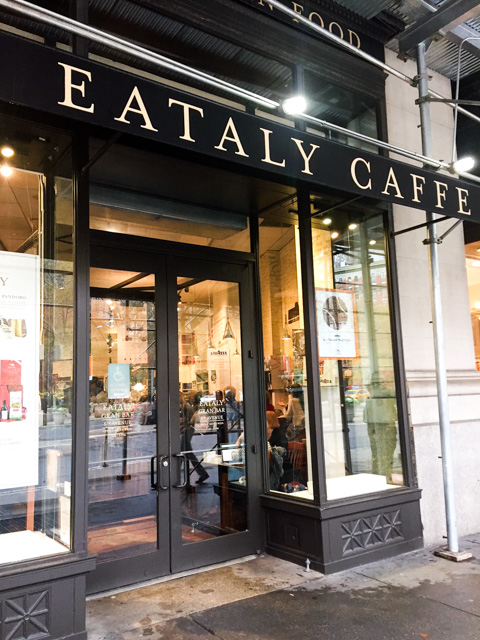
EATALY

eataly
If you find yourself in New York City, I highly recommend a visit to Mario Batali & Bastianich’s Eataly. I heard about the place even before its grand opening in 2010, but confess I was completely mistaken about it. I thought it was a regular trattoria with the celebrity chef behind it. Nope. It is not. If you’ve been to Paris, think about La Grande Epicerie de Paris, and you’ll be on the right track to grasp what Eataly is all about. In fact, its original location in Turin is simply THE largest Italian market in the world. Mind blowing array of all things food and drink related, from charcuterie to fresh truffles, from wonderful patisseries to freshly made panini and mouth-watering steak sandwiches. That’s what we had for our lunch, by the way, their signature steak sandwich. Nothing could be simpler: thinly sliced rib-eye steak, piled on a sourdough bread drizzled with a touch of a bright green olive oil. The meat was perfectly seasoned, I could taste oregano in the background. Superb.  I share a few photos of the place, always crowded and with a very upbeat atmosphere.

First, how about these beautiful full wheels of Parmigiano?

img_7375

If Parmigiano is not your thing, what’s wrong with you? Ok, fine, taste is a personal thing. You can choose one of these other cheeses (just a small sampling of what the store has to offer)

cheeses1

At this time of the year, Panettone is a must. They had countless brands, from the very traditional with dried fruits and Fiori di Sicilia, to creative departures, like chocolate….

panettone
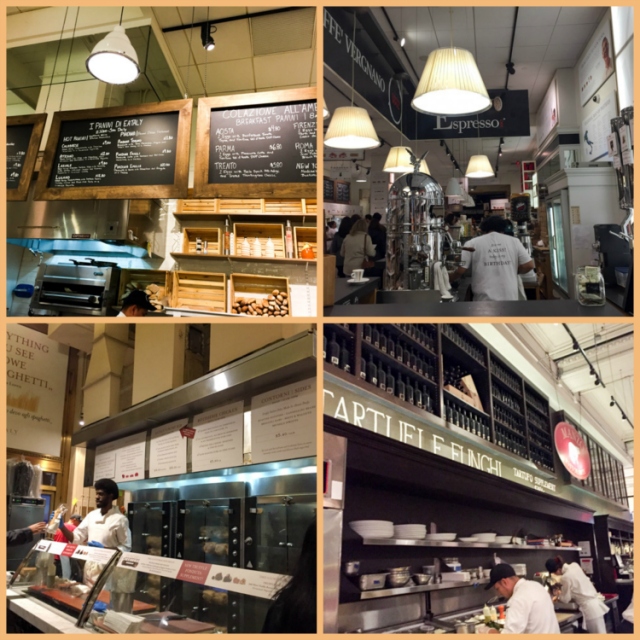
If being around all the food makes you hungry, do not worry.  Plenty to choose from…

composite
Top left, their panini station, where you can choose from a big selection of flavors.  Top right, espresso to get you pumped up to cruise the huge place. Bottom left, the fantastic steak sandwich stand, where you can have it plain and simple or splurge on their version with truffle butter. Sausage sandwiches are also available there.  Bottom right: a spot to savor all things truffle. You read me correctly. In case you are not sure they have the real thing, this is standing nearby.

white-truffles2

You can buy amazing seafood… a big selection of oysters is available too.

seafood

Impressive offering of charcuterie (again, this is just one small sampling)…

charcuterie
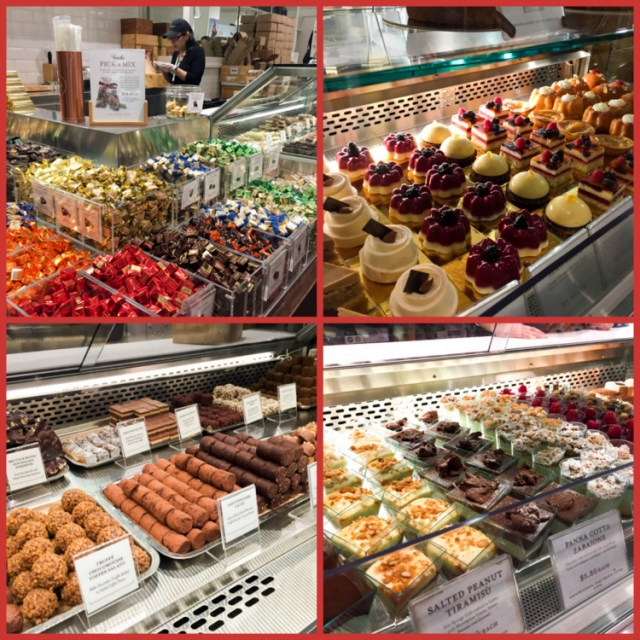
Chocolates, so many flavors I got a bit light-headed, and patisseries… I honestly had to drag myself away….

comppat
They also sell wine and other alcoholic beverages, spices, coffee, tea, honey, breads, cookbooks, kitchen stuff, and when we were about to leave I spotted on a corner – get ready for it – a Nutella crepe station. Having just savored a very satisfying steak sandwich, I could not bring myself to order one. In retrospect, it could have been my lunch. Well, we might have to plan another trip to New York City to cross that off my list.

If you find yourself in the Big Apple, make sure to visit Eataly,  truly an amazing place!

Add to FacebookAdd to DiggAdd to Del.icio.usAdd to StumbleuponAdd to RedditAdd to BlinklistAdd to TwitterAdd to TechnoratiAdd to Yahoo BuzzAdd to Newsvine

ONE YEAR AGO: Spaghetti Squash Perfection

TWO YEARS AGO: Skinny Eggplant Parmigiana

THREE YEARS AGO: Supernova Meets Wok

FOUR YEARS AGO500 Posts and The Best Thing I ever made

FIVE YEARS AGO: Back in Los Angeles

SIX YEARS AGO: White House Macaroni and Cheese

SEVEN YEARS AGO: Korean-Style Pork with Asian Slaw


SLOW COOKER PORK RAGU WITH FENNEL

Another one for the OMG files. My vegetarian friends will have to avert their eyes, because this one is the omnivore’s dream come true. Pork shoulder, another example of a cut of meat that performs very well when prepared in the slow cooker, without any compromise in texture. Fennel is the magical ingredient that takes the dish from simple to spectacular. The recipe comes from Serious Eats, a site that never disappointed me. Kenji’s recipes are trustworthy by default.

pork-shoulder-fennel
SLOW COOKER PORK RAGÚ WITH FENNEL
(slightly modified from Serious Eats)

1 (6-pound) bone-in pork shoulder
Kosher salt and freshly ground black pepper
1 1/2 tablespoons olive oil
2 fennel bulbs, trimmed and thinly sliced
1 large carrot, peeled and cut on the bias
2 large shallots, sliced
3/4 cup dry white wine
1 tablespoon Worcestershire sauce
1 (28-ounce) can crushed tomatoes
2 tablespoons tomato paste
4 sprigs fresh thyme
2 bay leaves
1/4 teaspoon crushed red pepper
1/2 teaspoon dried oregano
1/2 teaspoon dried rosemary, crushed
1/2 teaspoon dried sage
1 Parmesan rind

Season pork all over with salt and pepper and place in the bowl of a large slow cooker. Heat oil in a Dutch oven over medium-high heat. When oil is shimmering, add fennel and carrot and cook, stirring often, until vegetables start to brown, 6 to 10 minutes. Add shallots and continue cooking until softened, about 4 minutes longer.  Add wine and bring to a boil. Simmer for a couple of minutes, then add the Worcestershire sauce, tomatoes, tomato paste, thyme, bay leaves, 1 1/4 teaspoons of salt, 3/4 teaspoon black pepper, crushed red pepper, oregano, rosemary, sage, and Parmesan rind. Stir to combine and transfer to the slow cooker, pouring tomato mixture on top of the pork shoulder.

Cover and cook on low setting for 10 to 12 hours, basting with tomato sauce occasionally. When pork is fall-apart tender, transfer meat to a bowl and discard thyme, bay leaves and Parmesan rind. Skim fat from the top of the sauce and adjust seasonings, if needed.   When meat is cool enough to handle, shred using two forks, and discard the bone and any undesirable fat. Mound meat on top of your favorite side dish, spoon sauce on top and garnish with shredded Parmigiano.

ENJOY!

to print the recipe, click here

compositepoekragu
If we have to say goodbye to summer, let’s at least indulge into a bit of comfort food, shall we? Pork shoulder has that melt in your mouth quality that makes it perfect to create a ragú such as this one. Plus, using the slow cooker makes life so easy, you arrive home to the delicious smell of a dinner basically ready and waiting. If you don’t have a crock pot, use your regular oven low and slow or a pressure cooker fast and furious. How about that for flexibility?

oskypork

The classic side dish for this ragú would be pappardelle, but for the sake of our waistline I normally opt for a root veggie pure, in this case a cauliflower and  rutabaga mix. A bit of Parmigiano shaved on top just for good measure. Leftovers get better and better, and if you don’t mind stretching the boundaries of fusion cuisine, they work surprisingly well as a filling for tacos. Remember… flexibility rules, at least in the Bewitching Kitchen it does!

slow-cooker-pork-ragu-with-fennel-from-bewitching-kitchen


Add to FacebookAdd to DiggAdd to Del.icio.usAdd to StumbleuponAdd to RedditAdd to BlinklistAdd to TwitterAdd to TechnoratiAdd to Yahoo BuzzAdd to Newsvine

ONE YEAR AGO: Pimp your Veg, a Guest Post

TWO YEARS AGO: Cooking Light Pan-Charred Veggies 

THREE YEARS AGO: Pomegranate Chicken Thighs and Carrot Mash

FOUR YEARS AGO: The Many Faces of Kale

FIVE YEARS AGO:  Short and Sweet 

SIX YEARS AGO: Ciabatta, a Classic Italian Bread

SEVEN YEARS AGO: Magical Lamb Stew