DRUM ROLL PLEASE….. ONE MILLION PAGE VIEWS! IT’S GIVEAWAY TIME!

(Sep 23rd, 2014: comments are shutdown, no further entries accepted) 

Today my Bewitching site hit a wonderful milestone: 1,000,000 page views How on Earth did I get there?  😉

onemillion

I am so excited about it, I will offer a small token of appreciation to my readers.  Ottolenghi is about to publish a new cookbook, PLENTY MORE, so if you would like to have it, leave a comment on this post.  The giveaway is open to the whole wide world, by the way…

The comments will be open until September 22nd, and I will announce the winner the following day. Of course, shipping the book will depend on its release, as soon as I get it, it ships.

plenty more

It’s been a ton of fun to keep this site going, and of course hitting this milestone gives me an extra boost of energy!

THE COUSCOUS THAT WASN’T

I am quite slow when it comes to following cooking trends. Chia seeds? Haven’t used them yet, although I do own a bag and lovingly glance at it from time to time. Then, there is cauliflower in its unexpected uses, like the super popular pizza crust and processed versions that mimic rice.  The only non-traditional preparation I embraced long ago was mashed cauliflower for a low-carb take on mashed potatoes. It turns out I am so fond of it, that the real thing almost never finds its way into our kitchen. It is a bit puzzling that I ignored all other “out-there” uses for cauliflower. Better late than never, I now profess my newest found love: cauli-couscous.  Please, if you haven’t tried it yet, do not twist your nose at it. The tiny bits of cauliflower end up with a texture very similar to its semolina cousin, and seem to absorb flavors even more efficiently.  A very versatile dish, you can take it in many different directions by changing the veggies, the spices, herbs, and the cooking liquid. Just as you would with… couscous!  😉

CauliCouscous
MEDITERRANEAN STYLE CAULIFLOWER COUSCOUS

(from the Bewitching Kitchen, inspired by many sources)

1 head of cauliflower, broken into florets
1 Tablespoon grapeseed oil + drizzle for chickpeas
1 can of chickpeas, drained and well rinsed
1/4 teaspoon ground cumin
3/4 teaspoon salt, divided (1/4 + 1/2 tsp)
pinch of cayenne pepper
juice of 1 lemon mixed with 1/4 cup water
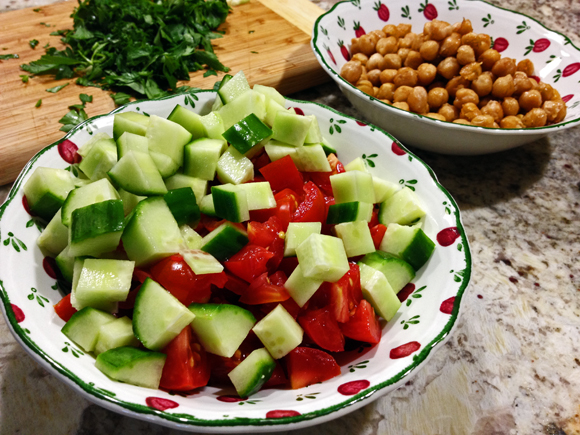
8 cherry tomatoes, quartered
1 English cucumber, diced
1/4 cup slivered almonds, toasted
fresh parsley, minced (to taste)

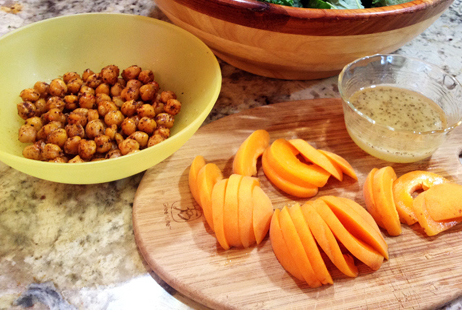
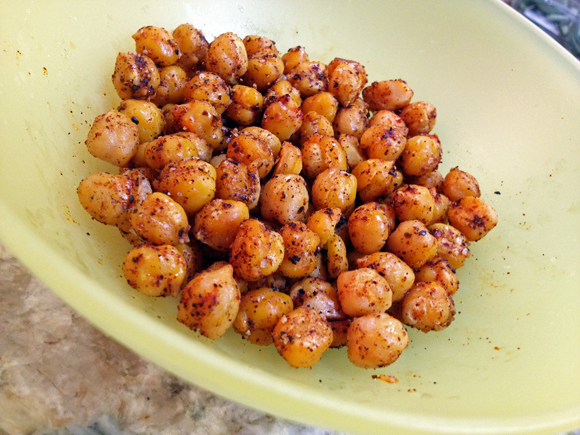
Prepare the chickpeas: Warm a dry skillet over medium-high heat and toss chickpeas in warmed skillet for about two minutes to remove any residual moisture. Be sure to shake the pan and/or stir the chickpeas. Sprinkle the chickpeas with cumin, salt, and cayenne pepper.  Drizzle a little grapeseed oil over the seasoned chickpeas and toss to combine. Keep stirring the chickpeas and adjust seasonings as desired. When the chickpeas are well saturated with flavor, remove from heat and reserve.

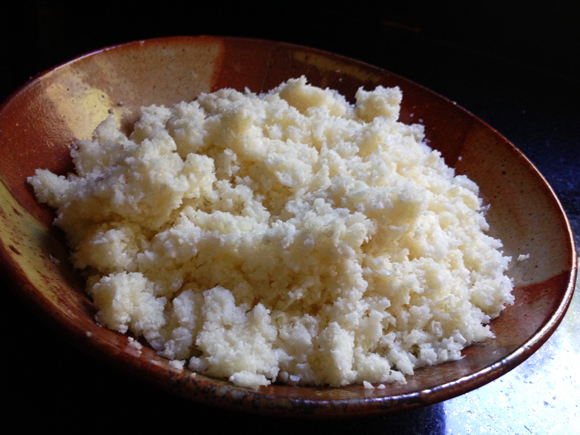
Place the cauliflower florets in the bowl of a food processor. Pulse until the cauliflower reaches the desired consistency, not too fine, not too coarse.  You will need to stop the processor a few times and move the large pieces around.  Transfer to a bowl, and marvel at how beautiful your fake couscous looks.

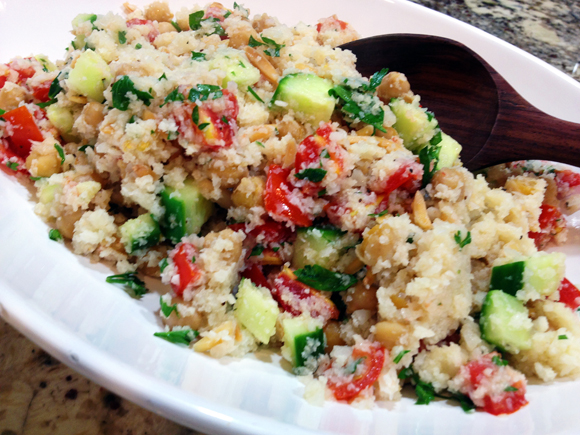
Heat 1 Tablespoon of grapeseed oil,  add the cauliflower, and saute until it starts to get some color. Add the water and lemon juice, cover the pan and simmer just for a few minutes.  Add the tomatoes, cucumber, almonds, adjust seasoning with salt. Add the reserved chickpeas, toss gently to combine using low heat. Remove from heat, add the fresh parsley, and serve.

ENJOY!

to print the recipe, click here

 I was surprised by the amount of “couscous” the single head of cauliflower produced. Isn’t that beautiful?

RicedCauliflower

Once more I used the skillet dried chickpeas “invented” by Kelly, from Inspired Edibles. I did not want them to get soggy, so they were added in the final moments of cooking, right before serving. Still, even next day after a brief torture in the microwave, the chickpeas were very tasty.  Maybe  a little less crunchy, but nothing to be disappointed at.

On a side note, whenever I say “invented” I think about one of Seinfeld’s classic episodes… Merlot? Never heard of it. Did they just invent it?”  😉

ingredients

I decided to call this recipe “Mediterranean” because it does have a lot of the usual suspects in that style of cooking. Plus, Mediterranean has a nice gastronomic reputation. Everybody loves it.  😉

Before I leave you, I’d like to share a list of very creative uses for cauliflower, some will surprise you, I am sure. Did you know you can use it for a fake bechamel-style sauce?  And that’s just the tip of the iceberg…

For the basic crust: The Best Cauliflower Pizza Crust, from Lucky Penny Blog

For a gorgeous example of the cauli-pizza:  Roasted Pear and Caramelized Onion Pizza, from Inspired Edibles

Cauliflower Crust Calzone, from The Iron You

Cauliflower Crust Stromboli, from The Iron You

Paleo Moussaka, from The Iron You (Mike, aka Cauliflower Overlord, is a cauliflower magician, and in this post he uses it in a very interesting bechamel type sauce)

Cauliflower Fried Rice, from Skinnytaste

Spicy Buffalo Cauliflower “Wings”, from Inspired Edibles

Cauliflower Pancakes, from Healthy Recipes

Cauliflower Gnocchi, from The Food in my Beard

Ricotta and Cauliflower Gnocchi, from Divalicious Recipes in the City

Cauliflower Pesto, from Vintage Cooking Notes, tried and loved by yours truly

 and if you thought sweets are off-limits, think again 

Cauliflower and Chocolate Ice Lollies with Pistachio Dust, from Veggie Desserts

Cauliflower Chocolate Cake, from Divalicious Recipes in the City

Chocolate Chip Banana Cauliflower Muffin, from Once Upon a Gourmet Gin

 I hope I convinced  you to give cauliflower couscous a try, I am definitely in the mood for a cauliflower pizza crust, just for the fun of it…

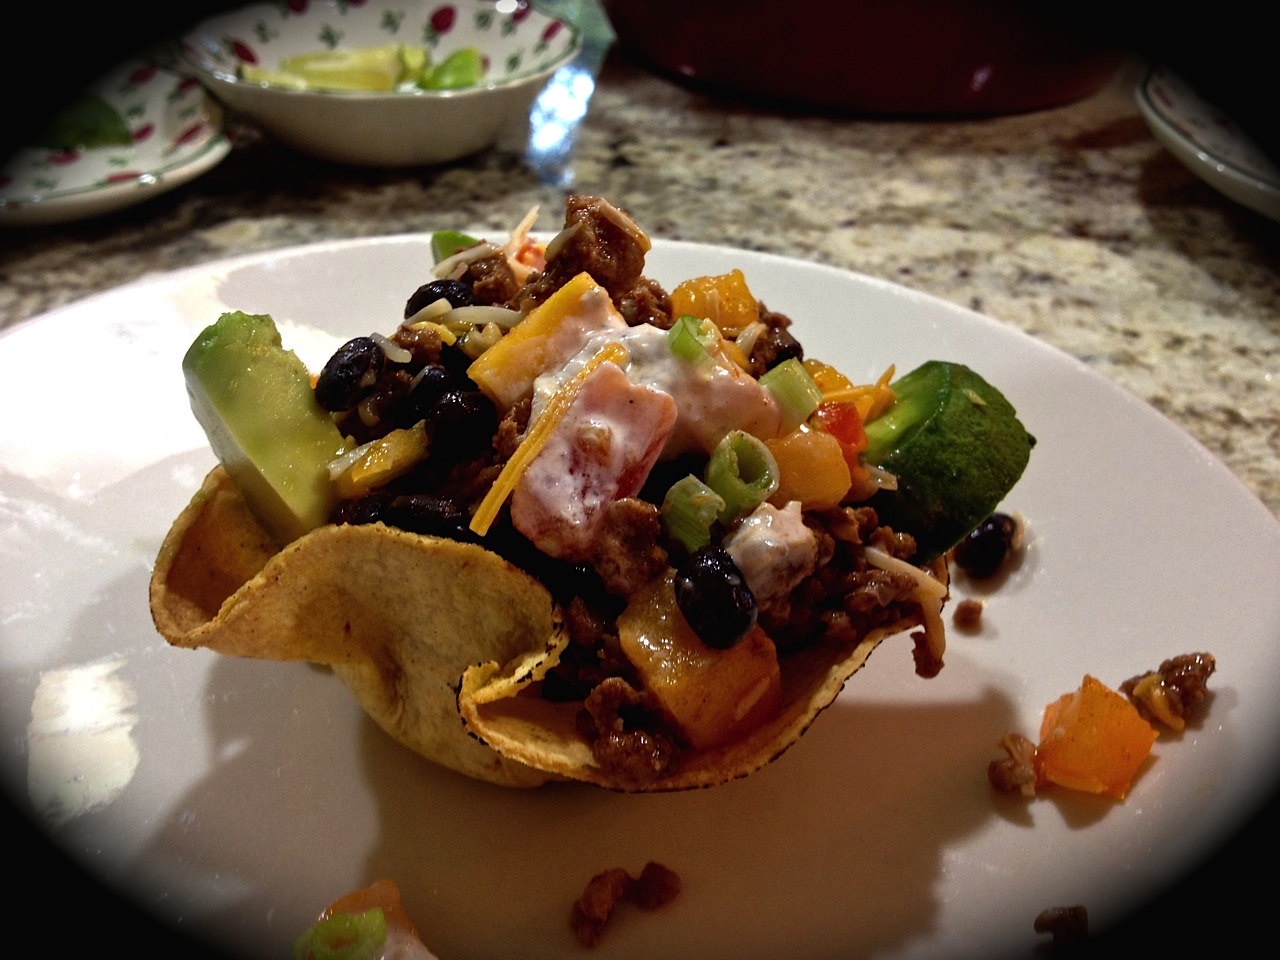
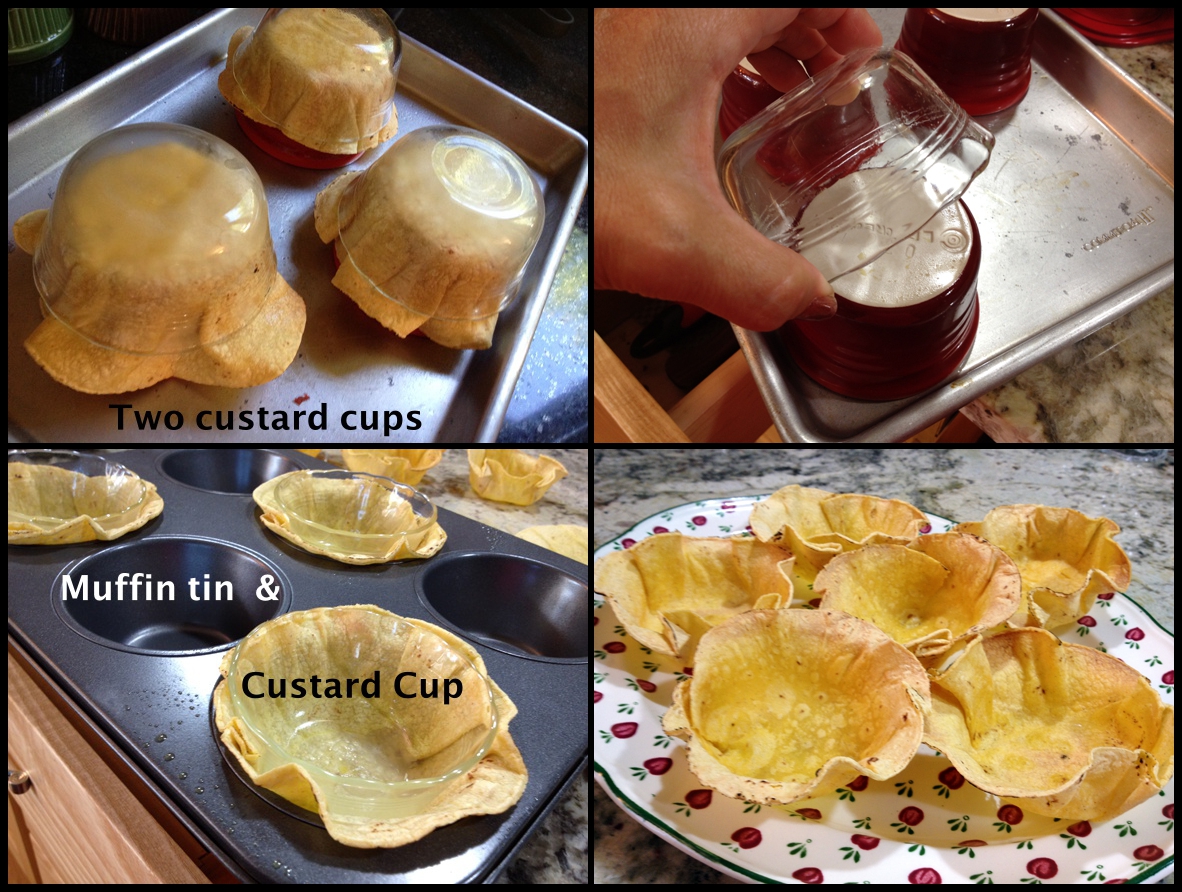
ONE  YEAR AGO: Tlayuda, a Mexican Pizza

TWO YEARS AGO: Paradise Revisited

THREE YEARS AGO: Feijoada, the Ultimate Brazilian Feast

FOUR YEARS AGO: Vegetable Milhojas

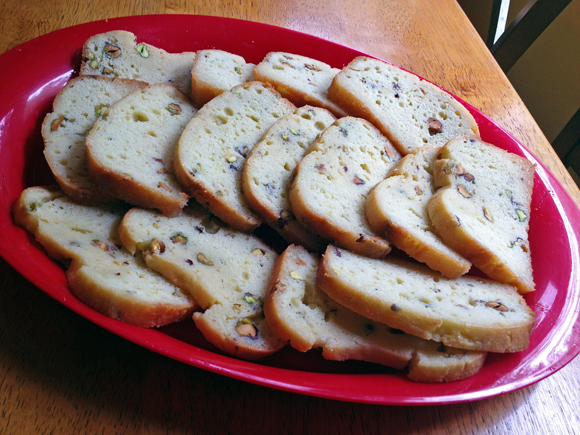
FIVE YEARS AGO: Italian Bread

SECRET RECIPE CLUB: TACO SALAD

This is the last Monday of August.  We are about to say goodbye to Summer, and I cannot stand the thought of it.  Only Reveal Day of The Secret Recipe Club can bring me some joy under the circumstances. My assignment this month was Flying on Jess Fuel, and I had a blast stalking it and making a list of possibilities to blog about today.  Jess met her husband Nick at a Mexican restaurant, and apparently he went nuts over her jalapeno-eating skills. What a great way to fall in love! They lived in many different places while Nick went to flying school for the Navy, including Enid, a location quite close to Norman, our former home in Oklahoma.

For some reason, I usually pick sweets for my Secret Recipe assignments, but this time I took the road less traveled and went with her Taco Salad, considering that Mexican food would be a fun way to celebrate the way they met.  I find it amusing that some recipes that I order in restaurants on a regular basis are never part of my own cooking at home. Taco Salad is one of those.  For the most part, Tex-Mex restaurants offer dishes over-loaded with cheese, and served with a humongous portion of rice, beans, plus a few flour tortillas for good measure.  Taco Salad is my default request to avoid feeling like a bloated whale as I leave the restaurant.  I made just a few changes in her recipe, and decided to pump up the presentation by making my own tortilla bowls.  Now, that was a ton of fun, but some unexpected problems were encountered.  As I was frantically trying to figure out which cups would be appropriate to shape the tortillas, one of my custard cups fell from the cabinet and crashed on the granite (yes, glass flew everywhere), but not without first hitting my head. OUCH!  And, going on with my usual modus operandi in the kitchen, I burned myself not once, but twice baking those tortilla bowls.  Sometimes I even amaze myself… However, I can tell you it was all worth it!  This recipe rocks, my friends….

TacoSalad

JESS’ TACO SALAD
(slightly modified from Flying on Jess Fuel)

1/4 cup sour cream
1/4 cup yogurt
1/2 cup salsa
1 Tablespoon grapeseed oil
1 lb ground beef
2 tablespoons bulk taco seasoning mix (or 1 packet)
1 can black beans, rinsed and drained
1 large head romaine, chopped
4 tomatoes, chopped
1 bunch scallions, chopped
Black kalamata olives, chopped (to taste)
Shredded Mexican blend cheese (to taste

To make the dressing, combine sour cream, yogurt and salsa in a small bowl. Set aside.

Heat the oil on a skillet and cook the meat for a few minutes. Season with salt (in case your taco seasoning doesn’t have salt already), then add either a packet of store-bought taco seasoning or 2 Tbs of a bulk product such as Penzey’s. Cook for a couple of minutes, add the amount of water recommended by the mix, and cook further just to thicken it slightly. Add the beans to the pan in the last 2 minutes of cooking.

If serving cold, let the meat and bean mixture cool to room temperature. In a large bowl, place half the lettuce, half the tomatoes, half the scallions and half the olives. Top with half the dressing. Top with the meat and bean mixture (you can reserve a little bit for decorating the top, if you want to be fancy). Sprinkle half the cheese on top. Add the rest of the veggies, dressing, and cheese (and meat mix if you reserved some). You can also serve it warm, adding the cold ingredients to the hot meat/beans mixture.

ENJOY!

to print the recipe, click here

IMG_5215

Here you can see some photos of my burning adventure with tortilla cups. You can do this in several ways, but I recommend the muffin tin + custard cup combo.  Using the two custard cups nested together requires that they both fit just right not to tear the tortilla, and also makes it a lot harder to remove the top cup to brown the tortilla in the final moments of baking.

compositeShells

MAKING TACO BOWLS:  Warm a corn tortilla very quickly over an open flame on your stove (I heard you can also use the microwave, but I haven’t tried it).  Spray both sides of the warm tortilla very lightly with canola or olive oil spray.  Immediately place in the muffin tin (or over a custard cup), and place another container on top to keep the shape.  Bake in a 375 F for about 15 minutes, removing the custard cup in the final 5 minutes. Let cool over a rack.

We loved this recipe!  Actually, Phil was raving about it non-stop, and begging me to make it again, and do it soon.  The tortilla cups make it very festive, but the taco stands on its own without any problem, it is fresh, bright, the dressing mixing sour cream and salsa was incredibly tasty!  I used a home-made salsa given to us by Mr. and Mrs. K (thank you, guys!), and it had just the right amount of heat.  Use any store-bought salsa you are fond of, or make your own if you have a chance.

Jess, I loved being assigned to your blog!  This has been one super busy month for us, but I made sure to compose this post within one week of getting the email notification. I fell in love with this recipe right away, and you can bet this will be in a regular rotation in our Bewitching Kitchen! 

To my readers: if you want to see what the other members of my group cooked up this month, poke the blue frog at the end of the post.

ONE YEAR AGO: Semolina Sourdough Boule 

TWO YEARS AGO: Forgive me, for I have sinned

THREE YEARS AGOCracked Wheat Sandwich Bread

FOUR YEARS AGO:  Au Revoir, my Bewitching Kitchen

FIVE YEARS AGO:  French Bread

UP CLOSE AND PERSONAL WITH KALE

Before I urge you to go massage a kale (I admit it does sound a little naughty), let me tell you that not in a million years I would think this step to be necessary. In fact, I used to go into compulsive eye-rolling while reading recipes that call for “massaged kale”. I was not the only one, the lovely Kelly from Inspired Edibles had this to say about the process:

When I first encountered the term ‘massaged kale’ I found it not only pretentious but kind of silly too.
Had kale been elevated to such a precious status that it now required massaging?
I couldn’t just eat the stuff, I needed to pet it too?

I could not have said it better. But, surprisingly enough, she decided to give it a try, and was blown away by the outcome. You should definitely stop by her site to read about her experience.  I was skeptical, but after her endorsement, I dimmed the lights, put some music on, and fully engaged in the role of masseuse.

KaleSalad

MASSAGED KALE SALAD WITH FRESH APRICOT & SPICY SKILLET CHICKPEAS
(slightly modified from Kelly’s Inspired Edibles)

for the salad:
1 generous bunch kale leaves, washed and torn into smaller bite-sized pieces
1 (15 oz) chickpeas, thoroughly rinsed and dried
6 fresh apricots, sliced
1/3 cup shaved almond, slightly toasted

for the spice mix:
1/2 tsp ground cumin
1/2 tsp ground coriander
1/2 tsp curry powder
pinch smoked paprika
pinch of ground cinnamon
sea salt to taste

for the Massage Oil (aka salad dressing):
2 Tbsp olive oil
juice of one lime (about 2 Tbsp)
1 tsp honey
sea salt and coarse black pepper to taste

Warm a dry skillet over medium-high heat and toss chickpeas in warmed skillet for about two minutes to remove any residual moisture. Be sure to shake the pan and/or stir the chickpeas.

Sprinkle the chickpeas with seasonings of choice. including salt and pepper.  Stir seasoned chickpeas to mix the spices. After about two minutes, drizzle a little bit of coconut or olive oil over the seasoned chickpeas and toss to combine. Keep stirring the chickpeas and adjust seasonings as desired. When the chickpeas are well saturated with flavor, remove from heat and reserve.

Meanwhile, in a small bowl combine salad dressing ingredients and whisk well.

Place kale pieces in a large mixing bowl and drizzle with dressing. Simply use your fingers to work the oil/dressing into the kale leaves – watch and feel the color/texture transformation. After only two minutes your kale is beautifully seasoned and softened and all set to eat. You will also find that it’s easier during the massage stage to remove any excessively hard pieces from the center rib of the kale. The leaves will fall off the rib quite easily and your fingers will be in place to feel it happen and facilitate the process.

Place massaged kale in large serving bowl, or on individual serving plates, and dress with seasoned chickpeas, fresh apricot and almonds.

ENJOY!

to print the recipe, click here

composite

Doesn’t that look pretty amazing?
I wish I could massage my face in the morning and have that type of improvement!

ingredients2

 Even though the star of this show should be the kale, I have to say I fell in love with Kelly’s skillet chickpeas. In fact, I’ve been making them this way quite often, varying the spices according to my mood. Those are better than roasted, with the added bonus of being ready in minutes, and without turning the oven on.  I had a hard time not munching on half of them before assembling the salad.

chickpeas

I suppose this recipe will please even hard-core kale haters.  The massage mellows down the harsh texture of kale, bringing it closer to a butter lettuce, but with a more assertive taste.  Of course, joining fresh apricots with the incredibly tasty chickpeas made this salad a complete winner!

I hope you twill try it either as we did, or using different spices and fruits.  I think fresh peaches or even strawberries could be fantastic substitutions.

Kelly, thanks again for another super creative and fun recipe!

ONE YEAR AGO: Black Berry Cherry Sorbet

TWO YEARS AGO: Asparagus Pesto

THREE YEARS AGO: Chocolate and Chestnut Terrine

FOUR YEARS AGO: Under the spell of lemongrass

FIVE YEARS AGO: Greens + Grapefruit + Shrimp = Great Salad!

LEMON PISTACHIO LOAF

Where is that “PLEASE MAKE ME” folder when I need it so badly?  This recipe from  Homesick Texan is fabulous. Lisa calls it Lemon Bread, I took some liberties with her recipe and decided to change it to loaf. To me, bread immediately brings the thought of yeast, and a drier crumb.  This is very moist and tender.  I also used pistachios instead of pecans, because one of our graduate students is nuts about pistachios (sorry, lousy pun). We like to keep our students happy, because happy students do great experiments. Or so we hope… 😉

LemonPistachioLoaf1

(made on May 18th – blogged on August 17th)

LEMON PISTACHIO LOAF
(slightly adapted from Homesick Texan)

for the loaf:
1/2 cup buttermilk
1/4 teaspoon baking soda
1/2 cup (1 stick) unsalted butter, room temperature
1 cup granulated sugar
2 large eggs, room temperature
1 + 1/2 cups all-purpose flour
1 tablespoon finely grated lemon zest
1/2 cup pistachios, chopped coarsely

for the glaze:
6 tablespoons fresh squeezed lemon juice
3/4 cups granulated sugar

Heat the oven to 350°F and grease and flour a 9×5 bread pan, lining the bottom of the pan with parchment paper.

Stir together the buttermilk and the baking soda and set it aside. Cream together the butter and sugar. Beat together the eggs and slowly add to the creamed butter. Stir in the buttermilk and then slowly add the flour. Mix until a smooth batter is formed. Stir in the lemon zest and the pistachios.

Pour in the batter and bake until a toothpick inserted in the center of the loaf comes out clean, about 55 minutes. Cool the loaf in the pan on a rack for 30 minutes.

As the bread is cooling, mix together the lemon juice and sugar for the glaze. To apply the glaze, tear out a sheet of foil large enough to contain the loaf when wrapped. Remove the loaf from the pan by running a knife along the edges and gently tapping it out onto the sheet of foil.

Spread the glaze evenly over the top of the loaf and on the sides. The glaze will be runny, just make sure to contain it all when you wrap the bread with the foil.

Place in the refrigerator for at least 12 hours. Serve cold.

ENJOY!

to print the recipe, click here

 LemonLoafEdited

I am sure Lisa’s original version is amazing too, but when I saw the bright yellow-green color of the cut pistachios in the loaf, and how well their taste combined with the acidity of the lemon flavor, I was glad I used them.  Of course, for weeks I’d seen packages of shelled pistachios at the grocery store, but they disappeared the moment I wanted to make this recipe.  I had to buy whole pistachios and shell them, one by one.  A labor of love, but worth it.

This would be perfect for brunch, to take to a potluck, or to brighten up the morning of your co-workers.

ONE YEAR AGO: Roast Beef French Dip Sandwich with Green Pea Pesto

TWO YEARS AGO: Asparagus Pesto

THREE YEARS AGO: Chocolate and Chestnut Terrine

FOUR YEARS AGO: Under the spell of lemongrass

FIVE YEARS AGO: Greens + Grapefruit + Shrimp = Great Salad!