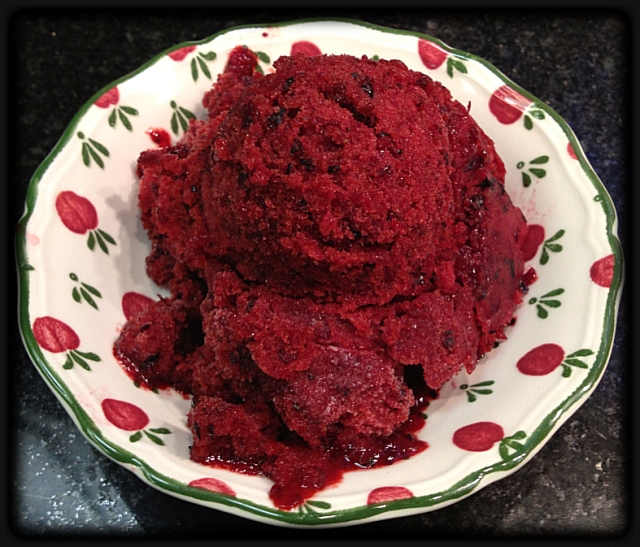
BLACKBERRY-CHERRY SORBET

When your office is next door to that of one of the best (and most generous) gardeners in the state of Kansas, be ready to receive amazing gifts, such as two boxes of freshly picked blackberries! We consumed some in their natural state, and decided to make a nice, refreshing sorbet with the rest. We’ve actually made two batches of this sorbet in the past month. I am sharing the recipe for the second version, which I think turned out to be the best, with the small amount of cherries plus a little unusual ingredient. Although some inspiration was found in Lebovit’s The Perfect Scoop, Phil devised his own recipe. Since we fully share our assets,  I feel entitled to call it “our own”. That’s my story, and I’m sticking to it.

blackberry2

BLACKBERRY-CHERRY SORBET
(from the Bewitching Kitchen)

3 cups blackberries
1 cup pitted cherries
1 ripe banana
2 Tablespoons lemon juice
2/3  cup sugar
1 + 1/2 cup water

Add the blackberries, cherries, and banana to the bowl of a food processor.  Process until smooth, cleaning the sides of the bowl a couple of times. Add the lemon juice, the sugar, and the water, and process everything together until fully smooth.

Keep the base in the fridge overnight or for at least 4 hours to cool completely.

Place the mixture in your ice cream maker and churn it according to the instructions of the manufacturer.

Scoop into a freezer-safe container.

ENJOY!

to print the recipe, click here

composite111

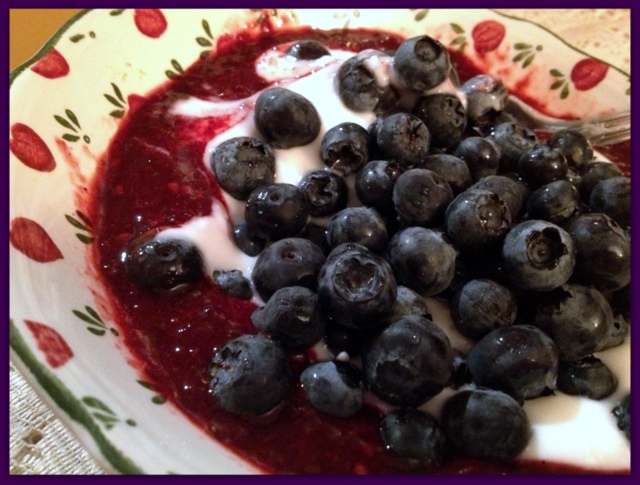
Comments:  The banana adds a nicer texture to the sorbet, which can be a bit grainy once it freezes, because there is no milk fat in it.  You can barely taste it, though. Most recipes for blackberries or raspberries will instruct you to pass the pureed mixture  through a sieve to get rid of the seeds.  We decided to skip this step, and I’m glad to report that we did not mind the seeds at all.  If you are looking for a real smooth texture, go ahead and sieve it away.  If you don’t remove the seeds, the amount of sorbet made could be just a little big for your ice cream maker.  If that’s the case, no need to worry, it’s the type of problem you should welcome with open arms (and a spoon).   Save the excess, and follow these instructions: pour some of the sorbet base in a small bowl, add Greek yogurt and a handful of fresh blueberries on top.    Enjoy late at night, early in the morning, or anytime you feel like it… it’s that good!   😉

photo

ONE YEAR AGO: Asparagus Pesto

TWO YEARS AGO: Chocolate and Chestnut Terrine

THREE YEARS AGO: Under the spell of lemongrass

FOUR YEARS AGO: Greens + Grapefruit + Shrimp = Great Salad!

CHOCOLATE GELATO

Maybe it’s the alignment of the planets, or the record-breaking heat  this  summer in Oklahoma.  But, the fact is I’m posting another sweet production from our kitchen.  This time it’s a second attempt at “something chocolate” with our ice cream maker.  I haven’t given up on chocolate sorbet, but this recipe from one of my favorite blogs moved all the others to a secondary position in line.   Use the best chocolate you can find and you’ll make a gelato that stands up shoulder to shoulder with those sold in Italy… 😉

CHOCOLATE GELATO
(from The Italian Dish, original recipe from A16)

1 quart whole milk
1 tablespoon + 1.5 teaspoons cornstarch
1/2 cup light corn syrup
1/3 cup sugar
1/2 teaspoon kosher salt
8 ounces bittersweet chocolate (70% cocoa)
1 teaspoon vanilla extract

Place 2 tablespoons of the milk in a small bowl, whisk in the cornstarch to make a slurry and set aside.

Add the remaining milk into a heavy saucepan and bring to a boil over medium heat. Pour in the slurry, corn syrup, sugar and salt, stirring gently. Return the mixture to a boil and whisk in the chocolate until completely smooth. Transfer into a bowl and let cool to room temperature. Once cooled, mix in the vanilla extract. Cover and refrigerate for at least 3 hours or preferably overnight to make sure it is completely chilled.

Whisk the base and then pour it into your ice cream maker and churn. The gelato should be the consistency of soft-serve ice cream, so don’t churn it as long as you would to make a regular type ice cream. Store in the freezer, with plastic wrap pressed onto the top, and let it be at room temperature for 10 minutes before serving, to make scooping out easier.

ENJOY!

to print the recipe, click here

Comments: If you are a chocolate lover, you’ll love this recipe! It feels rich in your mouth, even though it contains no heavy cream in the base. The proper way to indulge it is with eyes closed, paying attention to the many changes in taste and texture as the gelato melts in your mouth, and brings happiness to your soul.

Have you ordered your ice cream maker yet? 😉

ONE YEAR AGO: Au Revoir, My Bewitching Kitchen

TWO YEARS AGO: Teriyaki Chicken Thighs

Add to FacebookAdd to DiggAdd to Del.icio.usAdd to StumbleuponAdd to RedditAdd to BlinklistAdd to TwitterAdd to TechnoratiAdd to Yahoo BuzzAdd to Newsvine

SUMMER’S FINALE

My favorite season is over.  Soon it will be time for “the move”:  summer clothes will go into storage, while long sleeves, sweaters and coats will return to my closet.   My sandals will be gone, and with them the nice tan on my feet… The poor babies will be hiding in socks and shoes for months!

To say goodbye to Summer, I picked a yellow watermelon and turned it into granita. Watermelon is my beloved’s favorite fruit.  His ritual is to sit on the couch with a huge slice dangerously balancing on a plate, and our dogs locked into full begging mode close by. The dogs are watermelon maniacs;  they can smell it from several rooms away.

Granita is a refreshing classic, conveying the essence of Summer’s bliss with each spoonful.

granita

WATERMELON GRANITA

Make a simple syrup
1 cup water
1/2 cup granulated sugar
Heat until sugar is completely dissolved; cool to room temperature.

Make the fruit juice
Watermelon pieces
1 T lemon juice
pinch of salt

Juice the watermelon (easier if using seedless fruit, but we prefer to buy the regular kind).   Measure the amount, you will need a minimum of 3 cups.

For three cups of juice, add the full amount of simple syrup made, the lemon juice and salt.  Mix well.

Make the granita:
Pour the mixture in a glass baking dish, 9×13 inches, or 8×8 inches.  Depending on how thick the layer is, the longer it will take to freeze.  Place it in the freezer, and every half an hour (or 45 minutes, depending on the size and shape of your dish), scrape it with a fork to destroy the ice crystals forming on the edges, then place it back in the freezer.  Do this several times, maybe 4 or 5 times,  until the mixture is completely frozen. It will  take from 3 to 6 hours.

To serve, scrape the frozen granita with the tines of a fork into a serving bowl. Decorate with mint (which you can also add to the juice, I normally do that, but forgot this time), and….

ENJOY!

To print the recipe, click here.

click for more photos e receita em portugues