
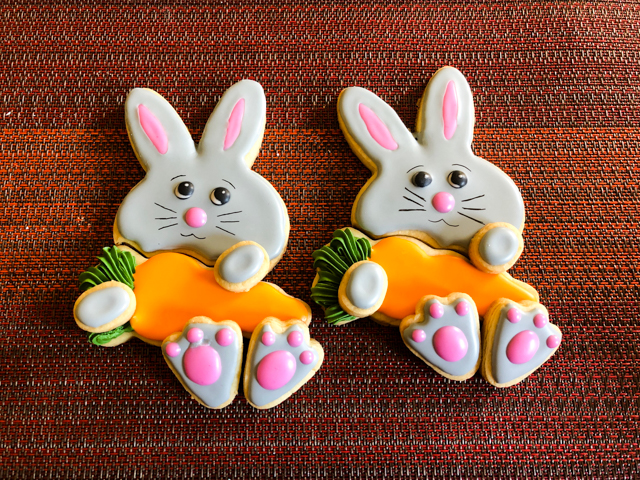
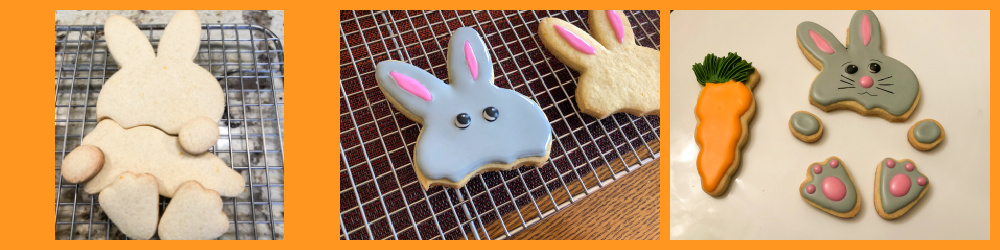
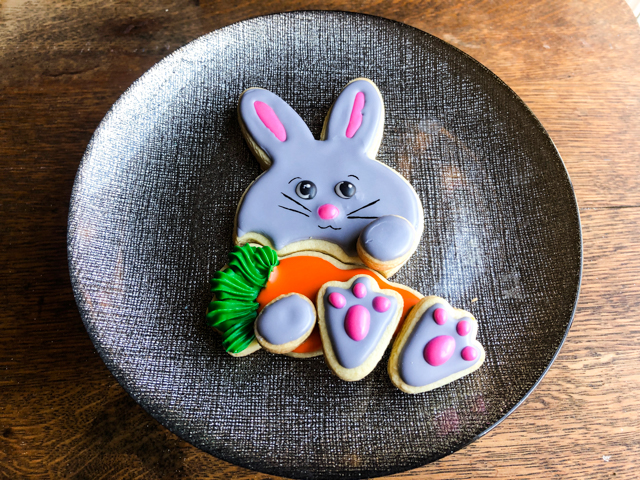
Do you know what a Franken-cookie is? No, it’s not just for Halloween, although of course you can make some perfectly tailored to that occasion. Franken cookies are made by joining different cutters in unexpected compositions. I share today my first attempt with Easter season in mind. Credit must go for the one and only Marlyn, cookier-extraordinaire from Canada (Montreal Confections). Her work is simply amazing. For a very detailed tutorial to make this little guy, click here. It starts at the 38 min mark. You will need rabbit cookie cutters + carrot shape cutter (mine was the one from this set).
FRANKEN BUNNY HONEY-LEMON COOKIE
(design my Marlyn, cookie recipe from Bewitching Kitchen)
1 cup butter (226g), cut in pieces, cold
200g sugar
zest of 1/2 lemon
2 eggs
1 tsp honey extract (Olive Nation)
1/2 tsp vanilla extract
420 g all-purpose flour
60 g cornstarch
1/2 tsp salt
1/4 tsp baking powder
Mix the flour, cornstarch, salt and baking powder and reserve.
Cream sugar, butter and lemon zest in the bowl of a Kitchen Aid for a couple of minutes until the sugar is incorporated well and does not feel gritty. Add the eggs, honey emulsion and vanilla extratc slowly and mix until incorporated, but don’t over-mix.
Add the flour mixture slowly, mixing in low-speed. If needed, add a little more flour, up to 1/4 cup. Once the dough comes together, stop, and form three discs. You should have three discs with about 330g each. Dough can be rolled out immediately or placed in the fridge to roll out later. It also freezes extremely well.
Cut in shapes, freeze the cut-outs for 10 minutes, then bake in a 350F oven for about 13 minutes. Ice and decorate as desired.
For my favorite Royal Icing recipe, visit Tanya’s blog with a click here.
ENJOY!
to print the recipe, click here
Comments: This is my favorite cookie recipe for the time being. It is the same basic “neat edges” recipe I’ve been using for months, but the honey extract from Olive Nation truly takes this to a whole new level. I love it.
To decorate the Franken bunny, you’ll need Royal icing orange and grey in flooding consistency, pink in medium consistency (maybe around 20 -25 seconds if you like to measure it by how many seconds it takes to level off). Green in stiff consistency, as you will pipe the green part of the carrot with a star tip and you want it to hold the shape. Making the eyes as royal icing transfer was a bit tricky, but I managed to get 3 pairs that looked ok. You can always paint them with a food pen to make life easier. The transfer produces a more dramatic, realistic look.
For other fun examples of franken-cookies, take a look here, here, and here.
LITTLE YELLOW CHICK
(design by Marlyn)
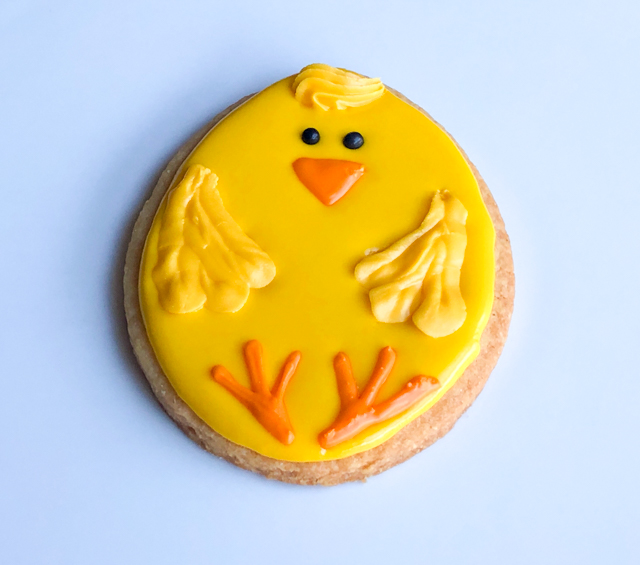
For this cookie, Marlyn suggests making all details as Royal Icing transfers, so make sure you plan ahead, as those need to dry overnight. Pipe more than you think you’ll need, because then you can choose the best ones, and also not go into panic mode if they break. You can always simplify and just flood the cookie then paint the details with a food pen.
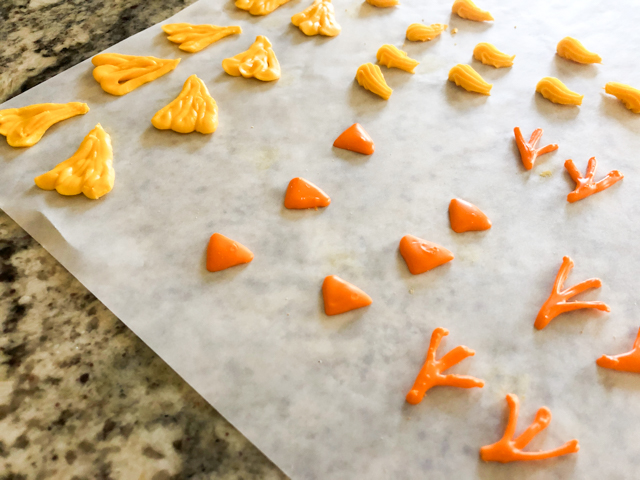
The wings are made with a petal icing tip, the decoration on top of the head with a small star tip, and the beak and feet with a tipless bag, or if you prefer, a number 1 Wilton tip. Next day, flood the egg-shaped cookie with royal icing, and carefully place the transfers on top. For the eyes I used PEM black pearls, because they never bleed into the surrounding icing.
EGG-SHAPED TRILOGY
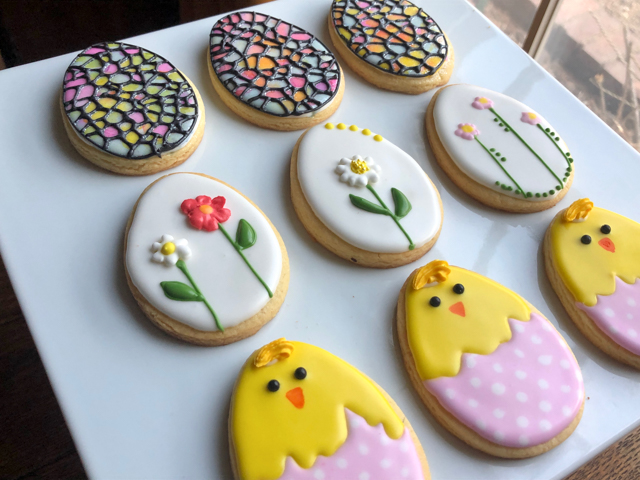
All cookies were made from the same recipe, Honey-Lemon Sugar Cookies. The simplest one to decorate is the bi-color chick, although I did use leftover decoration from the previous cookie for the top of the head. That can be omitted.
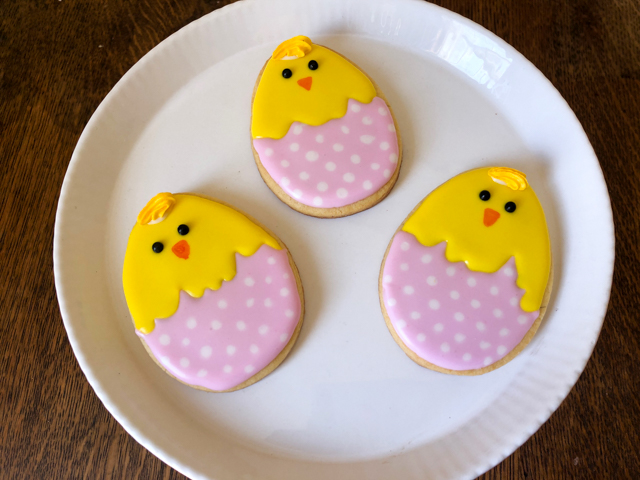
You will need pink, yellow and white Royal Icing, all in flooding consistency. Flood the pink, forming a random edge slightly above the middle of the cookie. Immediately add small white dots. Let it dry for 15 minutes, flood with yellow. Add the eyes if using black pearls, or allow to fully set before drawing the details with a food safe pen, orange and black.
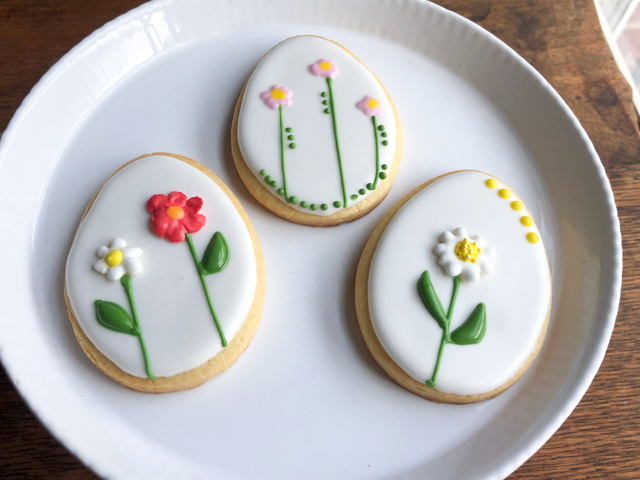
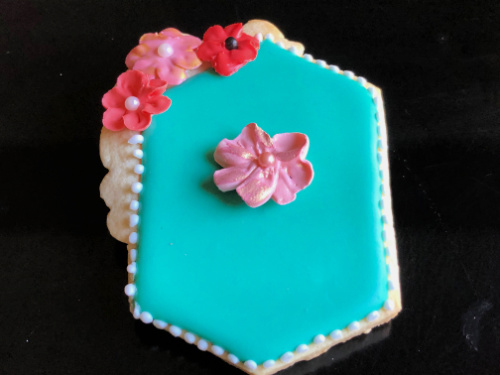
For these cookies, you will need white Royal icing to flood the surface, and if adding flowers as transfers, place them immediately on top. The upper, central cookie was decorated with simple royal icing using a tipless bag, after the flooding set.
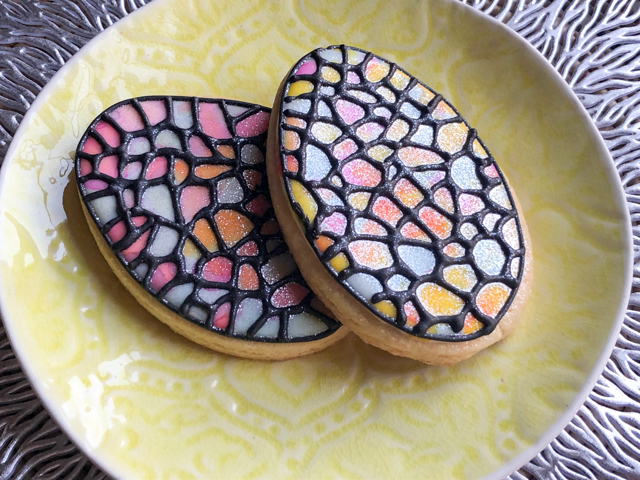
These were a lot of fun to make. I definitely need to improve on the dreadful fine lines, but how can you improve if you don’t try, right? The design is from another great cookier, Haniela, from sunny Spain. Her detailed tutorial for these eggs is found here.
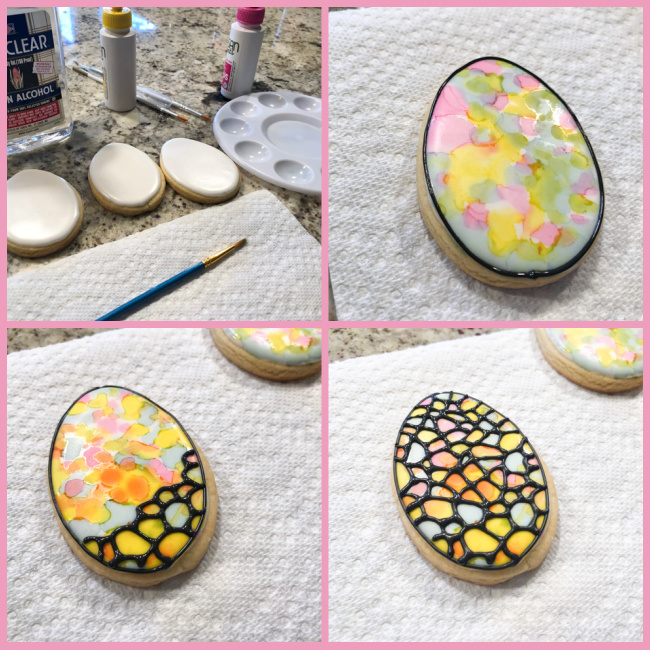
You start with a white-flooded cookie, do a tie-dye decoration with gel dye and vodka, in any shades of colors you like. Let that air-dry for a few minutes, and add the details with black Royal icing using as fine a tip as you are able to. Follow Haniela’s tutorial for the best results. I need more practice.
BLUE MARBLED EASTER EGGS
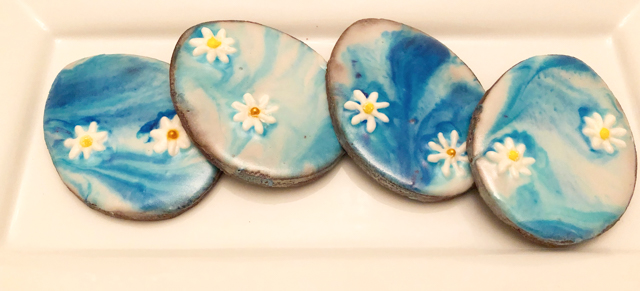
Another design by Haniela, using Royal icing in three different shades of blue, and then placing sugar daisies on the surface. Her tutorial explains it all very clearly. Once again, keep in mind that the daisies have to dry overnight before using as decoration.
BUNNY RABBIT STICK COOKIES
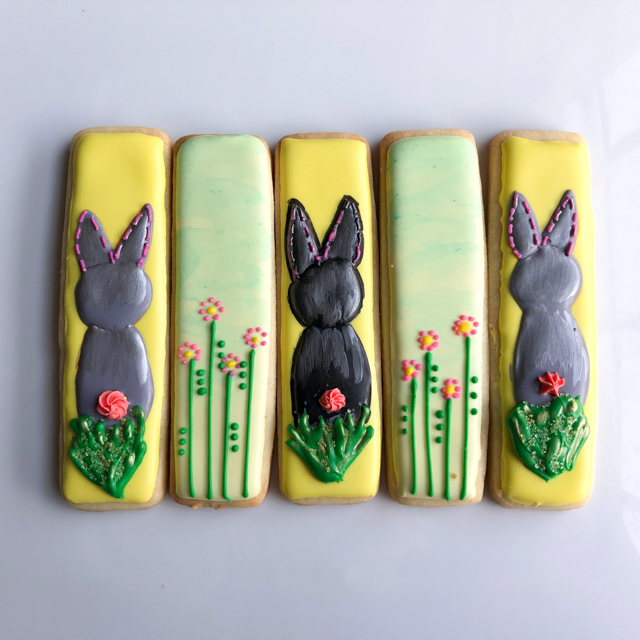
I could not share a series of Easter cookies without including cookie sticks, as I am quite smitten by this shape. They were inspired by CookieliciousNZ. I flooded them with light yellow Royal Icing allowed that to set, then piped the body of a bunny rabbit on top. Added a few more little details like the grass and tail. The flower cookie was made with Royal icing in detail consistency and a tipless bag.
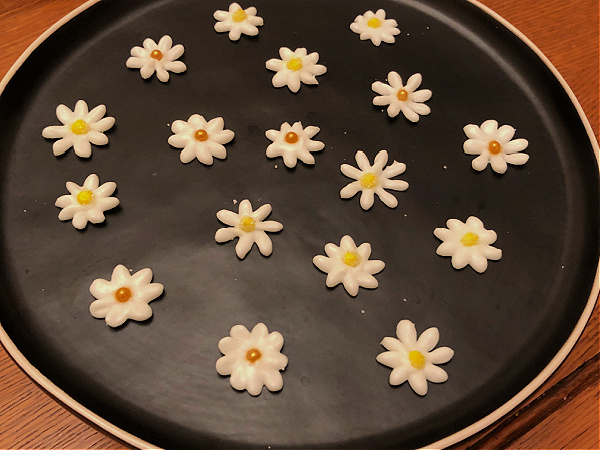
I hope you liked this small collection of Easter-inspired sugar cookies. I have been practicing making Royal icing flowers, or simpler star-tip buds (like those used in the bunny’s tail). I simply save them in a little plastic box. It’s amazing how they can come in handy to add a little something something to cookies. Because you don’t need that much to make this type of decoration, whenever I have Royal icing leftover, I adjust the consistency to firm, and practice a few flowers. There are plenty of tutorials in youtube to help, Marlyn and Haniela have many available for free. Check their youtube channels here and here.
ONE YEAR AGO: Yin and Yang Viennoise Bread
TWO YEARS AGO: Extreme Chocolate Cupcakes
THREE YEARS AGO: Sunflower Seed Kamut Sourdough
FOUR YEARS AGO: The Joys of Grating Squash
FIVE YEARS AGO: Auberge Pecan-Walnut Bread
SIX YEARS AGO:Gluten-free and Vegan Raspberry Bars
.
SEVEN YEARS AGO:Lasserre, a French Classic
.
EIGHT YEARS AGO:Sourdough Bread with Walnuts and Dates
.
NINE YEARS AGO:Braised Brisket with Bourbon-Apricot Glaze
.
TEN YEARS AGO: The Real Vodka Sauce
.
ELEVEN YEARS AGO:Pork Tenderloin and Blue Cheese
