
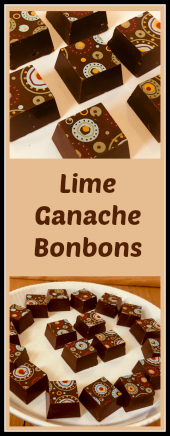
As I suspected, it did not take me too long to go back to making bonbons. This time I tried something new: transfer sheets to add a design to the top of the chocolate. As with anything new I try, there was a bit of trepidation, but I am very happy with the way they turned out, especially since it was my first time.

BONBONS WITH LIME GANACHE FILLING
(from the Bewitching Kitchen, inspired by Making Artisan Chocolates)
equipment:
magnetic mold with 24 slots (I used this one)
chocolate transfer sheet (many available at etsy.com)
for making shells:
300g tempered dark chocolate
150g tempered dark chocolate for sealing
for lime ganache:
180g milk chocolate, chopped
56 g heavy cream
juice and zest of 1 small lime
1 tsp corn syrup
7g butter
pinch of salt
4 drops of lime oil (I used the one from this set)
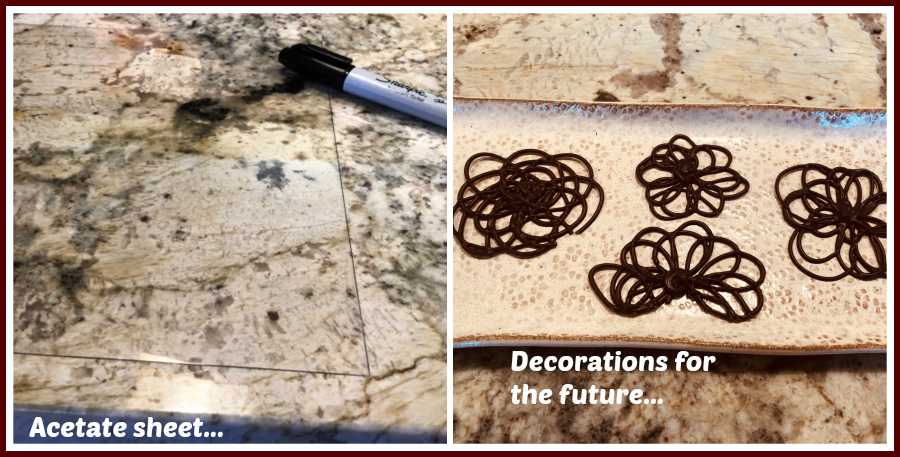
Make the shells by coating the mold lined up with the transfer sheet with 300g tempered chocolate. Use any leftover amount to make chocolate decorations or save to re-temper when closing the bonbons. Let the mold sit inverted for a couple of hours while you prepare the ganache.
Place the chopped chocolate in a bowl. Place the cream, lime zest and juice, and corn syrup in a heavy small saucepan and bring to a gentle boil . Immediately pour through a sieve over the chocolate. Let sit for 2 minutes then stir slowly to incorporate. Using a probe thermometer placed in the center of the bowl, check the temperature. Once the ganache has reached 95°F add the butter, and lime oil, and mix to combine. Pour the ganache into a piping bag and pipe into the molded shells, filling each shell three-quarters full. Gently tap the filled shells against the counter or table to release any trapped air bubbles. Let the ganache sit for a couple of hours at room temperature to dry (you can also leave it overnight).
Temper the chocolate for sealing. Right before using, warm up the edges of the open shells with a hair dryer or heat gun. You do that to make it easier for the shells to glue to the bottom. Place the tempered chocolate on top, and a little acetate sheet covering the base. Press the acetate very hard with a scraper as you hold it firmly on the top side, scraping all excess chocolate down. You can again collect it to make decorations, if you work fast. Let the shells sit at room temperature for 1 hour, then place in the freezer for exactly 15 minutes. You can also just leave them at room temperature for 24 hours for full crystallization to take place.
Remove the acetate, open the box, marvel at the design, and bravely invert the mold banging to release each bonbon.
ENJOY!
to print the recipe, click here

Comments: Magnetic molds are not cheap, I admit. But they are very easy to use and once you invest in one, you can just get different designs for the transfer sheets and have a lot of fun with them. You can match the design with the filling, or go with a seasonal motif. I have a snowflake design that will be perfect for this coming winter. A very nice video on how to use magnetic molds can be found here. It helped me a lot to make this batch.

If you are a seasoned bonbon maker, nothing that I will state now will be a surprise, so feel free to skip it. But if you are new to the technique or a total “bonbon virgin”, here are some tips that I’ve learned so far, through messy mistakes.
#1 Cover the surface of your countertop with plastic wrap. I have a commercial size roll that is very convenient for that. The chocolate that drips can be easily collected from that surface and re-used.
#2 Before you start working, gather EVERYTHING you’ll need. Scraping tools to clean the molds, paper towels, small piping bags or paper cones ready to collect excess tempered chocolate, a surface to pipe chocolate decorations with any tempered chocolate you might have leftover.
#3 Prepare the set up to invert your mold above the surface of your countertop. Ideally, the tops of the shells (which will become the bottoms) should not touch anything, so sitting the tray over a cookie drying rack is not a good idea. Make sure you have the spacers or anything you use to raise up the mold set with the right placement, because once the mold is inverted and the chocolate is done dripping, your life will be much easier if it’s all ready to go.

#4 Tempered chocolate waits for no one. Make sure you won’t be interrupted by anything or anyone once you start working.
#5 Guitar sheets (acetate) are the best surface to pipe chocolate decorations, but they are hard to see once you set them over a surface. I simply run a black marker on the edges, so that the acetate margin becomes visible. Then I don’t have to worry about where to pipe. Small details help a lot when you are a newbie working with chocolate.
I am thrilled with these bonbons, but as I mentioned, it was a not a fully smooth process. I did not work fast enough with the tempered chocolate and it started to thicken and refused to pour freely from the cavities in the mold. I had to be pretty “assertive” with it, hitting the mold with a wooden spoon like crazy, sending chocolate in many directions, some not exactly over the plastic covering the countertop. I thought that the shell would end up too thick and maybe not even close perfectly, but considering the circumstances, I think it turned out pretty good.
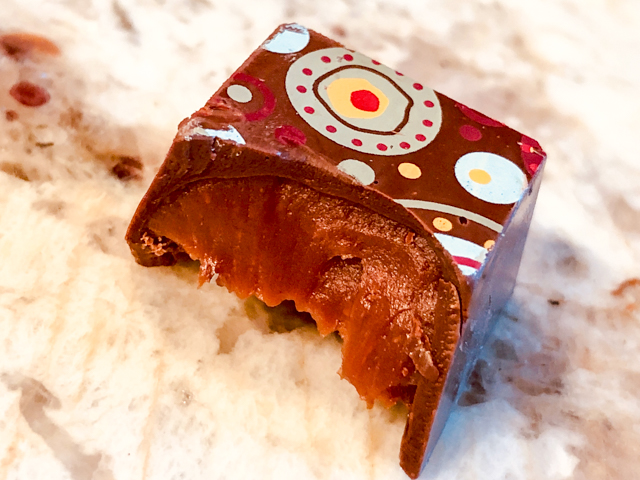
After last year’s adventure in the tent – realizing how Paul Hollywood judges the concoctions – I became a lot more concerned with being able to clearly taste the main flavor. Case in point: if you say a bonbon is lime-flavored, it better taste like lime… I think that’s where the oil is important. It is concentrated and dissolves nicely in the ganache. Lemon extract is nice but not nearly as potent. The lime ganache had a nice citric tone, and perfectly creamy texture. I am looking forward to my next batch of bonbons, hopefully with less trepidation…

ONE YEAR AGO: The Dobos Torte
TWO YEARS AGO: Coffee-Caramel Entremet Cake
THREE YEARS AGO: Fennel Soup with Almond-Mint Topping
FOUR YEARS AGO: Eataly
FIVE YEARS AGO: Spaghetti Squash Perfection
SIX YEARS AGO: Skinny Eggplant Parmigiana
SEVEN YEARS AGO: Supernova Meets Wok
EIGHT YEARS AGO: 500 Posts and The Best Thing I ever made
NINE YEARS AGO: Back in Los Angeles
TEN YEARS AGO: White House Macaroni and Cheese
ELEVEN YEARS AGO: Korean-Style Pork with Asian Slaw
