PASTA WITH FRESH TOMATO SAUCE

If you cannot stand the heat…

… no need to stay out of the kitchen.

Try this dish instead, and you’ll be glad you did…

fresh4

There are only a few ingredients: tomatoes, olive oil and herbs, so they need to be good quality. I repeat this mantra quite a bit, but it makes all the difference in the world. We had several  tomatoes from the farmer’s market laying around the kitchen, ripe and juicy.  And this weekend we’ll bring home lots more, so I wanted to use them.  After biking from work at 105 F, we needed something fresh and light, but substantial enough to replenish our energies.  Pasta with fresh tomato sauce was it!

You’ll find recipes for uncooked tomato sauce in  every Italian cookbook, and on countless websites.   I’ll  show you how I made it, following a basic method that can be adjusted to your taste and the fresh herbs you have handy.  I go through the trouble of peeling the tomatoes, but you can skip this step if you don’t like doing it. It won’t be as luscious, though… 😉

PASTA WITH UNCOOKED TOMATO SAUCE

(receita em portugues ao final do texto!)

tomatoes (ripe and gorgeous)
olive oil (the best you can find)
fresh basil leaves
fresh mint leaves
fresh thyme
salt and pepper
red pepper flakes (optional)

Peel the tomatoes (click here if you want a quick lesson), remove most of the seeds. Cut them in large chunks and place in the bowl of a food processor or blender.  Add a bunch of basil and mint leaves, some thyme, drizzle olive oil all over, season with salt and pepper.

Process by pulsing the machine on a few times.  You want to retain the tomato in pieces (see my photo after the jump).   Add red pepper flakes to taste.   Allow the tomato/herb mixture to sit in a bowl while you cook the pasta.   I like fettuccine or spaghetti.

Once the pasta cooks, drain it quickly, add to a serving bowl and mix in the cold tomato sauce.  Serve immediately.  The contrast of the hot pasta with the cold sauce is a great gastronomic experience!

Continue reading →

A PERFECT SUNDAY DINNER

Weekends are busy, but it is often possible to indulge in preparing meals that demand a little extra time, especially if it means hands-off cooking. This recipe by Jamie Oliver is perfect for Summer evenings, when there is absolutely no shortage of wonderful grape tomatoes and basil. He suggests variations such as adding cannellini beans or potatoes to turn it into a one-dish meal. I haven’t tried those yet, but this basic  recipe already showed up at our table a few times, served over pasta on the first day, and incorporated in sandwiches, quesadillas or salads later.

I’ve tried many methods to roast chicken parts, but in my experience, nothing beats a low oven, eventually running the dish under the broiler to crisp up the skin before serving. The meat gets tender and juicy, the herbs and spices come through nicely, as they have more time to infuse the dish with their flavors.

(receita em portugues na pagina seguinte)

jamie2

CHICKEN LEGS WITH CHERRY TOMATOES AND BASIL
(adapted from Jamie Oliver)

4 chicken legs, preferably organic, free-range
salt and freshly ground black pepper to taste
1 large bunch basil, leaves picked, stalks finely chopped
1.5 cups cherry tomatoes (yellow, red) or plum tomatoes quartered
a few cloves of garlic, no need to peel
Olive oil
drizzle of lemon juice

Heat the oven to 350F.

Season your chicken pieces all over and put them into a snug-fitting pan in one layer (see my photo after the jump). Scatter the basil leaves and stalks all over, then add the tomatoes and the garlic cloves. Drizzle some olive oil and lemon juice. Push some of the tomatoes in, allowing them to go under the chicken.

Place in the oven for one and a half hours (uncovered), moving the tomatoes around halfway through, until the chicken skin is crisp and the meat falls off the bone. If the skin is not as crisp as you like, run the dish under the broiler for a couple of minutes, watching it carefully. Guests can squeeze the garlic out of their skins, or you can do it before serving.

Bom apetite!

for more comments, photos, and receita em portugues…

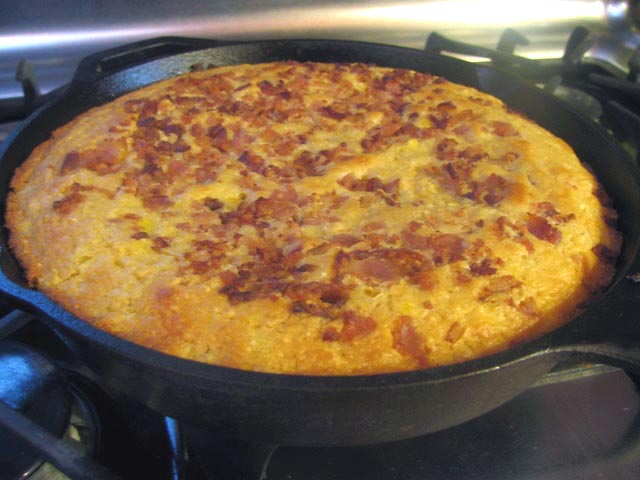
BBA#10: CORNBREAD

cornbread4

With this bread, almost 25% of the challenge is completed. Ten breads down, thirty-three more to go…

Reinhart tells us that cornbread normally would not fit into a bread book, as it is not leavened by yeast. However he had to include this one because, according to him, “it is the best cornbread you will ever taste”. Since taste is such a personal thing, I tend to take statements like that with a grain of salt, but needless to say, I had high expectations for it.

The recipe is very straightforward, but you must remember to soak the cornmeal with buttermilk the day before. Which, of course, I almost forgot. Spent Friday evening with a strange feeling of something left undone. Shortly after 10pm you could see me dashing to the kitchen, screaming “cornbread! cornbread!”.   My beloved by now is used to this sort of stuff.

click for more photos and comments

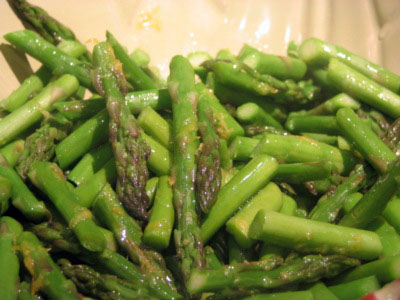
LEMONY ASPARAGUS

asparagus

By the time Summer hits with full force, there is no denying that the best of asparagus is over. For asparagus lovers such as myself this is a sad turn of events, but I still buy it whenever I see some that look tasty enough. There are so many ways to prepare asparagus, either as a side dish or incorporated in pastas, risottos, soups, savory tarts. I will share one of my favorite recipes: simplicity itself. I wish I knew where I got it from to give proper credit, but unfortunately I don’t remember. Only three ingredients (plus salt and pepper), and less than five minutes of your time. Have I convinced you to try it yet?  😉

IMG_1488

LEMONY ASPARAGUS

1 bunch of asparagus, not too thin, not too thick, just right
zest of 1 lemon
olive oil, best possible quality you can find
salt and pepper

In a small bowl, mix the olive oil with lemon zest and allow it to sit while you prepare the asparagus.

Cut the asparagus on a diagonal, reserving the tough ends for your veggie stock or your compost pile.  Add the asparagus pieces to slightly salted boiling water and boil for 2 minutes. Yes, only two. Trust me. Drain them in a pasta colander and run cold water from the faucet briefly over them. You just want to stop the cooking, but don’t allow them to get cold.

Add the asparagus to a serving dish, pour the olive oil/lemon zest mixture on top, toss, season with salt and pepper. Serve and wait for compliments.

Measurements for this recipe are not precise, in fact I often just eye-ball it.The amount of olive oil, for instance, I just use what it seems to be enough to lightly coat the asparagus pieces, and use enough lemon zest to make sure it will end up with a bright, nice, lemony taste. Sometimes I squeeze some lemon juice together with the olive oil, sometimes I add fresh thyme, but for the most part I keep it simple.

IMG_1489

It is important that the asparagus is still warm when you add it to the olive oil mixture. But you can enjoy this dish warm or at room temperature. Leftovers keep quite well, I love to have them in my bento box for lunch, with grape tomatoes, maybe some couscous or a slice of bread.

para receita em portugues, proxima pagina

THE HANDMADE LOAF

IMG_1462-1

Like a Mother who adamantly refuses to name her favorite child, I have a hard time picking a favorite cookbook. But, if someone asked me which cookbook had the greatest impact on my cooking,  I’d pick “The Handmade Loaf” by Dan Lepard, hands down.

If you dream of making great bread, if you feel that calling those preserved abnormalities at the grocery store “bread” is disrespectful to bakers everywhere, then you need this book.   Not only are the photos  gorgeous, but Dan’s writing will excite you to try every single bread from the book.  Isn’t that the mark of a great cookbook? Each page you turn makes you want to stop reading and start cooking! 😉

His main message is simple: if you want to become great at baking bread, forget about using a bread machine, or even a mixer. You won’t be pushing buttons, you will be using your hands to knead the dough. But his kneading technique is miles and miles ahead of the traditional, back-breaking, sweat-inducing method. You’ll fold the dough instead,  allowing time to accomplish what brute force used to do. You will also, for the most part, use yeast captured from your own kitchen, starting from flour, water, and a few raisins.  This book will completely change your approach to bread baking.

Yes, you will make the sourdough starter. Yes, at first you will feel intimidated. Yes, you will make mistakes, but you’ll soon realize that the starter is a very forgiving creature. Some of you who read my profile might be mumbling: “yeah, right, she is a biochemist who works with bacteria, easy for her to make starter”.  Believe me, I felt intimidated too.  I was afraid of the sourdough turning rotten, of my breads not rising, tasting flat, ending up hard as a hockey puck. In part because those things happened to me in the past, I was convinced that bread baking was simply not my cup of tea.

That all changed with “The Handmade Loaf”.  My first starter was born on March 2008 (I now have more than one). Since then, I’ve baked sourdough bread on a regular schedule, by far the MOST rewarding activity in my Bewitching Kitchen. I will share many of my bread baking adventures here, so stay tuned. 😉

Meanwhile, would anyone care for a piece of levain bread with black olives?
DSCN2236

Add to FacebookAdd to DiggAdd to Del.icio.usAdd to StumbleuponAdd to RedditAdd to BlinklistAdd to TwitterAdd to TechnoratiAdd to Yahoo BuzzAdd to Newsvine