BBA#31: NEW YORK DELI RYE

Following the BBA Challenge, we go forward with the sourdoughs, the next couple of which are made with rye flour.  Rye is low in gluten,  which increases the difficulty of handling it.  In this recipe Peter Reinhart uses a rye sponge, that’s made with a sourdough starter, rye flour, and lightly sauteed onions.  The sponge ferments for a few hours, gets refrigerated overnight, and the next day it’s mixed into a final dough with brown sugar, buttermilk, white and rye flours, and a small amount of commercial yeast.

I was a bit insecure preparing this dough – it’s easy to turn a rye dough into a gummy mess, so I paid extra attention to Peter’s advice to avoid over-kneading it.   And the onion smell was too strong, which only added to my worries and bothered my husband!

But, sometimes a bright light shines at the end of the tunnel!  This bread turned out awesome!  It delivered exactly what Peter promised: a flavorful New York deli rye bread…    My pictures don’t do it justice: it tasted much better than it looks.   😉

The crumb was tight but delicate, and the hint of onion in the background perfectly paired with the caraway spice.

My beloved, as usual, used it in a delicious sandwich creation:  grilled rib eye steak slices, sauteed mushrooms (both leftovers from last night’s dinner), and a few slices of Jarslberg cheese.   His remark afterwards:

Even Tom Colicchio would love this one!  😉

I’m pleasantly surprised by how much we both enjoyed this bread, especially because it’s my first time making this type of loaf.

Flash! Here’s something even more exciting… I enrolled in a class with Peter Reinhart himself in January!  I can hardly wait!   My Bread Baker’s Apprentice book is a little beaten up now, but  it’ll look like a million bucks once I get his autograph on it!   😉

Check the  New York deli rye made by Oggi, from “I Can do That”, by clicking here

Next on the challenge: 100% sourdough rye. That one’s REALLY intimidating.  Stay tuned…
TRIED AND… TASTY!

This recipe comes from “Closet Cooking” – I first printed it when I saw it on Kevin’s blog, and as usual, it sat on my pile of “soon to make” recipes, waiting and waiting. Then, a couple of weeks ago I learned that that the Closet Cooking blog will be featured in a net-event called “Tried and Tasted”, so it was the perfect opportunity to make the dish and join the party!

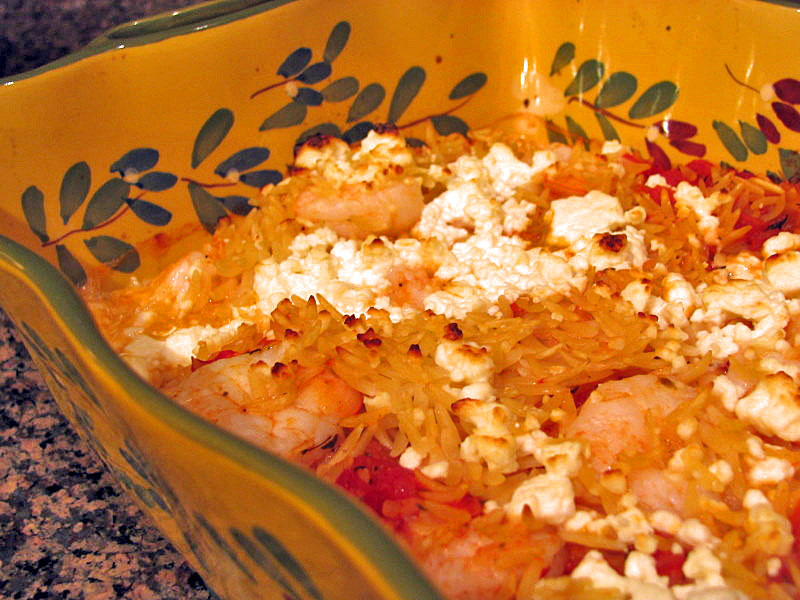
BAKED SHRIMP AND FETA PASTA
(adapted from Closet Cooking)

1  cup orzo
1 tablespoon oil
1 shallot, finely chopped
1 clove   garlic, chopped
1/2 teaspoon red pepper flakes
1/4 cup white wine
1 1/2 cups canned tomatoes, diced
1 teaspoon oregano
salt and pepper to taste
1/4 cup fresh herbs (parsley, basil, mint… your choice!)
2 green onions, sliced
1/2 pound shrimp, peeled and deveined
1/2 cup feta cheese  (crumbled)

Cook the orzo in boiling water until al dente. Do not overcook.

Heat the oil in a pan, saute the shallots until translucent, add the garlic and red pepper flakes, and saute for 30 seconds more.  Add the white wine, tomato and oregano, season with salt and pepper, and simmer until the sauce thickens, about 5 minutes.  Remove from the heat,  stir in the herbs and green onions. Mix the sauce, cooked orzo and shrimp,  place them in a baking dish and top with the feta cheese. Bake in a 425F oven until the shrimp is cooked and the sauce is bubbly, about 15 minutes.  If you want, run the dish quickly under the broiler before serving.

ENJOY!

to print the recipe, click here

Comments: Shrimp and feta  are perfect together. I often make a similar dish, in which I saute the shrimp, add them to a baking dish with diced tomatoes, herbs, and sprinkle feta on top.  However, I like Kevin’s approach better for two reasons:   first,  the shrimp is not sauteed beforehand, so it finishes with a more pleasant texture.  Secondly, the addition of orzo makes this recipe a complete meal. We ate it with a simple salad.

The original recipe called for green onions and fresh herbs – I thought I had some green onions in the fridge, but I didn’t, so I  skipped them.  And, since I’m making this dish in December, I had no fresh herbs, so I used dried oregano and thyme instead. I’m sure that the dish will be even better when made as originally posted. 😉   …Give it a try!

As  I mentioned before, I always soak the shrimp in a light brining solution before cooking, a trick learned from Chinese cookbooks that ensures a plumper texture.  Since the only shrimp we have are frozen, this step makes a huge difference.

So, with this post I participate for the first time in the Tried and Tasted event, which was launched by Zlamushka in April 2008. You can read more about it by clicking here.

para receita em portugues, veja a pagina seguinte

OSSOBUCO MILANESE: AN ITALIAN CLASSIC

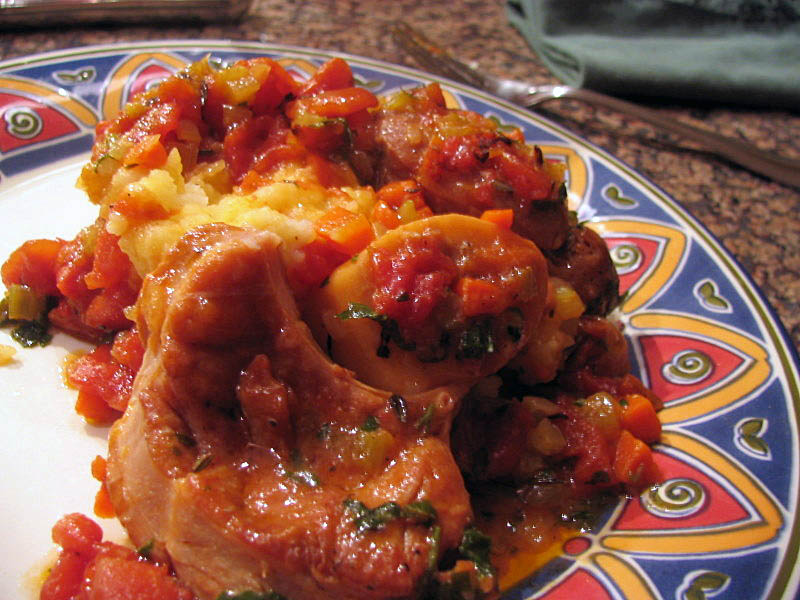
Ossobuco milanese is perfect for cold evenings, and great for company, as you can prepare it in advance and re-heat it when your guests arrive. Like most braises, it gets better with a day or two of rest in the fridge.   Traditionally, it’s served with a saffron risotto, but this time I made it with mashed potatoes.  The sauce is so luscious, and mashed potatoes are also a perfect match.  

When preparing such a classic dish, I avoid “simplified,” “easy,” “quick,” “low fat,” or “light” versions.  My favorite recipe for ossobuco comes from Marcella Hazan, a respected authority on Italian cooking. I scaled down her recipe, which is posted below, and cooked only 4 veal shanks. But, the dish is satisfying, and the original recipe is certainly enough for 6 to 8 happy folks.

OSSOBUCO MILANESE
(from Marcella Hazan, Essentials of Classic Italian Cooking)

6 – 8 veal shanks
Salt and pepper
Flour
2 Tbsp olive oil
4 Tbsp butter
1 cup diced onion
2/3 cup diced carrot
2/3 cup diced celery
1 cup dry white wine
2 strips lemon zest
1 cup  chicken stock (I used beef stock, homemade)
1 + 1/2 cups diced tomatoes
1 tsp fresh thyme
2 bay leaves
3 – 4 parsley sprigs

for gremolata
1 tsp grated lemon zest
1/4 tsp finely minced garlic
1 Tbsp minced Italian parsley

Pre-heat the oven to 350 degrees.

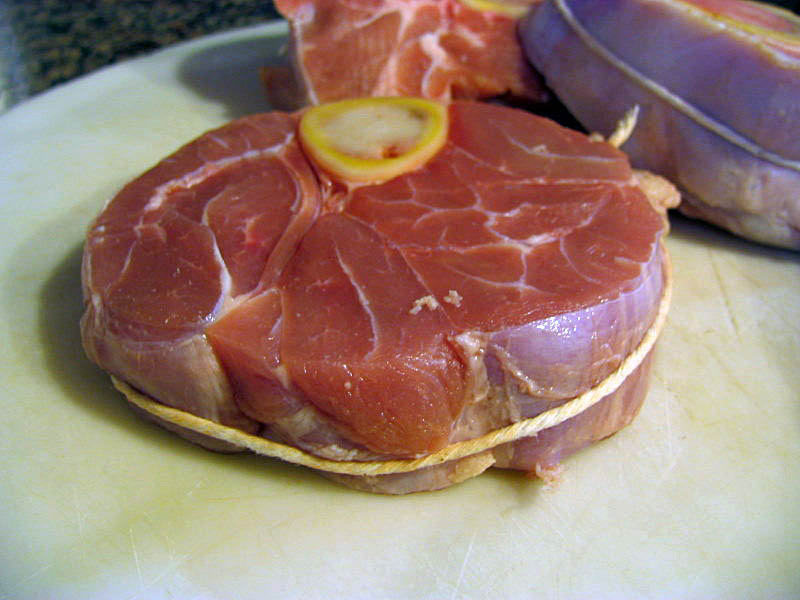
Tie each shank tightly with a piece of twine to prevent them from falling apart during cooking.  Lightly season the shanks with salt and pepper, then flour both sides of the meat and brown them in a skillet with very hot olive oil. Set the meat aside, discard most of the oil,  deglaze the pan with 1 cup of white wine, and set it aside.

Add butter to an oven-proof pan with a tight-fitting lid (like a Le Creuset pan) large enough to hold the meat in a single layer, and saute the onion, carrot, and celery mixture for about 6 minutes, until translucent.  Add the lemon peel and cook for a couple more minutes, then add the meat to the sauteed veggies,  pour the wine from deglazing the skillet over it and add the stock, the tomatoes, bay leaves, and thyme.  Season with salt and pepper.

Bring the contents to a simmer, cover and transfer the pan to the oven. Let it cook for 2 – 3 hours (depending on the thickness of your shanks),  until the meat is fork tender.  If the pot gets too dry, add a few tablespoons of water.

Add the gremolata on top of the meat and sauce a few minutes before serving, and don’t allow it to cook for a long time.   Cut the twine around the meat, and serve.

ENJOY!

to print the recipe, click here

receita em portugues na segunda pagina

Comments: The ideal thickness for veal shanks in ossobuco  is 1.5 inch. Mine were slightly thinner, which made it difficult to tie the string around them, but the meat cooked faster: a little over 2 hours was enough.

I expected that the string wasn’t going to stay tied during the cooking, but I decided to use it anyway. Another important tip from Marcella:  don’t remove the silver membranes around the shanks, they help preserve the shape of the meat as it braises.

Cutting the veggies:  for this recipe, I diced them by hand, as uniformly as possible. Since they are so prominent in the sauce, using a food processor or other gadget compromises the presentation.

Marcella advises to add liquid up to 3/4 of the height of the shanks; I added a little more, but I didn’t have to adjust the amount until the end.  Every half an hour or so I flipped the shanks in the liquid, and made sure that it wasn’t boiling too furiously.  During the final 45 minutes I lowered the temperature to 325F.

We had it with a nice slice of homemade sourdough bread, anointed with some of the bone marrow – it was pure bliss!    I can hardly wait to enjoy the leftovers later this week!

Continue reading →

BBA#30: BASIC SOURDOUGH BREAD

Here we are, at the beginning of my favorite, sourdough breads, which are all made from a “starter”, or, as Peter calls it, a  “seed culture”.    For  those unfamiliar with the BBA Challenge, it’s a net-event that was launched by Nicole, in which home bakers make every recipe from “The Bread Baker’s Apprentice“, in the order that they appear in the book;  forty-three breads in all.    People participating in this challenge agreed not to publish the recipes, so if you are interested, help the economy and buy the book.  😉

I’ve been regularly baking sourdough bread for the past two years, so I took some liberties and made a few changes in the overall method.  First, I didn’t put the “barm”  in the fridge overnight.  Instead,  I prepared it at 11pm the night before and used it next morning,  at 6am, without refrigeration.   I see no need to retard the barm in the fridge:  it adds an extra hour to the overall process (you do need to warm it to room temperature before using it), and from my experience it doesn’t  improve the bread’s flavor.  Retarding the dough after the final shaping is a better option, that is also discussed in the recipe.

My second change was the kneading method.  I am partial to folding the dough, as you can see by browsing my bread recipes in this site.   Why? Because it always works.   Kneading the dough in a machine or extensively by hand  may or may not produce the crumb texture I love: airy and full of uneven holes.  I don’t like to gamble with my breads, so I fold it.

The dough was easy to work with,  I am always  fascinated by the way it changes with minimal kneading over time.   These two photos show the dough 15 minutes after mixing all the ingredients, and after rising for 45 minutes.   I folded it at 45, 60, and 120 minutes, then allowed it to rise for 2 more hours (for a total of 4 hours) before shaping.

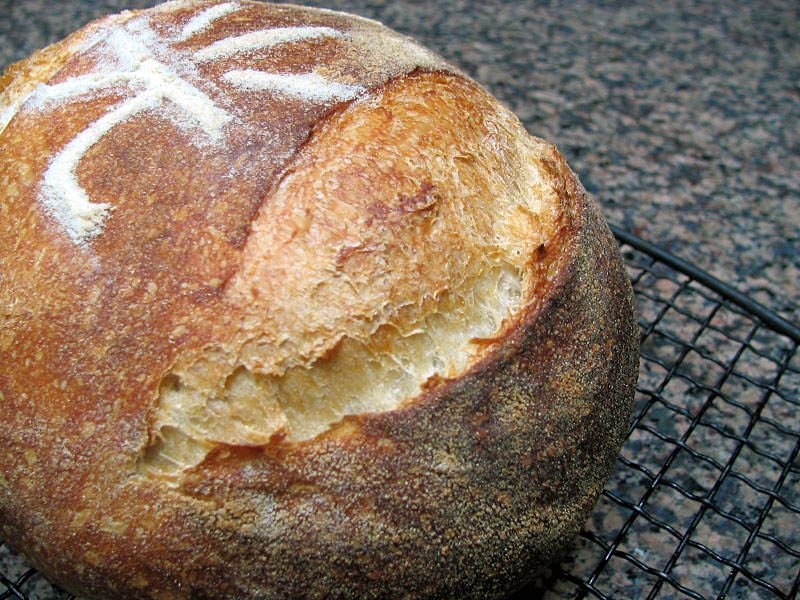
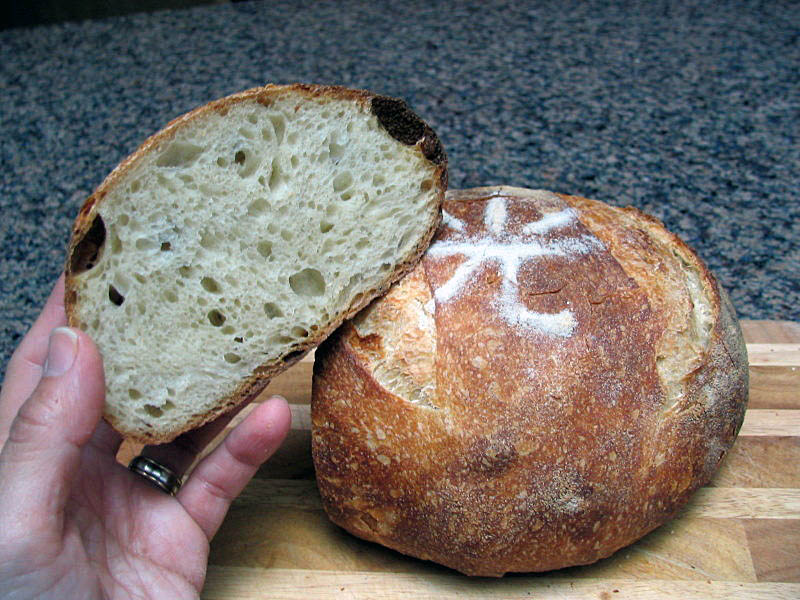
I’ve been flirting with the idea of stenciling my breads, and this time I decided to go for it.   It didn’t work perfectly.   I think I made my Chinese character too big, and I added too much flour in making it, but I’m hoping to improve my skills.

This is an ideogram that I like very much – guang – it means light, as in sunlight.  I guess my tropical nature attracts me to it.  😉

Excellent flavor, not too sour, the crust just the way we like it…

Click here is for a link to the sourdough post by Oggi, from “I Can Do That” – she did some nice different shapes  with her dough, very nice job!

DINNER IN A HURRY

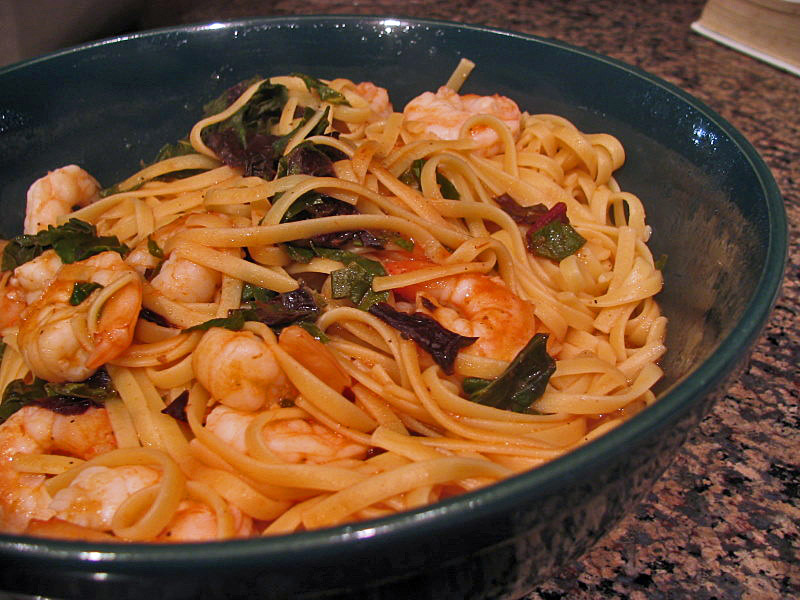
I made this in “desperation-mode”, when there was very little available in our fridge: a bunch of Swiss chard harvested from our garden, and a little over half a cup of tomato puree leftover from another recipe.   All I needed was to defrost a bag of large shrimp, and a quick, tasty dinner arrived at the table!

FETUCCINE WITH SHRIMP, SWISS CHARD AND TOMATOES

dried fetuccine (enough for two)
1 Tbs olive oil
1 shallot, finely diced
big bunch of Swiss chard
12-15 large shrimp
zest of a lemon
tomato puree
salt and pepper

Place a large pan with salted water to boil.

Shred the chard leaves after removing the central, tough stem. If you have extra time, dice the stems and start sauteing them a few minutes before adding the rest of the leaves; otherwise send them to your compost bin.

Heat the olive oil, add the diced shallots, cook for a couple of minutes, add  the chard, season lightly with salt and pepper,  and cook in medium heat until it starts to get soft, about 5 minutes.  Increase the heat to high and add the shrimp.  Cook until they turn opaque, add the tomato puree, lemon zest to taste,  simmer a couple of minutes, adjusting the seasoning with salt and pepper.

Meanwhile, cook the pasta until al dente. Reserve a little of the pasta cooking water, drain the pasta and add it to the skillet with the shrimp mixture.  Simmer everything together to perform the beautiful marriage of sauce and pasta, adding some of the pasta cooking water if necessary.

ENJOY!

to print the recipe, click here

Comments: Normally I don’t add Swiss chard to a tomato based sauce, but this worked so well, I intend to do it again.  Amounts are all very flexible, of course.  Most people will enjoy sauteing  some garlic with the shallots, so go right ahead…

para receita em portugues, siga ate’ a proxima pagina

Continue reading →