MICHIGAN & MACKINAC ISLAND

Sleeping Bear Dunes… majestic natural beauty from Michigan…

Last month we took a trip to Michigan to visit family, friends, and spend a few days in a honeymoon frame of mind at Mackinac Island. Michigan is a place very dear to Phil’s heart, as he was born and raised there, surrounded by incredible amounts of snow during winter. Such ordeal gets compensated by plenty of fun stuff to do in the 24 days or so of reasonably warm weather (ok, that was my Brazilian mean streak showing). We visited family in a town called Stanwood, we visited friends in Kalkaska, friends we had not seen in way too long.  Alex was a young teenager last time we stopped by with him for a fun summer vacation. Their home was built in 1896, with a huge barn in the backyard which is still standing proud. I was quite fascinated by the gorgeous barn quilts. They were all designed and made by our friend Pat. Barn quilts are very common in that part of Michigan, adding beauty and charm to homes. I could definitely envision one over our garage door… why not?

Isn’t it amazing to have an old photograph of the first owners (and builders) of your home sitting at the very front porch you pass by every single day?  A fascinating look into the past…

Michigan at this time of the year is blooming, flowers everywhere, beautiful gardens for the most part with a natural aura I find refreshing. Gardens that are too manicured do not impress me the same way.

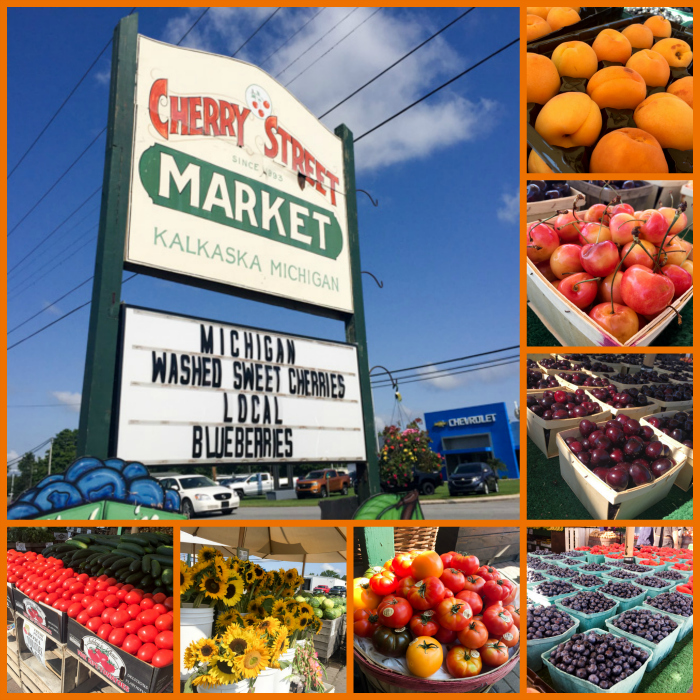
And the farmer’s markets!  We were lost in the middle of so much great produce, the blueberries and cherries have amazing flavor… we made sure to enjoy them on a daily basis during our vacation.

Our friends have a summer cottage by Blue Lake, one of the thousands of lakes in Michigan… it’s mind blowing, actually, walk two steps and you find yourself at yet another lake… We spent a couple of hours on a pontoon boat going up and down the lake, in almost complete solitude. Absolutely wonderful, although the water was so cold I thought I was going to die when I went for a swim. “Someone” had the nerve to say I was not brave enough to get into the water. HA! Fearless is my middle name.

If only the pups could see… Their Dad cheating on all of them with… another dog!
(She was super cute, though)

We left Kalkaska relaxed and happy, ready for a few days just the two of us, in a place I had never been to. In fact, I made a point of not even looking for images in the internet. To quote Seinfeld, I wanted to “go in fresh.”  Never in a million years I could imagine what Mackinac Island was all about.

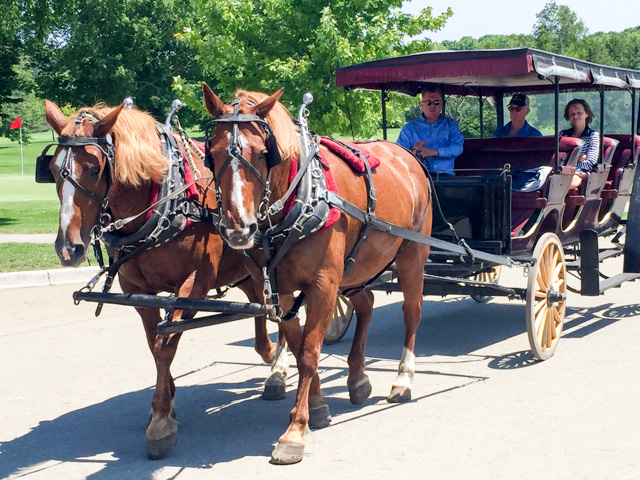
On the island, no cars are allowed. Only horses, carriages, and bikes. To get there, you take a ferry-boat ride that lasts about 20 minutes from Mackinaw City. Yes, two different ways to spell the same place. It turns out that the way the natives called the place was written in French as Mackinac (you do not pronounce the final C in French), and Mackinaw by Englishmen. So now we see two different spellings referring to the same spot. Mackinaw City, and Mackinac Island. Clear as mud?

Once you get to the island, you’ll feel as if you traveled back in time 100 years. All you hear is the soothing noise of carriages passing by.

We ended up not taking carriage tours. Instead we walked a lot on the first day, and took bike rides. On the first bike ride we did the more or less mandatory path around the perimeter of the island, about 8 miles. Next day we got real nice 24-speed mountain bikes and rode for a couple of hours through alternative paths all around the island, visiting all the touristic spots. Like the famous arch, which involves going up 207 steps. You park the bike, take a deep breath and up you go!

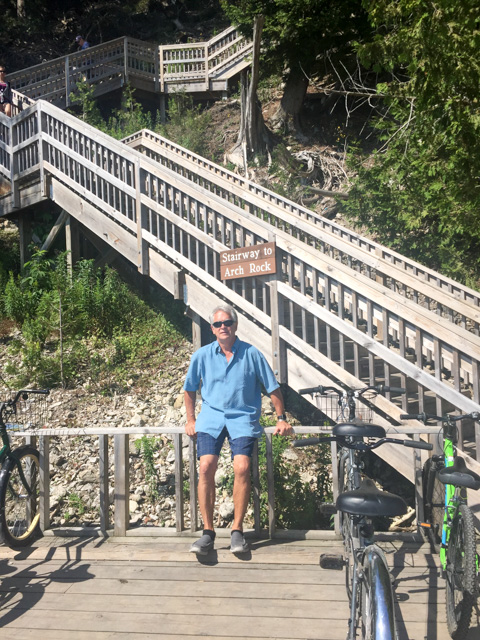
The view is breathtaking, and worth the workout!

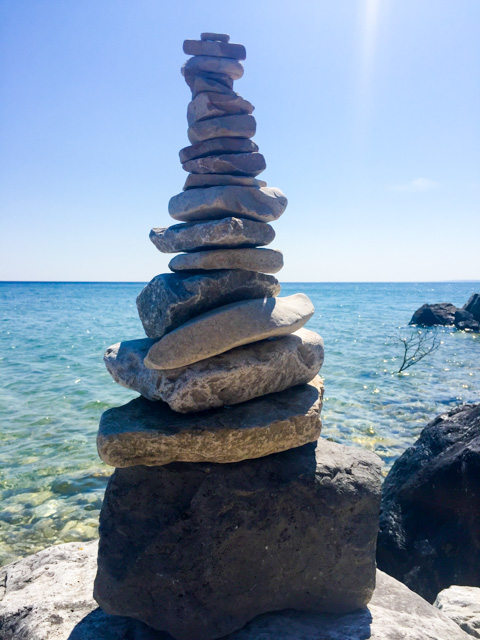
The best thing about bike rides is that you can stop anytime  you want to indulge in unexpected beauty along the way… like one of the hundreds of stone sculptures on the lake shore…

Or the beautiful stained glass window in a small church…

Another spot not to be missed is the wonderful Butterfly Sanctuary…  They get butterflies from all over the world shipped to them as chrysalis.

As they hatch, they stay for half an hour or so inside that window so that their wings dry and they get ready to fly. At that point, they are released into an enclosed garden with perfect temperature and moisture, lots and lots of flowers to provide them with nutrition. Before entering the actual butterfly garden, you go through a short lecture about their habits and how to behave around them. Then, the fluttering beauty takes over…

For a nice, relaxing video taken by Phil, click here.

One thing they make very clear: no matter what, do not touch the butterflies.  So, I was not amused when Phil told me that one had landed on my shoulder. I had no idea how big it was, and was very afraid to find out. Of course, the man I married thought it was oh so very funny (sigh).

(might have to re-consider that fearless thing)

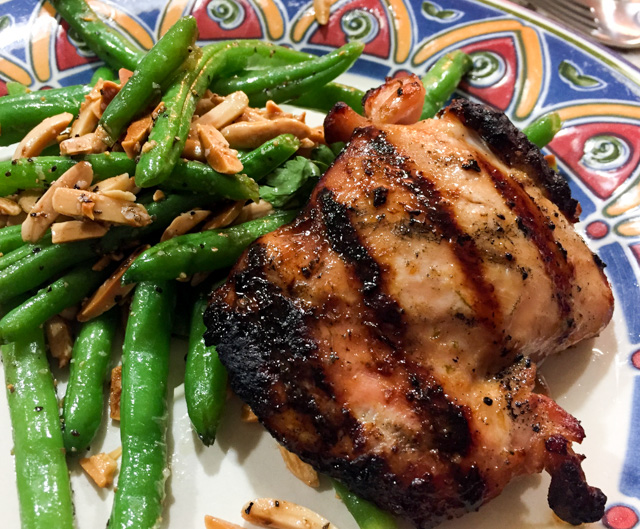
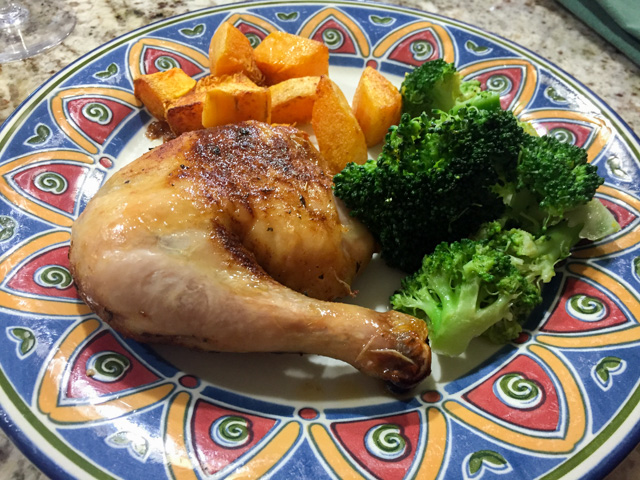
Since this is a food blog after all, let me assure you that we enjoyed some great meals during the trip… Notice the dessert at the bottom right? It was called Chocolate Three Ways, and it was hard to choose the best of the three samplings.  The great thing about Mackinac is that when you had to walk 50 minutes to get to the restaurant, then 50 minutes back to the hotel, the caloric excesses don’t even make you feel guilty… Of course, you can catch a carriage-taxi anytime you feel like it.

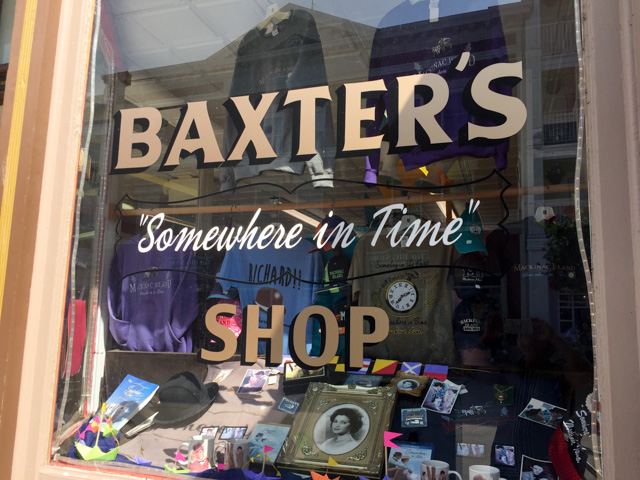
I highly recommend a trip to Mackinac. Perfect spot for a honeymoon, or even a trip with kids, since there’s a lot to do, from kayaking to horseback riding, visits to forts and rock formations like the Sugar Loaf and The Arch. In case you did not know, the movie Somewhere in Time was shot there, so there is a store in town with the movie memorabilia for those interested.

We loved our stay, and hope to come back within a few years, the only thing we would try to do next time would be staying in a hotel with a pool, so we could lay in the sun after those intense bike rides…

Somewhere in time… Somewhere in Mackinac… 

I hope you enjoyed this little virtual tour of Michigan…  

We’ll get back into food blogging shortly!

Michigan, 2002

ONE YEAR AGO: In My Kitchen, August 2016

TWO  YEARS AGO: Ka’kat, a Middle Eastern Snack Bread

THREE YEARS AGO: Spinach and Chickpea Curry

FOUR YEARS AGO: Sautéed Zucchini with Sun-dried Tomatoes and Basil

FIVE YEARS AGO: Orzo with Heirloom Tomato Relish

SIX YEARS AGO:  Headed to Brazil!

SEVEN YEARS AGO: The Rhubarb Brouhaha: Revelation Compote

EIGHT YEARS AGO: Love me tender…

Onve

SaveSave

SaveSave

SaveSave

SaveSave

SaveSave

SaveSave

SaveSave

SaveSave

SaveSaveSaveSave

SaveSave

SaveSave

SaveSave

SaveSave

SaveSaveSaveSave

SaveSave

SaveSaveSaveSave

Save

BLUEBERRY CRUMBLE COFFEE CAKE

As I mentioned before, one great food blogger I follow is Helen Fletcher. She is an expert baker, and also a natural teacher. Each of her posts is a detailed tutorial that allows even the most insecure baker (Sally raises her hand…)  to feel comfortable to face a little baking challenge. A few months ago she blogged on a Blueberry Coffee Cake that had a nice twist to it, the inclusion of a crumb topping.  I was intrigued. It turned out as a delicious, moist and tender cake, one that prompted Phil to grant me an unexpected compliment: “this is exactly the type of cake my Aunt Mildred would bake and we loved so much!”  Can you grasp the full impact of those simple words put together? Me and his Aunt Mildred, joined in the same level of cake baking.  I had to hold myself on the side of the counter top, my knees went a bit weak as my blood pressure dropped from the sheer shock of it. And then… then I could not stop smiling.

EASY BLUEBERRY CRUMB COFFEE CAKE
(from Pastries Like a Pro)

for the cake:
2 + 1/4 cups all-purpose flour, divided (315 grams)
1 cup sugar (200 grams)
3/4 cup butter, cold (170 grams)
1 teaspoon baking soda
1 egg
1/2 cup buttermilk
9 ounces frozen blueberries (255 grams)
for the lemon glaze:
1 cup powdered sugar (130 grams or 4 1/2 ounces)
3 tablespoons lemon juice (plus more if needed)

Heat the oven to 350°F. Spray a 9″ cheesecake pan or springform pan and set aside.

Combine 2 cups flour and sugar in the bowl of a mixer. Cut the butter into small pieces and add it to the bowl. Mix on low at first until most of the butter has been cut in. Raise the mixer and continue to mixing until crumbs form. Aim for fine, not large crumbs.

Remove 1/3 of the crumbs (about 210 grams) and set them aside. They will be used for the topping.

Add the remaining 1/4 cup flour, baking soda, egg and buttermilk to the remainder of the crumbs in the bowl. Beat on low to bring it together then on medium to smooth it out. Stir half of the frozen blueberries into the batter. Spread it evenly in the pan.

Place the second half of the blueberries over the top of the batter. Sprinkle the reserved crumbs over the blueberries. Bake for 50 to 55 minutes until a tester comes out clean. The crumbs will be light in color. My cake took a little more than 1 hour in the oven.

Let cool before removing from the pan.

For the glaze, combine the powdered sugar and lemon juice in a bowl and stir until smooth and with the right consistency to be drizzled. Place the cake on a rack over waxed or parchment paper for easy clean up. Drizzle one way,turn the cake and drizzle in the opposite direction. Allow the glaze to set before serving.

ENJOY!

to print the recipe, click here

Comments: for a step by step tutorial, make sure to stop by Helen’s site using the link I provided under the recipe’s title. Once you pour the cake batter in the pan, it will seem as if it’s not enough.  Don’t worry, just go on and follow the recipe as specified. I suppose my glaze could have been slightly thicker so that it would stay more as a drizzle, but even if a bit thin, the taste was not compromised.

As usual, this was shared with our co-workers on a Monday morning. It is one of my favorite things to do, bake something on Sunday and share with our departmental colleagues. The cake was gone before 9:30hs, which is an excellent indication of approval. But, truth is, I could not ask for a better compliment than that of my beloved husband, the resident cake-critic, the one who was raised by bakers probably as talented as… Helen Fletcher!

Helen, thanks so much for another great recipe, I now need to take a deep breath and make your Portokalopita! If anyone is puzzled by the name, go visit her site, it is a cake that uses phyllo dough in the batter!  Can you imagine that?  Mind blowing!

ONE YEAR AGO: Fresh Strawberry Yogurt Bundt Cake

TWO YEARS AGO: Quinoa Salad with Red Grapes and Avocado

THREE YEARS AGO: Strawberry Coffee Cake

FOUR YEARS AGO: Lemon-Poppy Seed Muffins

FIVE YEARS AGO: Mascarpone Brownies

SIX YEARS AGO: Salmon Tacos

SEVEN YEARS AGOCinnamon Turban Bread

EIGHT YEARS AGO: Summertime Gratin


SaveSave

SaveSave

SaveSave

SaveSave

SaveSave

SaveSave

SaveSave

SaveSave

SaveSave

SaveSave

VIETNAMESE-ISH CHICKEN

I am very fond of Vietnamese food, and this is my take on grilled chicken thighs inspired by that cuisine. I took a few liberties with classic versions, by using coconut aminos instead of soy sauce, and omitting garlic, which is always present.  Of course, add all the garlic that pleases you, and go for the traditional soy. I find the flavor of coconut aminos a bit more subtle, allowing other herbs and spices to shine more. I also added Sriracha sauce, a product from Thailand which I happen to be addicted to. So there. As I said, it is “inspired” by Vietnamese cuisine, made by a Brazilian-American with gastronomically-daring tendencies.

VIETNAMESE GRILLED CHICKEN THIGHS
(from the Bewitching Kitchen)

6 boneless, skinless chicken thighs
1 teaspoon kosher salt
1 tablespoon Asian fish sauce
2 tablespoons coconut aminos sauce (or soy sauce)
1 tablespoon dark brown sugar
2 teaspoons peanut oil
1 teaspoon grated ginger
1 teaspoon Sriracha sauce or other hot sauce of your preference
Grated zest and juice of 1 lime
fresh cilantro, for serving

Season the chicken thighs with salt. Make the marinade by whisking all other ingredients (except cilantro) in a bowl.  Add the chicken and mix well to coat. Place in a plastic bag, massage the pieces and place in the fridge for at least one hour, up to overnight.

When ready to cook, remove the pieces from the marinade, and grill the thighs until cooked through, about 7 minutes per side. Serve with fresh cilantro and a sprinkle of fresh lime juice all over the meat.

ENJOY!

to print the recipe, click here

Not much is needed to turn these juicy grilled chicken thighs into a great meal. Green beans with almonds were a very nice complement, but when it’s really hot I think cucumber raita could be even better. Keep in mind I made this recipe back in March, just taking my usual slow-coach approach to share on the blog.

If you are partial to white meat, use the same marinade for chicken breasts, but pound them very thin, and run them on the stupidly hot grill until cooked through. I find it that it is the best approach for that type of meat. Plus, it’s ready in less than 10 minutes. Cannot beat that. The brown sugar in the marinade ensures those gorgeous grill marks even if the grilling time is kept short.

Add to FacebookAdd to DiggAdd to Del.icio.usAdd to StumbleuponAdd to RedditAdd to BlinklistAdd to TwitterAdd to TechnoratiAdd to Yahoo BuzzAdd to Newsvine

ONE YEAR AGO: Rutabagas Anna

TWO YEARS AGO: The Ultimate Raspberry Sorbet

THREE YEARS AGO: Crispy Cornmeal Sweet Potato Fries

FOUR YEARS AGO: Pan-grilled Tilapia with Smoked Paprika & Avocado Cream

FIVE YEARS AGO: Golden Saffron and Fennel Loaf

SIX YEARS AGO: In My Kitchen, July 2011

SEVEN YEARS AGO: Heavenly Homemade Fromage Blanc

EIGHT YEARS AGOA Perfect Sunday Dinner


SaveSave

SaveSave

SaveSave

SaveSave

SaveSave

SaveSave

PATI JINICH’S FLOURLESS CHOCOLATE PECAN CAKE

I started watching Pati’s show on PBS about a year ago. Not only every recipe I made from her show (and cookbook) worked great, but I became more and more fond of her warm personality, authenticity, down to Earth way. The type of person I would not think twice about inviting over for dinner or sitting down at a cafe to shoot the breeze. Her show is always refreshing and fun. In her travels around Mexico she visits interesting spots and focuses on real people, fishermen, cooks on street stands, farmers, I always learn something new. Come to think of it she is the antithesis of Giada in her current show on FoodTV. I keep losing my enthusiasm for Giada, more and more, due to her excessive focus on Hollywood-style glamour. Hosting a fashion dinner on the rooftop of the Prada store in Firenze, with chamber music playing and wearing a Dolce & Gabbana dress?  The whole time acting all matter-of-fact about it?  It’s a bit much for me…  But, back to Pati. This cake is a cinch to make, tastes wonderful, and is superb with a cup of coffee. Try it, and you will love it.

FLOURLESS CHOCOLATE PECAN CAKE
(from Pati Jinich)

1/4 cup  (56 g) unsalted butter plus 1 tablespoon for buttering the pan
6 ounces bittersweet chocolate
1 cup  (125 g) pecans
6 large eggs
1 teaspoon vanilla extract
1 cup (200 g) sugar
Pinch of kosher or coarse sea salt
confectioners’ sugar

Heat oven to 350°F. Butter a 9-inch springform pan and line bottom with parchment paper.

Melt the chocolate and the 1/4 cup butter in a microwave at 50% power for a couple of minutes, stirring after one minute. Set aside to cool.

Using a blender, chop the pecans finely. If you have a Vitamix, it will take about 30 seconds, do not let it turn into pecan butter. Add the eggs, vanilla, sugar, salt and melted chocolate mixture, blending until smooth. Pour the batter into the buttered springform pan and bake until a toothpick inserted in center comes out moist but not wet, about 40 minutes.

Once it has cooled a little, run the tip of a knife around the pan and release the cake from the pan. Invert onto a plate, and then again, or serve directly onto plates if left on bottom part of springform pan. Sprinkle with confectioners’ sugar and serve.

ENJOY!

to print the recipe, click here

Comments: This is by far the easiest cake ever to make. Perfect to bake with kids, since it will be ready in minutes with the help of a blender. Pour the batter into the pan, and you are done. It is very moist, the pecans giving it a perfect additional flavor that matches the chocolate quite well. It has of course the added benefit of being gluten-free, so if you bake for someone with gluten sensitivities, it is a must-have in your repertoire.

I took it to our department and it was a huge hit with everyone who arrived early enough on that Monday to enjoy a piece.  Pati says in her show that she’s been making this cake for many years, it is a favorite with her family. Once you baked it, you’ll see why. Simple, no fuss, sweet but not over the top, rich but not too extravagant. My favorite type of dessert.

ONE YEAR AGO: A Tale of Two Macarons

TWO YEARS AGO: Chocolate Chip Shortbread Cookies

THREE YEARS AGO: Chicken in Green Pipian Sauce, Sous-vide Style

FOUR YEARS AGO: Classic Shrimp Gobernador Tacos

FIVE YEARS AGO: A Walk Towards the Sunset

SIX YEARS AGO: In My Kitchen

SEVEN YEARS AGO:  Heavenly Home-made Fromage Blanc

EIGHT YEARS AGO:  A Perfect Sunday Dinner


SaveSave

SaveSave

SaveSave

SaveSave

SaveSave

SaveSave

SaveSave

SaveSave

SaveSaveSaveSave

SaveSave

SaveSave

MIMI’S STICKY CHICKEN, A CALL FROM MY PAST

Paleo-friendly, low-carb & delicious!

Many years ago I used to visit a cooking forum that is long gone. One recipe was a big hit with many of the members: Mimi’s Sticky Chicken. I admit the name is not very sexy, but once you’d read the many stellar reviews, you’d be inclined to disregard the sticky issue and give it a try. Over the years, that exact recipe has been published in websites everywhere, credit not always given to the author. So, without further ado, here you have the original link. I tried to find out Mimi’s whereabouts, but my search skills returned nothing.  As you can see in the link, she created this recipe in the early 80’s, and asked for full credit whenever someone talked about it. It’s only fair.  I used to make it quite often when I was dating Phil and during the early years of our marriage, as the kids absolutely loved it. For some reason, I forgot all about it. It’s been definitely more than a decade since I last had it on our table. But to compensate, I made it twice in the last month. HA!

MIMI’S STICKY CHICKEN
(modified from the original version found here)

2 teaspoons salt
1 teaspoon paprika
1/2 teaspoon cayenne pepper
1/2 teaspoon onion powder
1/2 teaspoon thyme
1/2 teaspoon black pepper
1/4 teaspoon garlic powder
1 whole roasting chicken, about 3 pounds
1 shallot, cut in half
1 lemon, cut in quarters

Combine all spices  in a small bowl. Dry chicken very well, rub the spice mixture over skin and sprinkle a little inside the cavity.  Place in a bag or in a bowl, covered with plastic wrap, and refrigerate overnight.

Heat the oven to 250F. It is not a typo. It is a very low oven.  When ready to roast, stuff the cavity of the chicken with the shallots and lemon. Place it breast side down in a roasting pan (I like to use a small rack to keep it elevated, spraying the rack with olive oil to prevent the skin from sticking to it).

Cook for about 5 hours, or until the internal temperature reaches 155 F. Baste occasionally after the first two hours, with the liquid that starts to accumulate in the roasting pan.

If you like to crisp up the skin, carve the chicken in pieces and place under the broiler briefly. It will falling apart, so handle it gently.

ENJOY!

to print the recipe, click here

Comments: Amazing how something we loved so much could end up neglected for years. Two things I’d like to bring up: first, if you don’t have time to refrigerate the bird overnight with the spice mixture, don’t worry, just go ahead with it right away. Second, if you are not around to baste the chicken, it won’t be a serious drawback. When ready to serve, baste a little with the roasting liquid, and go for that brief encounter with the broiler. On your first time making this recipe,  it would be nice to check the temperature and see if after 4 hours the meat is already approaching 155F. If it is, don’t leave it all the way to the five-hour mark. Once you get to know how your oven behaves, you can trust the timing a bit more. Make sure to always roast a chicken of similar size.

As I mentioned before, once the meat is cooked, it will be falling apart. Note in the picture below how the bone broke through the skin.


I also like to squeeze the roasted lemon all over the chicken right before serving, and sometimes will grab a fresh one to make sure to get that extra bite of acidity that goes so well with it.


Dinner is served: Mimi’s Sticky Chicken,
Pan-Steamed Broccoli, and Roasted Butternut Squash… 


Add to FacebookAdd to DiggAdd to Del.icio.usAdd to StumbleuponAdd to RedditAdd to BlinklistAdd to TwitterAdd to TechnoratiAdd to Yahoo BuzzAdd to Newsvine

ONE YEAR AGO: Perfect Soy-Grilled Steak

TWO YEARS AGO: The Devil’s Bread

THREE YEARS AGO: Heart of Palm Salad Skewers

FOUR YEARS AGO: Potluck Frittata and Lavoisier

FIVE YEARS AGO: Home-made Corn Tortillas

SIX YEARS AGO: Whole-Wheat Spaghetti with Peanut Sauce

SEVEN YEARS AGO: Brigadeiros: A Brazilian Party!

EIGHT YEARS AGO: Lemony Asparagus