
 Today I have a special post for you! We are throwing a virtual baby shower for a great food blogger I got to know through the Secret Recipe Club, Tara, from Tara’s Multicultural Table. We are all baking biscotti for this party. Why biscotti, you may ask? Well, it is her second baby, and these are twice baked cookies: a natural choice! Wanna see what I came up with? Here they are:

I was quite excited to participate, because – believe it or not – I’d never made biscotti from scratch. But first, let me share a story. My first time enjoying biscotti was in 1991, during a visit to Italy. The best possible place to get acquainted with this delicacy, if you ask me. I had given a seminar in a big vaccine biotech company, and they took me out for a fantastic dinner later that evening. After dinner, where vino was flowing freely, someone insisted that we should all head to a bar so that I could try biscotti dunked in grappa. I knew nothing about either entity, but quickly realized that they complement each other perfectly. The biscotti are hard, but the grappa softens it. And the sweetness of the biscotti masks quite well – maybe too well – the alcohol in the grappa. Of course, after dunking, you’re supposed to drink the leftover grappa with the little tiny bits of biscotti that found their way to the bottom of the glass. Great food, vino, grappa, all framed by the beauty of Tuscany! Good thing I had already given my talk at that point, and was in full “dolce far niente” mode. At any rate, it was a magical evening. I remember a complete sense of awe as I walked back to my hotel under the most amazing full moon shining over the streets of Siena. One of those perfect moments that stay with you forever. Since biscotti are so dear to my heart, I spent quite a bit of time debating which kind to bake for Tara’s baby shower. Of course, keeping it all baby-friendly, I’ll ask you to skip that dunking in grappa. Unless there’s a full moon outside, then all bets are off… 😉
MAPLE WALNUT BISCOTTI
(from Susan Russo, for NPR)
Makes about 36 biscotti
for the biscotti:
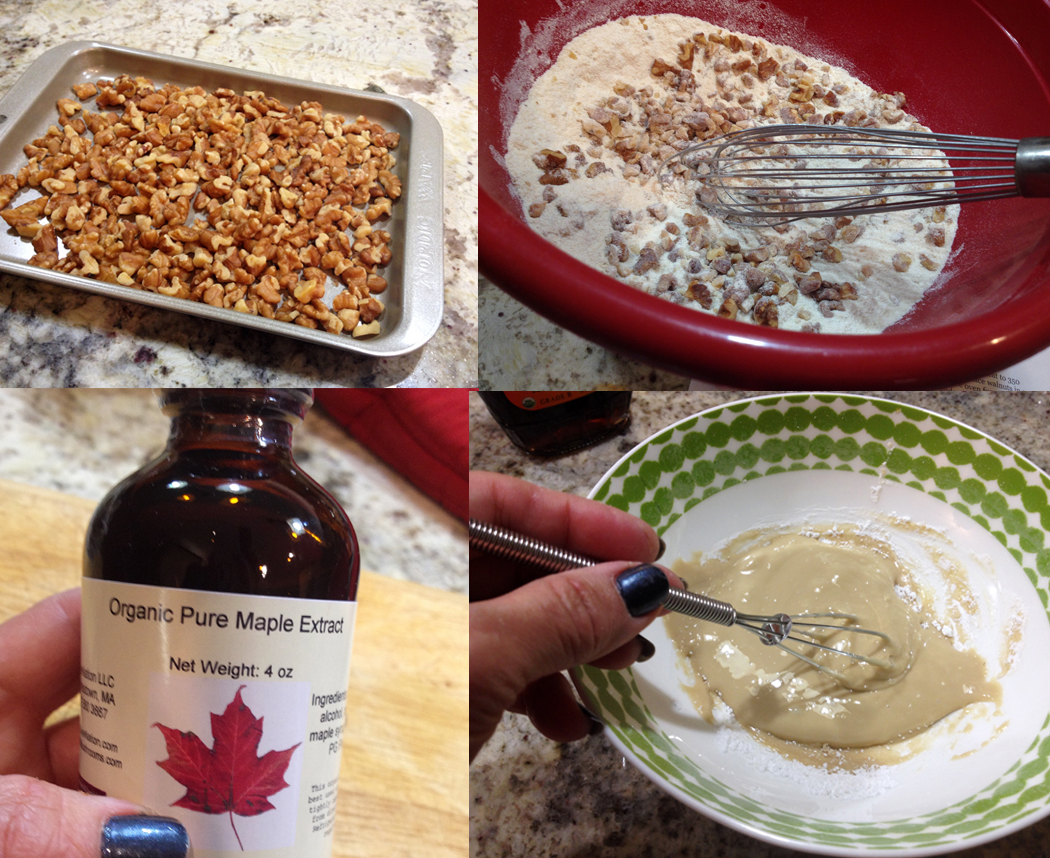
2 cups unsalted walnuts
1 cup granulated sugar
1 cup light brown sugar
1/2 teaspoon ground cinnamon
2 teaspoons baking powder
2 1/2 cups all-purpose flour
2 large eggs, plus 1 egg, lightly beaten, for brushing tops of loaves
3 tablespoons maple extract
for the icing:
1/2 cup confectioners’ sugar
3 tablespoons maple syrup
Position racks in the upper and lower thirds of the oven and preheat to 350 degrees. Line 2 large baking sheets with parchment paper. Place walnuts in a single layer on a baking sheet and toast in the 350-degree oven for 10 minutes. Transfer to a cutting board and coarsely chop. Set aside.
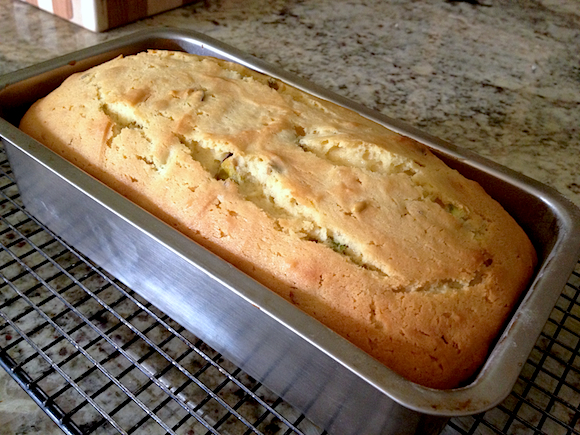
In a large bowl, hand mix toasted walnuts, sugars, cinnamon, baking powder and flour. In a small bowl, whisk eggs. Add maple extract and whisk until well blended. Add to the flour mixture. Stir a few times. Work the batter together with lightly floured hands. Keep squeezing the batter with your hands, until a dough starts to form. Shape as a ball and divide it into 4 equal pieces.
On a lightly floured surface, place one piece of dough, and using your hands, roll into a log shape that is approximately 8 inches long, 2 inches wide, and 3/4 of an inch high. If it’s sticky, simply dust your palms with more flour. Repeat with remaining three pieces of dough. Brush loaves all over with 1 lightly beaten egg.
Bake for 40 minutes, rotating pans halfway through, or until the tops of the loaves are shiny and deep golden. Cool on a rack for about 20 minutes before slicing, using a large serrated knife. Cut 3/4-inch-thick slices, using a sawing motion to prevent crumbling. Each loaf should yield 9 to 11 cookies.
Place slices on their sides back on to the baking sheets; place in the still warm oven with the temperature off and the door closed for 30 to 60 minutes. The longer they stay in the oven, the harder they will become. Remove from oven and cool completely before storing in an airtight container.
To make the maple icing, mix the confectioners’ sugar and maple syrup in a small bowl and whisk briskly until the icing is smooth and opaque and clings to the back of a spoon. Dip a teaspoon into the icing and drizzle the spoon back-and-forth over the biscotti. Allow to dry completely before storing. Store biscotti in an airtight container, preferably a tin, which helps keep them crisp.
ENJOY!
to print the recipe, click here
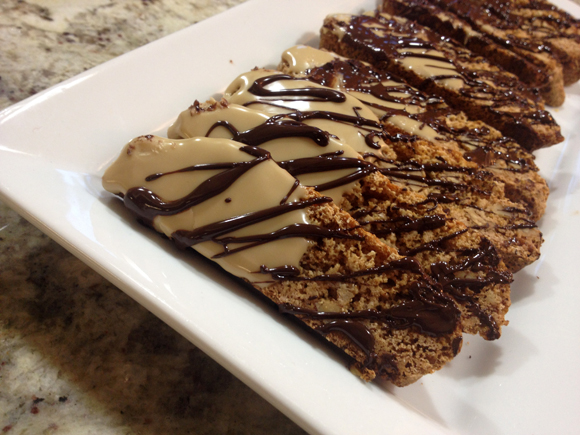
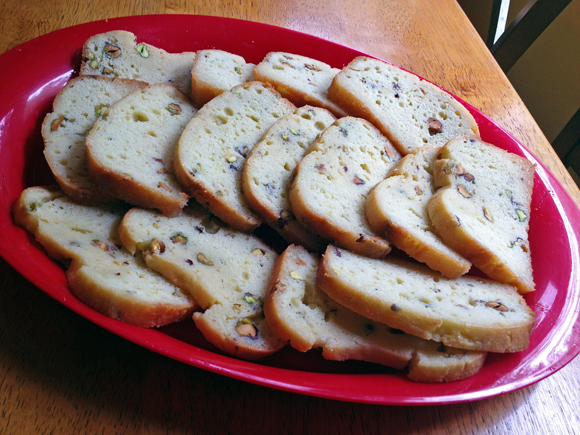
Comments: I was a bit nervous about this baking adventure, because I know that biscotti can be tricky to make, and that very few things are worse than bad biscotti, right? I fell in love with the flavors of this recipe because anything with maple makes me all warm inside, and walnuts only make it better. I suppose most people go crazy for chocolate, but I usually opt for other flavors in sweets. The recipe called for maple extract, because it has a more concentrated flavor, so I was “forced” to place an order for some. It smells amazing!
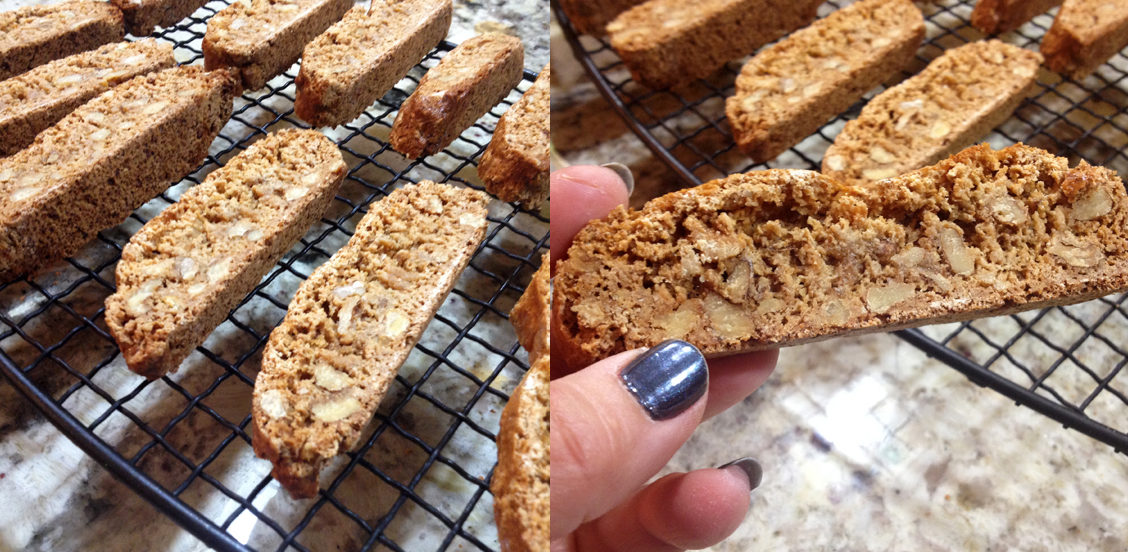
One of the tricky things about biscotti is slicing them after the first bake. You are supposed to wait for 20 minutes, and use a good quality serrated knife for the job. Worked great, I had no problems. By the way, I made half the recipe, and ended up with 18 biscotti, some quite small, cut from the edges. They are also called “sacrificial biscotti”. Honest. Not making that up.
I went for a double type of icing, the maple called for in the recipe, and then a drizzle of chocolate for cosmetic purposes. But, after tasting them, I do think the chocolate drizzle did more than beautify them. The taste complements the maple and walnuts quite well.
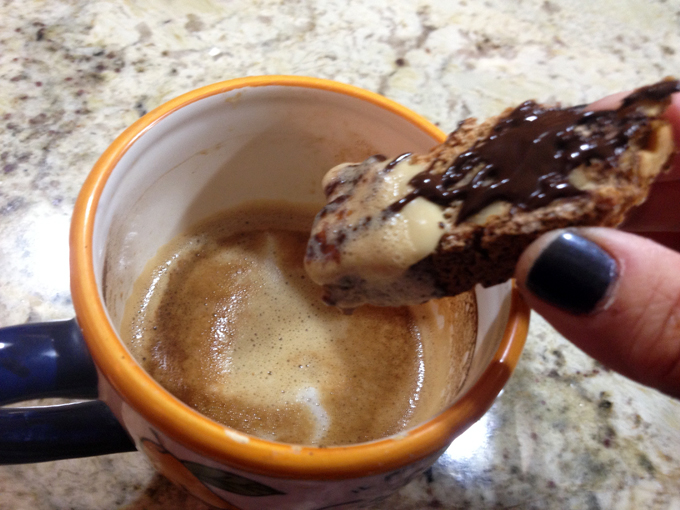
Now that I am older, not necessarily wiser, I dunk my biscotti into a steaming hot cup of cappuccino… Great way to start any day!
Tara, I hope this virtual Baby Shower brought a big smile to your face, we certainly had a great time planning and making sure it was kept secret until today…
And here I share the collection of biscotti from all virtual secreters who joined this party:
Biscotti Bites from Nicole at I am a Honey Bee
Blueberry Pecan Biscotti from Renee at Magnolia Days
Cinnamon Biscotti from Lauren at Sew You Think You Can Cook
Cranberry Pistachio biscotti from Stacy at Food Lust People Love
Dark Chocolate Orange Biscotti from Amy at Amy’s Cooking Adventures
Green Tea Biscotti Cookies from Rebekah at Making Miracles
Jam-Filled Mandelbrot from Kelly at Passion Kneaded
Maple Walnut Biscotti from Sally at Bewitching Kitchen
Nut-Free Anise Biscotti with Chocolate Chips from Susan at The Wimpy Vegetarian
Orange and Dark Chocolate Biscotti from Lynsey at Lynsey Lou’s
Orange, Date, and Almond Biscotti from Karen at Karen’s Kitchen Stories
Parmesan-Peppercorn Biscotti from Camilla at Culinary Adventures with Camilla
Spa Water from of Dorothy at Shockingly Delicious
ONE YEAR AGO: Barley Risotto with Peas
TWO YEARS AGO: Oatmeal Fudge Bars
THREE YEARS AGO: Cauliflower Steaks
FOUR YEARS AGO: Soft Spot for Chevre
FIVE YEARS AGO: Quick sun-dried Tomato Crostini


