ALMOND BUTTER CAKE

My dear friend and baker extraordinaire Heather wrote me an email a couple of weeks ago saying that she baked a delicious cake and thought I should give it a try because it was simple (in other words: Sally-proof) but quite flavorful.  What is simple for Heather, is not necessarily simple for me, but when I read the recipe, I noticed that it did not have that scary “cream sugar with butter”  step.  Cautiously optimistic, I gave it a try. Indeed, this was one of the easiest cakes I’ve ever made, and each bite seemed to taste better than the previous one.   Heather adapted the  recipe  from the winning entry in a C&H Sugar Baking Contest years ago.
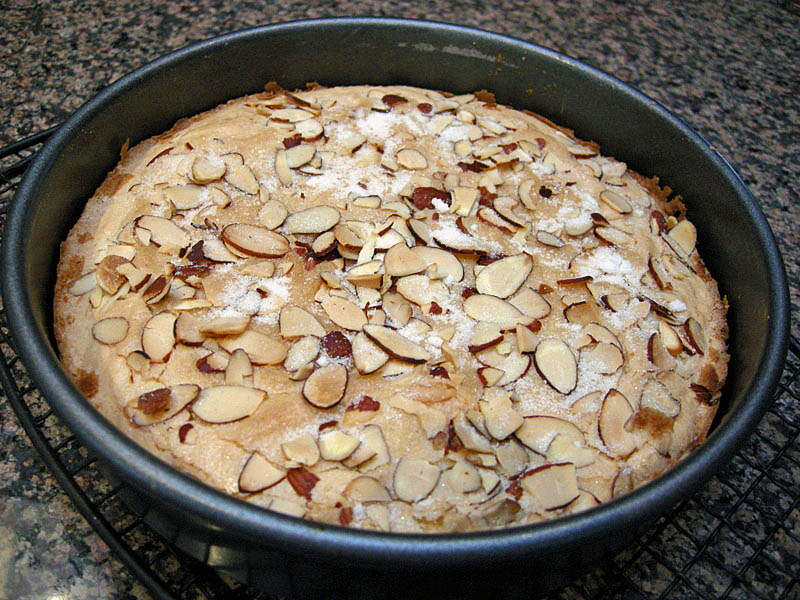
ALMOND BUTTER CAKE
(from Heather’s kitchen)

½ C butter, melted
1 + ½ C sugar
2 eggs
1 tsp almond extract
1 + ½ tsp vanilla
¼ tsp salt
1 + ½ C flour
¼ C sliced almonds, lightly toasted
1 tablespoon sugar

Preheat oven to 350. Butter and flour a 9” round pan.

Beat sugar and melted butter together, add eggs and flavorings and beat well. Add salt and flour and mix just until blended.  Spread in pan, sprinkle with sugar and almond slices.

Bake 30 to 35 minutes – it is better not to over-bake, so use a toothpick to test it, and as soon as it comes out almost clean, the cake will be ready.  Cool on a rack for 15 minutes before unmolding it.

ENJOY!

to print the recipe, click here

Comments: I served this cake next to strawberries and blueberries macerated with a small amount of sugar, and a dusting of powdered sugar on top, as suggested by Phil. Perfect indeed, the fruit went very well with the almond flavor and the tenderness of the cake. Sorry, no pictures of the sliced cake, often when we have guests I don’t feel like grabbing a camera and taking photos. Even served plain, this cake would shine next to a cup of tea on a sunny afternoon.

ONE YEAR AGO: Taillevent (a meal that shall never be forgotten…)

Add to FacebookAdd to DiggAdd to Del.icio.usAdd to StumbleuponAdd to RedditAdd to BlinklistAdd to TwitterAdd to TechnoratiAdd to Yahoo BuzzAdd to Newsvine

SATURDAY MORNING SCONES

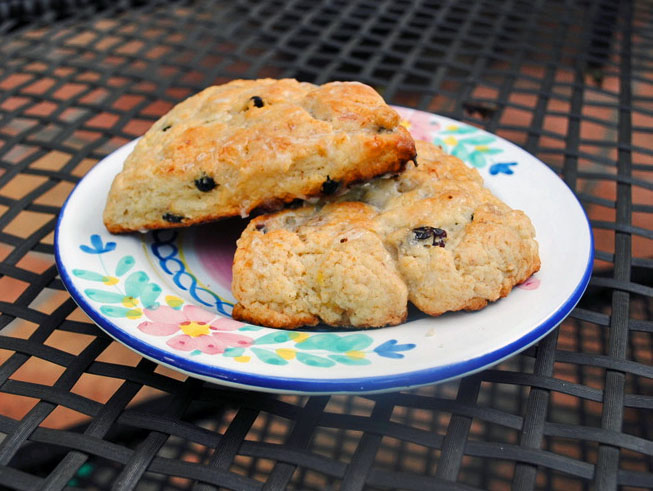
Scones and bran muffins have something in common: they often make a bad first impression.  Indeed, my first scone experience was over 10 years ago, and I’ve avoided them ever since.  I had no intention of ever baking a batch, but a series of events made me reconsider.  First, I saw this post at Lisa’s blog, which peaked my interest.  Then, a few days later some friends raved about banana scones from the latest Fine Cooking.  Any hope of removing scones from my mind were shattered when I asked Phil what I should make for our Saturday post-run breakfast?   “How about some blueberry scones?” …was his response. The path of least resistance was beckoning, and I veered that way.

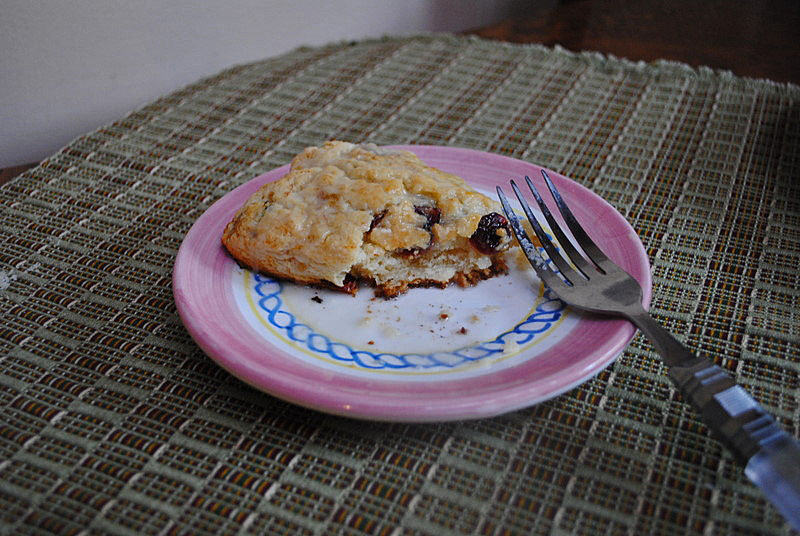
LEMON-GLAZED BANANA-BERRY SCONES
(adapted from Fine Cooking)

9 oz. (2 cups) all-purpose flour
1/4 cup granulated sugar
2-1/4 tsp. aluminum-free  baking powder
zest of 1 Meyer lemon
3/8 tsp. table salt
5-1/2 Tbs cold unsalted butter, cut into pieces
1 small ripe  banana, cut into 1/4-inch dice (1/2 cup)
1/2 to 3/4  cup dried blueberries and cranberries
3/4 cup plus 2 Tbs. heavy cream; more for brushing
For the glaze
3 oz. (3/4 cup) confectioners’ sugar
1-1/2 Tbs. fresh Meyer lemon juice
1 Tbs. unsalted butter, softened
pinch of salt

Heat the oven to 375°F.

In a large bowl, whisk the flour, sugar, baking powder, lemon zest, and salt. Rub the pieces of butter into the flour mixture using your fingers until a few pea-size lumps remain. Stir in the banana and the dried fruits. Add the cream and stir the mixture with a fork until it comes together.

Turn the dough onto a lightly floured surface and pat gently into a 7-inch circle about 1 inch high. Cut the dough into 8 wedges. Transfer to a baking sheet lines with parchment paper, allowing 1 inch of space between the scones.  Brush the tops with heavy cream and bake until the tops are golden and they feel firm to the touch – 20 to 25 minutes.  Cool slightly on a wire rack before glazing.

To make the glaze, mix the confectioner’s sugar, lemon juice, butter, and salt, stirring until completely smooth.  Drizzle the warm scones and serve them warm or at room temperature.

ENJOY!

to print the recipe, click here

Comments: The original recipe called for bananas and crystallized ginger. I’m   insecure about changing baking recipes, especially the first time making them.  However, being married to an incorrigible optimist helps a lot. ” Just skip the ginger and add the blueberries, it will be fine.” As I was preparing the ingredients he dug out a bag of dried cranberries and handed it to me: “…here, add these babies too, they’ll be some awesome scones”!

Well, he was right.  The scones were delicious!  Moist, flavorful, with a delicate banana flavor that although not pronounced,  was definitely noticeable.  The lemon glaze pumped them up another notch, so don’t skip it [yet another delicious use for those Meyer lemons.  ;-)]

ONE YEAR AGO: Pain de mie au levain

Add to FacebookAdd to DiggAdd to Del.icio.usAdd to StumbleuponAdd to RedditAdd to BlinklistAdd to TwitterAdd to TechnoratiAdd to Yahoo BuzzAdd to Newsvine

BRAN MUFFINS: NOT JUST FOR HIPPIES

Ever since I started dating Phil he spoke fondly about a bran muffin that he enjoyed on a regular basis at Hans’ Danish Bakery in Berkeley (it closed years ago), during his grad student, “hippie days.”  At that time (while living in Brazil and not quite a teenager) I watched the hippie movement from afar, too young to embrace or fully understand it.  Never in a gazzilion years could I imagine that one of those long-haired, tie-dyed,  war-protesting, head-banded hippies would become my husband.   We didn’t meet until decades later, but the passion for peace and love,  tie-dyes, and hippie ideals are still in-force around our home, and that includes a fondness for  bran muffins!   No sense quitting what makes us happy. 😉

Nevertheless, my attempts to recreate the famous bran muffin from Berkeley were stuck on a road paved with failure and frustration, until this past weekend my luck began to change. I went to Dan Lepard’s collection of recipes at The Guardian in search of his take on the elusive bran muffin, and adapted his recipe to suit my favorite hippie’s finicky taste.

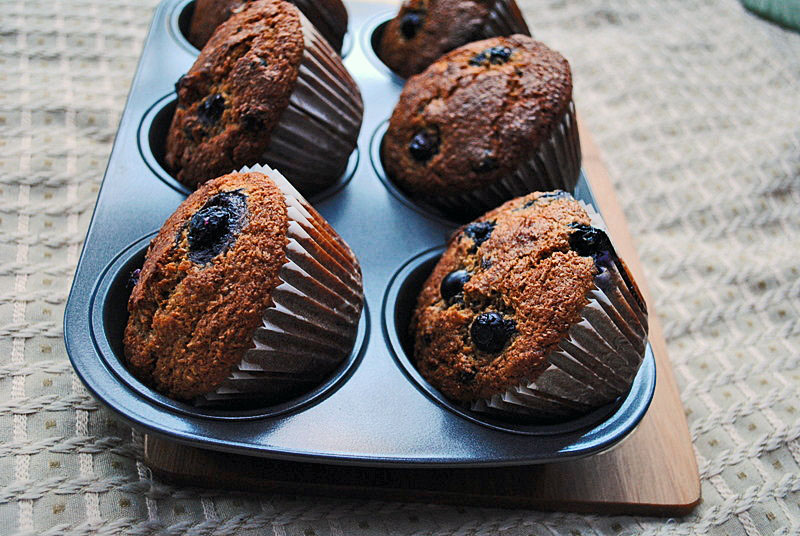
BLUEBERRY-WALNUT BRAN MUFFINS
(adapted from Dan Lepard’s original recipe)

75g wheat bran
100g dark brown sugar
200ml milk (3/4 cup)
1 Tbs molasses
zest of 1 orange
150ml vegetable oil (1/2 + 1/8 cup)
2 large eggs
200g all purpose flour
3 tsp baking powder
75g sugar
pinch of salt
1/2 cup fresh blueberries
1/2 cup dried raisins and dried blueberries
1/2 cup walnuts, lightly toasted and chopped

Heat the oven to 400F (200C)  and line the cups of 6 large muffin tins with paper.

Place the wheat bran and the brown sugar in a mixing bowl.  Bring the milk almost to a boiling point, and pour it over the bran. Mix to incorporate, and allow it to sit for 5 minutes.  Beat in the molasses, orange zest, oil and eggs until very smooth.

Sift the flour, baking powder, sugar, and salt, then gently mix this through the bran mixture trying not to over-mix.  Fold in the blueberries, raisins, dried blueberries, and walnuts.  Spoon the mixture into the prepared muffin tin, and bake for about half an hour, until they get a dark brown color on top and feel firm to the touch.  Tip the muffins slightly off the pan to cool them without steaming the bottom.

ENJOY!

to print the recipe, click here

Comments:  Because some people find them too dense or dry, almost austere, bran muffins are not everyone’s favorite.  But, these muffins are different, starting with their nice texture, and finishing with a great balance of whole grain flavor and sweetness. I dare saying that they will please even a hard core anti-bran person.   They received a nod of approval from the resident muffin-connoisseur, who said the main difference between these and those in his memory was the orange flavor, which is pronounced in Dan’s recipe.  Not that there’s anything wrong with that… 😉  But my next batch will  omit the orange zest.

I already smell the fireworks…

ONE YEAR AGO: Flourless Chocolate Cake (a chocolate lover’s dream come true)

Add to FacebookAdd to DiggAdd to Del.icio.usAdd to StumbleuponAdd to RedditAdd to BlinklistAdd to TwitterAdd to TechnoratiAdd to Yahoo BuzzAdd to Newsvine

NO-FUSS COFFEE CAKE

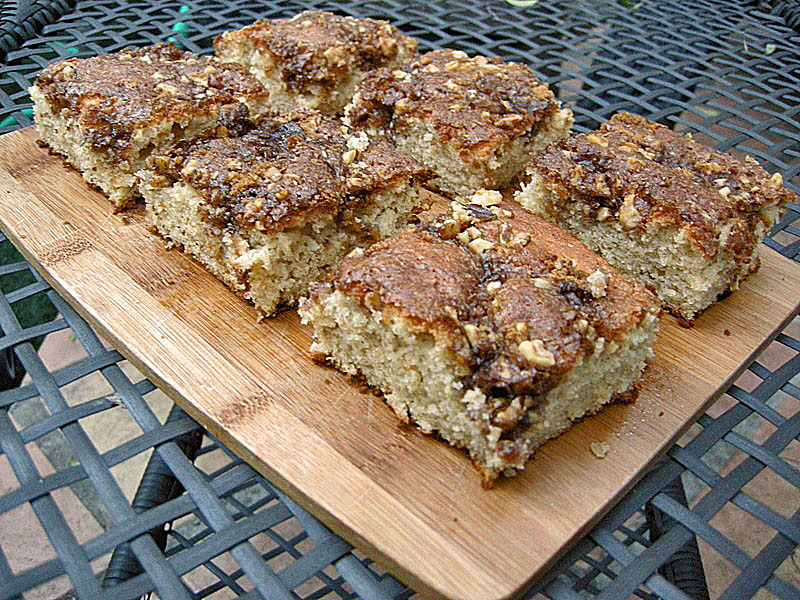
King Arthur promised and delivered again: a coffeecake so easy to make that even a cake-challenged as myself can do it without problems.  One of the things I loved about this recipe was the fact that I could prepare the cake the day before, stick it in the fridge, and bake next morning. By the time our lab meeting started, the cake was at its peak, barely warm, very moist and tender.

NO-FUSS COFFEECAKE
(adapted from King Arthur Flour’s blog)

12 tablespoons (1 + 1/2 sticks) butter (plus a little more for greasing the pan)
1 cup granulated sugar
1/2 cup dark brown sugar, firmly packed
1 teaspoon baking powder
1/2 teaspoon baking soda
3/4 teaspoon salt
1 teaspoon ground cinnamon
1 teaspoon vanilla extract
2 large eggs
2 cups all purpose flour
1 cup low-fat yogurt

For the topping:
1/2 cup dark brown sugar, firmly packed
3/4 cup chopped walnuts  
3/4 teaspoon ground cinnamon

Prepare a baking pan (9 x 13 inch) by lightly greasing it with butter. In a large mixing bowl, beat together the softened butter, sugars, baking powder, baking soda, salt, cinnamon, and vanilla extract, mixing until smooth.  If you are starting from very cold butter, place it in the microwave for 20 seconds, and proceed with the recipe, it will be perfect to mix with the dry ingredients.

Add the eggs one at a time, beating well after each addition. Add the flour and the yogurt (one third at a time, alternating flour and yogurt),  stirring to combine after each addition. Spoon the batter into the prepared pan.

Make the topping by combining  the brown sugar, nuts,  and ground cinnamon in a small bowl, stirring to combine. Sprinkle the topping over the batter in the pan, cover it with plastic wrap, and refrigerate overnight.

Next morning, take the cake out of the refrigerator, remove the plastic wrap, and bake it in a 350 F oven for 40 to 45 minutes, until golden brown on top, and a toothpick inserted in the center of the cake comes out clean. Cool it briefly before serving.

ENJOY!

to print the recipe, click here

Comments: The original recipe called for a bit more brown sugar in the topping (3/4 instead of 1/2 cup), and also the optional addition of 1 full cup of chips (chocolate, butterscotch, or cinnamon).  I am glad I reduced the amount of brown sugar (and omitted the chips) because the cake was at the limit of my tolerance for sweetness.  If you have a real sweet tooth, go for the kill and follow the recipe as published.

The King Arthur’s blog is an amazing source of information for all things baking: cakes, breads, muffins, pies, cookies…   If you don’t know that site yet, I highly recommend a visit.  Followed by a bookmark, and many return visits!   😉

ONE YEAR AGO: Swedish Limpa

Add to FacebookAdd to DiggAdd to Del.icio.usAdd to StumbleuponAdd to RedditAdd to BlinklistAdd to TwitterAdd to TechnoratiAdd to Yahoo BuzzAdd to Newsvine

THE ULTIMATE APPLE CAKE

Cover of "Around My French Table: More Th...

Cover via Amazon

For someone who’d rather go to the dentist than bake a cake, making the same cake two weeks in a row means:

– the cake is fool-proof;

– the cake is awesome.

Awesome indeed! It’s a bunch of diced apples surrounded by a few dollops of cake batter, that puffs and gently envelopes each piece of fruit, resulting in a dessert that’s a cross between cake and clafoutis.  Very French, very elegant, just enough decadence to turn your afternoon tea into a four-star event.

The recipe comes from a cookbook that’s been on my wish list at amazon.com since it’s released: Dorie Greenspan‘s Around my French Table.   It’s just a matter of time until I move the book to my shopping cart, the reviews are stellar!

MARIE HELENE’s APPLE CAKE
(from Dorie Greenspan)

3/4 cup all-purpose flour (110g)
3/4 tsp baking powder (about 3.75 g)
pinch of salt
4 large apples (any kind you like, mix and match)
2 large eggs
3/4 cup sugar (145g)
3 Tbs rum (or apple schnapps, or Calvados)
1/2 tsp vanilla extract
1 stick butter, melted and cooled (115g)

Heat the oven to 350F.  Butter a 8-inch springform type pan with butter and set aside.

Peel and core the apples, cut them roughly in 1 inch chunks. Reserve.

In a small bowl, mix the flour, baking powder, and salt.   In a large bowl, beat the eggs with a whisker until frothy, add the sugar and whisk until smooth.
Add the rum, vanilla extract, and mix well.  Add half of the flour mixture, mix until fully incorporated, pour half of the butter and whisk to combine.   Add the rest of the flour, then the rest of the butter.

Pour the thick batter over the apples, and use a silicone or plastic spatula to mix them gently, trying to cover each piece with some of the batter.   The mixture will seem too thick, and you will be tempted to use less apples.  Do not.  Trust Dorie. Pour the mixture in the prepared pan, use a fork to level the apples as much as possible, but don’t worry too much about it.

Bake for 50 to 60 minutes, until golden and a cake tester comes out clean when inserted at the center of the cake.  Remove the pan to a rack and let it cool for 5 minutes before opening the sides.

ENJOY!

to print the recipe, click here

Comments: The first time I baked this cake, I didn’t use all the apples because it seemed impossible to coat them all with the batter.  I realized my mistake when I witnessed how much the batter puffed up during baking.  On my second attempt, I used all the apples, and substituted apple schnapps for rum. We both liked the schnapps version better.  A friend of mine used Calvados and also preferred it to rum.  Either of those liquors reinforce the apple flavor. Next time I might add a little cinnamon to the batter, but this cake is pretty close to perfection as it is.

ONE YEAR AGO: Trouble-free Pizza Dough

Add to FacebookAdd to DiggAdd to Del.icio.usAdd to StumbleuponAdd to RedditAdd to BlinklistAdd to TwitterAdd to TechnoratiAdd to Yahoo BuzzAdd to Newsvine