FEASTIE: A SEARCH ENGINE JUST FOR RECIPES

If you are like me, and suffer from CRCD (Compulsive-Recipe-Collection-Disorder),  you probably use Google to find recipes in the blogosphere. Did you know that cooking recipes account for 1% of all online searches? That is pretty impressive!  It is not surprising that earlier this year Google came up with their own version of a search engine geared exclusively for recipes.  However, it has serious drawbacks, particularly from a food blogger’s perspective, as it favors “mega-sites” to show up on top of the search. If you are interested in learning more about it,  read the excellent article written by Lydia Walshin, a veteran food blogger, host of The Perfect Pantry and  Soup Chick.

Recently I was introduced to Feastie, a new search engine for recipes (with a nice blog associated with it), and was very pleased with it.  When you enter a keyword in their search box, the output is in a beautiful format, with photos of the recipes and links to the food blogs where they were found.  But, as a bonus, once you click on a particular recipe, you’ll also see all the ingredients required to make it, ready to take to the grocery store (you can even save it straight on your phone).  Another great feature added this past week: if you cook a recipe listed on the site, a simple click on a chef’s hat icon gets it added to your profile, so that you can retrieve it easily in future visits.   You can read more about it here.

Much to my delight, the recipes from Bewitching Kitchen are all indexed in Feastie, so if you’d like to see them in a format that is quite a bit better than my own index page, click here.  I had a small rush of adrenaline when I first saw it!

If you are a food blogger and would like to see your site listed on Feastie, drop them a line at recipes@feastie.com.   And no, I don’t work for them.  By now I guess it’s clear I only endorse what I’m really fond of.  From cookbooks, to gadgets, to cookbook authors (Dan Lepard comes to mind!  ;-))…
A HIGH PROTEIN LUNCH

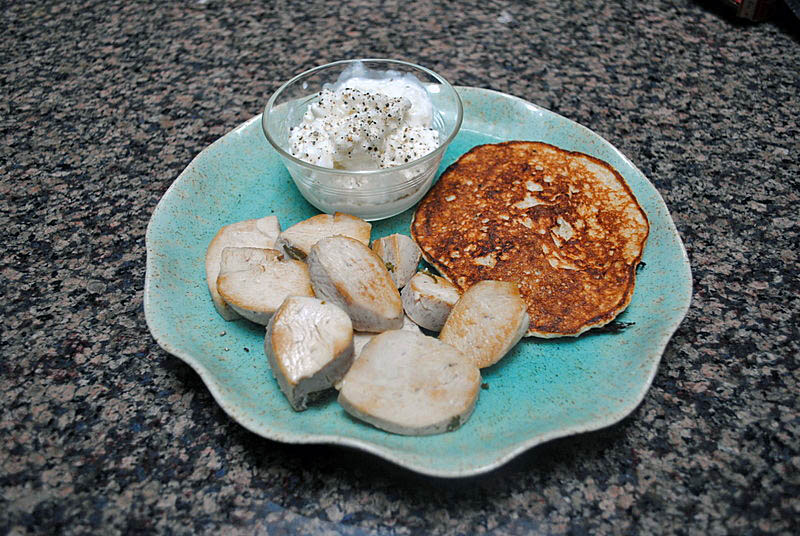
I could call it “my secret weapon”  to  counteract usual over-indulgences. Back in June, I bought  the  book   “The Dukan Diet” and tried that nutritional system for a while. I found out that I really like his oatmeal galette, a nice source of protein and complex carbs that became part of my weekday lunches.  The galette can also be adapted for breakfast by omitting the salt, pepper and spices, and adding a little Splenda or the sweetener of your choice.

HIGH PROTEIN LUNCH
(from the Bewitching Kitchen)

for Dukan-type pancake
1 egg white
2 Tbs non-fat yogurt
2 Tbs oatmeal
salt and pepper
pinch of dried thyme

for chicken
chicken breasts, boneless
water to cover
splash of soy sauce
1 Tbs green tea
2 star anise
a few peppercorns
piece of ginger
salt
squeeze of lemon juice

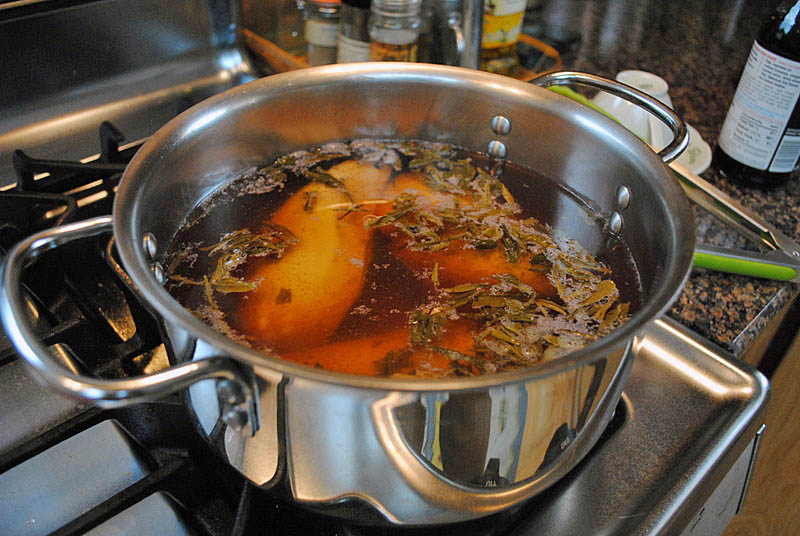
Poach the chicken by bringing all ingredients to a gentle boil in a saucepan, cover the pan, turn the heat off, and allow the meat to sit in the liquid for 25 minutes.  Remove from the pan, and keep in the fridge until needed (I usually cook 3 chicken breasts on the weekend, and save for lunches the following week).

Make the pancake by beating the egg white in  a small bowl.  In another bowl, mix the yogurt with the oat bran, salt, pepper, and thyme.  Add the beaten egg white to the yogurt, and mix gently with a silicone spatula.   Spray a very light coating of olive oil on a non-stick frying pan, heat the pan over medium heat, and pour the pancake batter on it.  Fry the first side until the top seems to be getting dry, then carefully flip the pancake over. Cook the second side for a couple of minutes, and slide the pancake on a plate.

Cut the chicken breast in slices, add to the same pan you cooked the pancake, adding just a little more oil if necessary.   Saute the chicken slices briefly just to warm them up and get some color.  A squeeze of lemon juice at the end brightens up the flavor. Serve it with the pancake and a small bowl of non-fat cottage cheese, seasoned with salt and pepper.

ENJOY!

to print the recipe, click here

I love poaching chicken in green tea and soy sauce.  The  meat gets a delicate hint of color, and the addition of ginger and star anise imparts nice flavor.   You can use chicken poached this way in other recipes, of course.  Shredded for salads, filling of fajitas, or even incorporated in a sauce for pasta.   As to non-fat cottage cheese,  I admit it’s not very gourmet…  The low-fat version is better,  the full-fat truly delicious, but when I’m on my protein-only mission, I stick with the zero fat, and use it to build not only muscle, but character.   😉

ONE YEAR AGO: Festivus Dinner Rolls

TWO YEARS AGO:  New York Deli Rye

Add to FacebookAdd to DiggAdd to Del.icio.usAdd to StumbleuponAdd to RedditAdd to BlinklistAdd to TwitterAdd to TechnoratiAdd to Yahoo BuzzAdd to Newsvine

CELEBRATE WEDNESDAY WITH PLUM-GLAZED DUCK BREASTS

It wasn’t our wedding anniversary, nor his birthday, nor mine. Valentine’s Day won’t arrive for a couple of months.  It was just a simple Wednesday, stuck in the middle of a frantic week with the usual extra-struggles after traveling for a while.  But, I wanted a special dinner for us, just for the fun of it.  Duck breast filets (maigret de canard sounds even better… ;-)) are very easy to prepare, although potentially intimidating if it’s your first time to cook them.  A recent issue of Fine Cooking had a recipe with plum preserves to form a saucy glaze, perfect with the duck meat, that shines with a little sweetness and a little spice.


PLUM-GLAZED DUCK BREASTS
(from Fine Cooking magazine, October 2011)

2 boneless, skin-on duck breast halves
Kosher salt and black pepper
1/2 cup plum preserves
1 Tbs. soy sauce
1/4 tsp. Chinese five-spice powder
Pinch crushed red pepper flakes

Heat the oven to 425°F. Trim any excess skin and fat from the duck breast and, using a very sharp knife,  score the skin and fat underneath in a 1-inch diamond pattern. Be careful not to cut all the way through the flesh, you want to just get the layer of fat underneath the skin to be exposed, so the fat renders more efficiently.  Pat the duck dry and season with salt and pepper.

Heat an oven-proof skillet over medium-high heat. Put the duck in the skillet skin side down, reduce the heat to medium low, and render the fat until only a thin, crisp layer of skin remains. It will take 8 to 10 minutes.

Meanwhile, in a small bowl, combine the preserves, soy sauce, five-spice powder, and red pepper flakes. Remove the duck to a platter, pour most of the fat off the skillet, and return the filets to the pan, skin side up. Brush the preserves mixture over the breasts. Transfer the skillet to the oven and roast until an instant-read thermometer inserted into the thickest part of a breast registers 135°F for medium rare, 8 to 10 minutes. Transfer the duck to a cutting board and let rest for 5 minutes.  Heat the remaining plum mixture briefly, slice the duck diagonally  and spoon the pan juice over.

ENJOY!

to print the recipe, click here


You won’t need much else to round out this meal.  White rice and carrots with an agave nectar glaze were wonderful for us, next to the rich and flavorful duck. But the best part of this meal was the smile on Phil’s face when I said we were having maigret de canard for dinner…  Sweet memories of Paris make any evening a special event!

ONE YEAR AGO: Holiday Double-Decker

TWO YEARS AGO: Tried and Tasty!

Add to FacebookAdd to DiggAdd to Del.icio.usAdd to StumbleuponAdd to RedditAdd to BlinklistAdd to TwitterAdd to TechnoratiAdd to Yahoo BuzzAdd to Newsvine

GRILLING RIBBONS

We use our outdoor grill pretty much the whole year, as even during the winter we’ll have nice breaks in the weather, with temps reaching the mid 60’s.  Grilling brings a glimpse  of summer into the kitchen, and that is a feeling any Brazilian-American always appreciate!

I found this recipe in a Food and Wine magazine, and the first thing that called my attention was the way it treated the squash:  thinly cut as ribbons, then threaded into skewers.  The photo in the magazine was quite gorgeous, evidently some practice is needed to cut the squash in the perfect thickness and grill them carefully enough to preserve a nice shape.  Let’s say my technique needs to be improved before serving this dish to guests…   But even if you don’t hit the jackpot with your technique, this is a fabulous side dish.  Don’t omit the prosciutto, it is a key component.

GRILLED SQUASH RIBBONS AND PROSCIUTTO WITH MINT DRESSING
(adapted from Food and Wine magazine)

1 teaspoon lime zest
1/4 cup fresh lime juice
1/4 cup chopped mint
1/4 cup extra-virgin olive oil + more for brushing veggies
Salt and freshly ground pepper
2 medium zucchini, very thinly sliced lengthwise
2 medium yellow squash, very thinly sliced lengthwise
6 ounces sliced prosciutto

Prepare a gas or charcoal grill, brushing or spraying the grids with a little olive oil.  In a small bowl, combine the lime zest and juice with the mint, and the   olive oil. Season with salt and pepper.Alternately thread the zucchini, yellow squash and prosciutto onto 4 pairs of 12-inch bamboo or metal skewers (soak the bamboo skewers in water to prevent them from burning).  Lightly spray the vegetables and prosciutto with olive oil and season with salt and pepper.Grill the skewers over high heat until the zucchini and yellow squash are lightly charred, maximum of 2 minutes per side. Serve the mint dressing on the side (it is great for salads too).

ENJOY!

to print the recipe, click here

Comments:   I suppose the same recipe would work without going through the trouble of making the ribbons, but they do add a lot of charm to the dish.  I wasn’t sure about grilling the prosciutto, as it is a bit dry to start with, but it turned out as a great match for the squash ribbons.  Salty and chewy, it gave that extra bite to the veggies, just like croutons on a Caesar salad. We both loved everything about this recipe, a real winner!

Food & Wine suggests using these veggies + dressing as a “sauce” for pasta.  Simply cook the pasta al dente, and slide the veggies off the skewers, mixing with the pasta while it’s still very hot. Add some of the dressing, adjust the consistency if needed with the pasta cooking water, and voila’:  heaven on a plate!

ONE YEAR AGO: Peppery Cashew Crunch
TWO YEARS AGO: Ossobuco Milanese (a GREAT dish!)
.

Add to FacebookAdd to DiggAdd to Del.icio.usAdd to StumbleuponAdd to RedditAdd to BlinklistAdd to TwitterAdd to TechnoratiAdd to Yahoo BuzzAdd to Newsvine

FOCACCIA WITH SUN DRIED TOMATOES AND GORGONZOLA

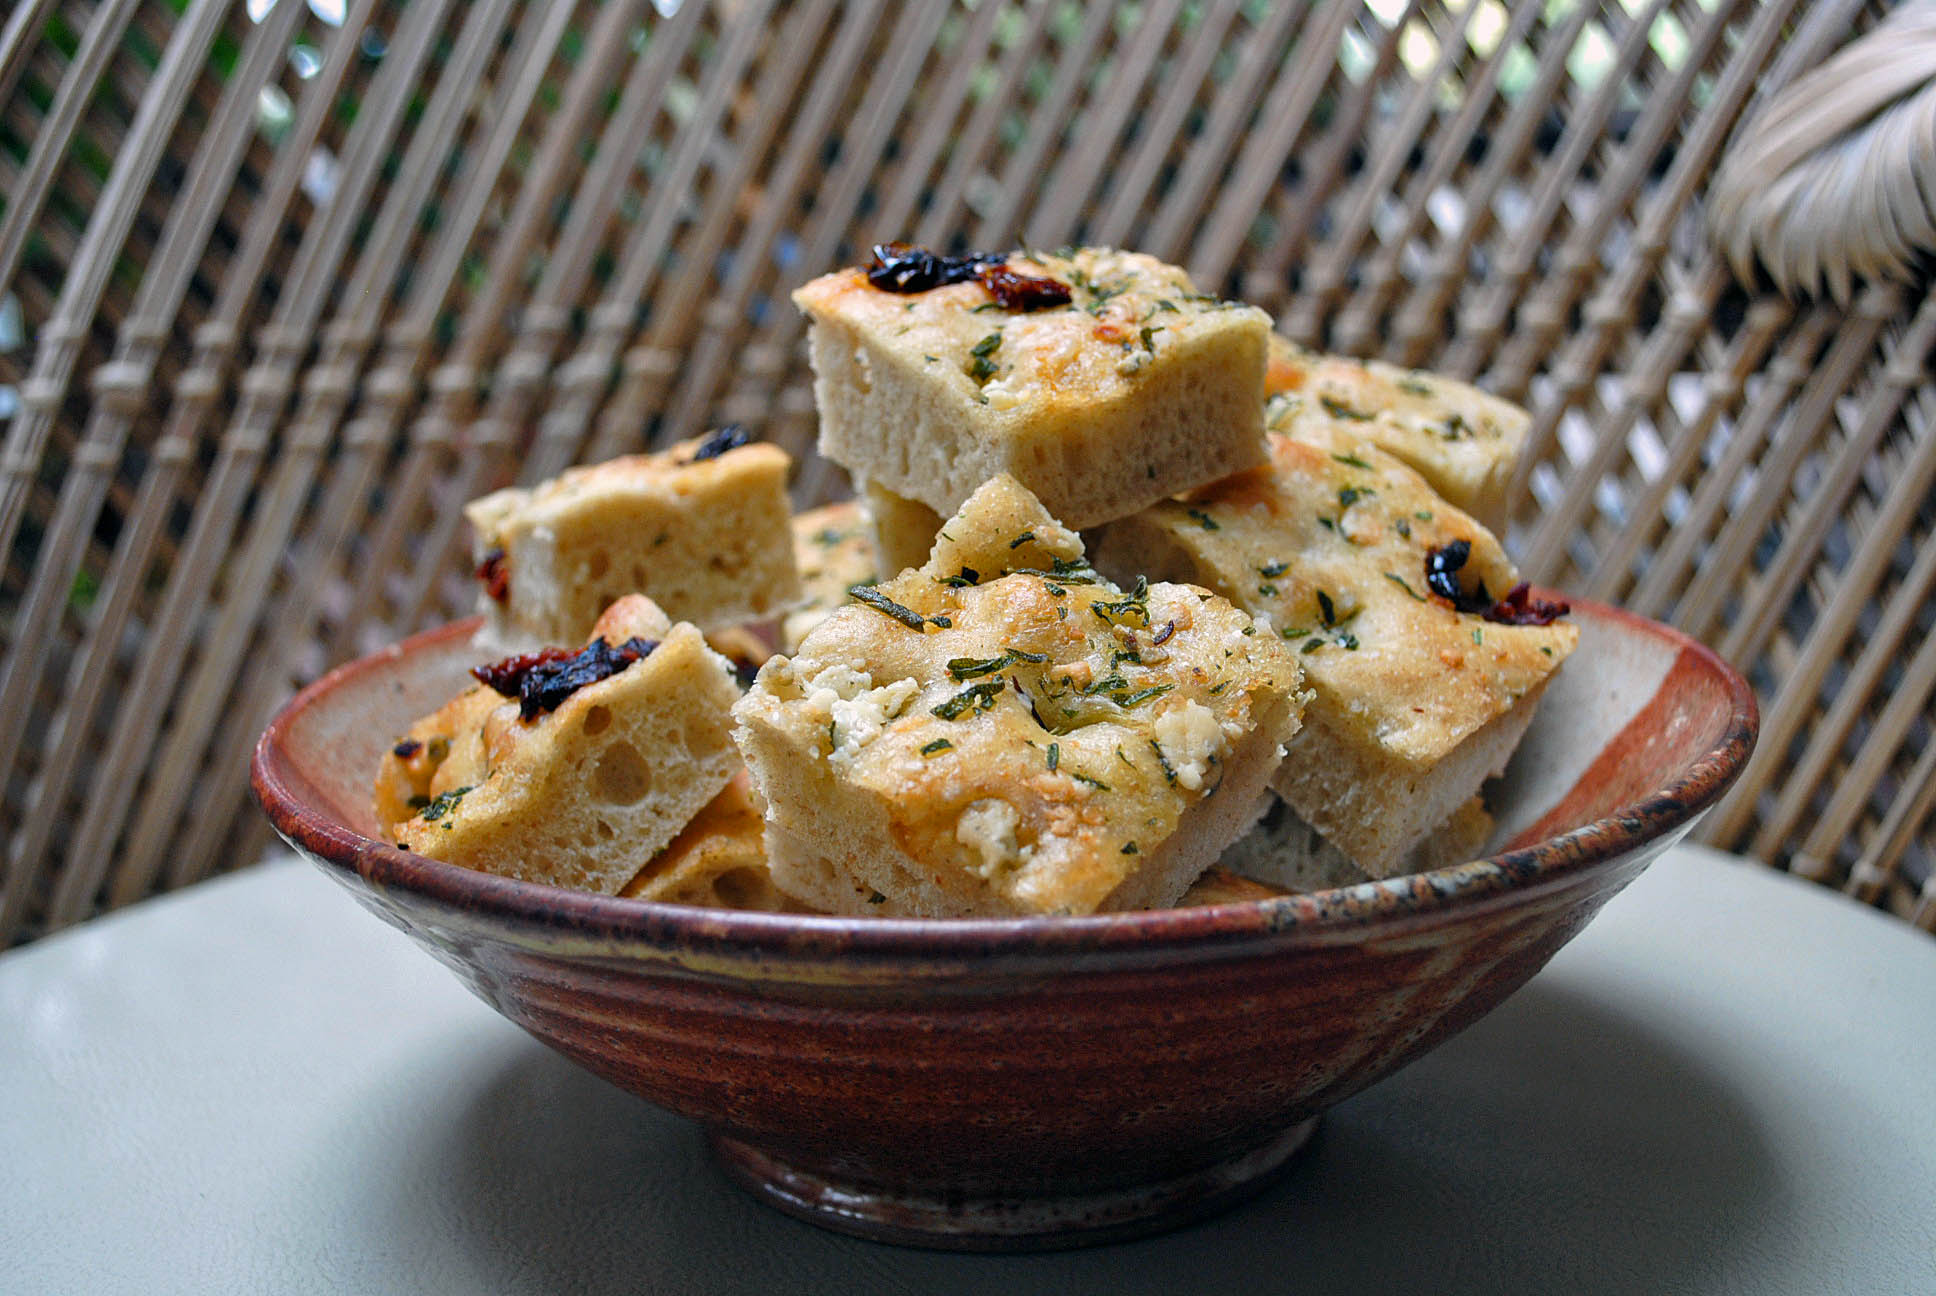
I used my basic “No Need to Knead” recipe as the starting point for this version, that includes a small amount of rye flour in the dough.  Rye gives it a more “rustic” feel, and the sun dried tomatoes a hint of sweetness to balance the sharpness of the gorgonzola cheese.  This colorful focaccia will be a great addition to  your end of the year festivities, and it is so simple to prepare, you can pull it even in the middle of an intense cooking marathon.

FOCACCIA WITH SUN DRIED TOMATOES AND GORGONZOLA
(inspired by Suzanne Dunaway’s “No Need to Knead”)

2 cups lukewarm water
2 tsp active dry yeast
3 + 1/2 cups bread flour
1/2 cup rye flour
3 tsp salt
1-2 Tbs  olive oil
4 ounces sun dried tomatoes, packed in oil
2 ounces gorgonzola cheese
2 T chopped fresh rosemary
kosher salt for topping

Measure the water in the bowl of a KitchenAid mixer, sprinkle yeast over the water and stir until dissolved. Add the two types of flour, and the 3 teaspoons of salt.  Mix for a minute or so, until ingredients form a shaggy mass.   Let the dough rest for 15 minutes.

Using the kneading pad, knead the dough for about 8 minutes, until smooth.  It should still cling to the sides and the bottom of the bowl.  Cover the bowl with plastic wrap and let it rise in a warm place until almost doubled in volume (1 to 1.5 hours).  Meanwhile, cut the sun dried tomatoes in small pieces, and crumble the gorgonzola cheese.  Reserve.

Heat the oven to 500F. Oil one (or two)  non-stick 13×18 inch baking sheets (I prefer to use a single one, to get a thicker focaccia).

Pour the dough onto the sheet,  brush the surface with 1 Tbs olive oil. Dip your fingers in cold water or olive oil and make indentations all over the dough, working to stretch the dough as you go. Distribute the sun dried tomato and gorgonzola cheese all over, pushing them into the dough, using a little more olive oil, if necessary.   Sprinkle rosemary leaves all over, a little salt (careful, gorgonzola is salty), and place it in the oven, reducing the temperature to 450F.

Bake for 15 to 20 minutes, until golden brown. Cool on a wire rack and enjoy!

to print the recipe, click here

Comments:  I went back into kneading-mode for this version,  using the KitchenAid instead of stirring with the wooden spoon, and noticed that a longer time of fermentation was better, perhaps because of the rye flour, so leave it for a full hour and check if the dough is bubbly and noticeably risen.  If not, leave it for another 15 to 30 minutes.

Some of the sun dried tomatoes might insist on falling off the bread, but guests don’t seem to mind chasing them…  😉

I am submitting this post to Susan’s Yeastspotting.  Stop by to see what everyone else is bringing to the party!

ONE YEAR AGO:  Revisiting Spring

TWO YEARS AGO: Basic Sourdough Bread


Add to FacebookAdd to DiggAdd to Del.icio.usAdd to StumbleuponAdd to RedditAdd to BlinklistAdd to TwitterAdd to TechnoratiAdd to Yahoo BuzzAdd to Newsvine