CAKE PUCKS


Back in July last year, I shared my first adventures with cake pucks (for a flash back, click here). I’ve made quite a few since then, some with boxed cakes and home-made buttercream, some with cakes crushed into crumbs while still warm, skipping the addition of buttercream. In my opinion, the texture of the cake component suffers a bit if you don’t use a little buttercream, but I am sure that is a matter of personal taste. Some bakers swear by the warm crumbled cake. Today I want to focus on a different recipe, one that uses a peanut butter fudge instead of cake for the center. And I also want to show you a new type of cake puck, made with a smaller mold. So, without further ado, let’s go over the peanut butter version.

PEANUT BUTTER FUDGE PUCK CAKES
(from bentycakes)

2 cups granulated sugar
1 + 1/3 cup creamy peanut butter
1/2 cup milk
2 tsp vanilla
dash of salt
melting chocolate (such as candy melts)

Bring sugar and milk to a boil over medium heat. Once boiling, whisk for 1-2 minutes. Add in vanilla, peanut butter and salt and mix until smooth. Working quickly, fill your small molds with the mixture.
The peanut butter fudge should set up pretty quickly at room temperature, but I prefer to stick in the fridge for 30 minutes or so.

Melt 17 ounces chocolate and a spoonful of refined coconut oil gently in the microwave at 50% power. for 1 minute. Place larger mold (with the Benty Cakes logo on the bottom) on the plastic tray and fill one cavity half full with melted chocolate.


Place chilled center on melted chocolate. Gently apply even pressure as you slowly press the center down until chocolate comes up from the sides and covers the top of the center. Scrape off any excess chocolate. If there is not enough chocolate to cover the center. Add chocolate and scrape away excess.
Tap the mold tray on the counter to eliminate air bubbles.

Let the pucks set in the fridge for 20 minutes or so, then gently un-mold. Decorate as desired.

ENJOY!

to print the recipe, click here

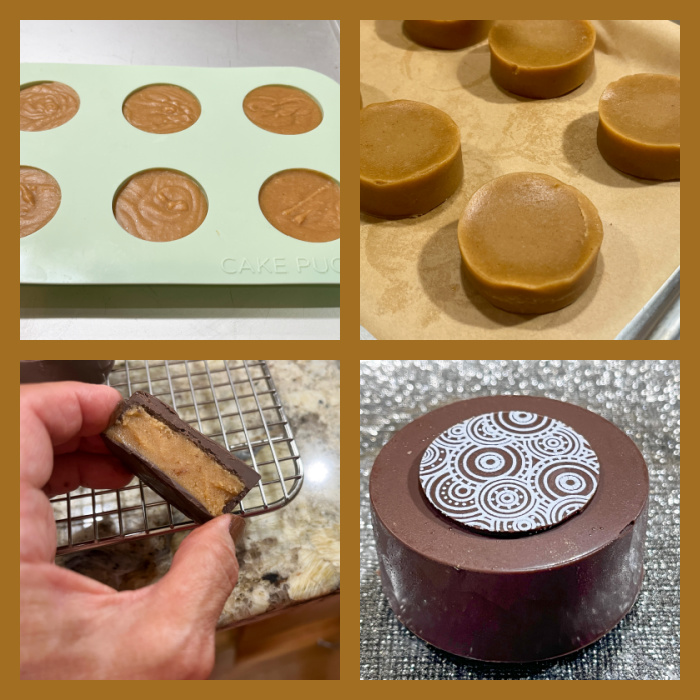
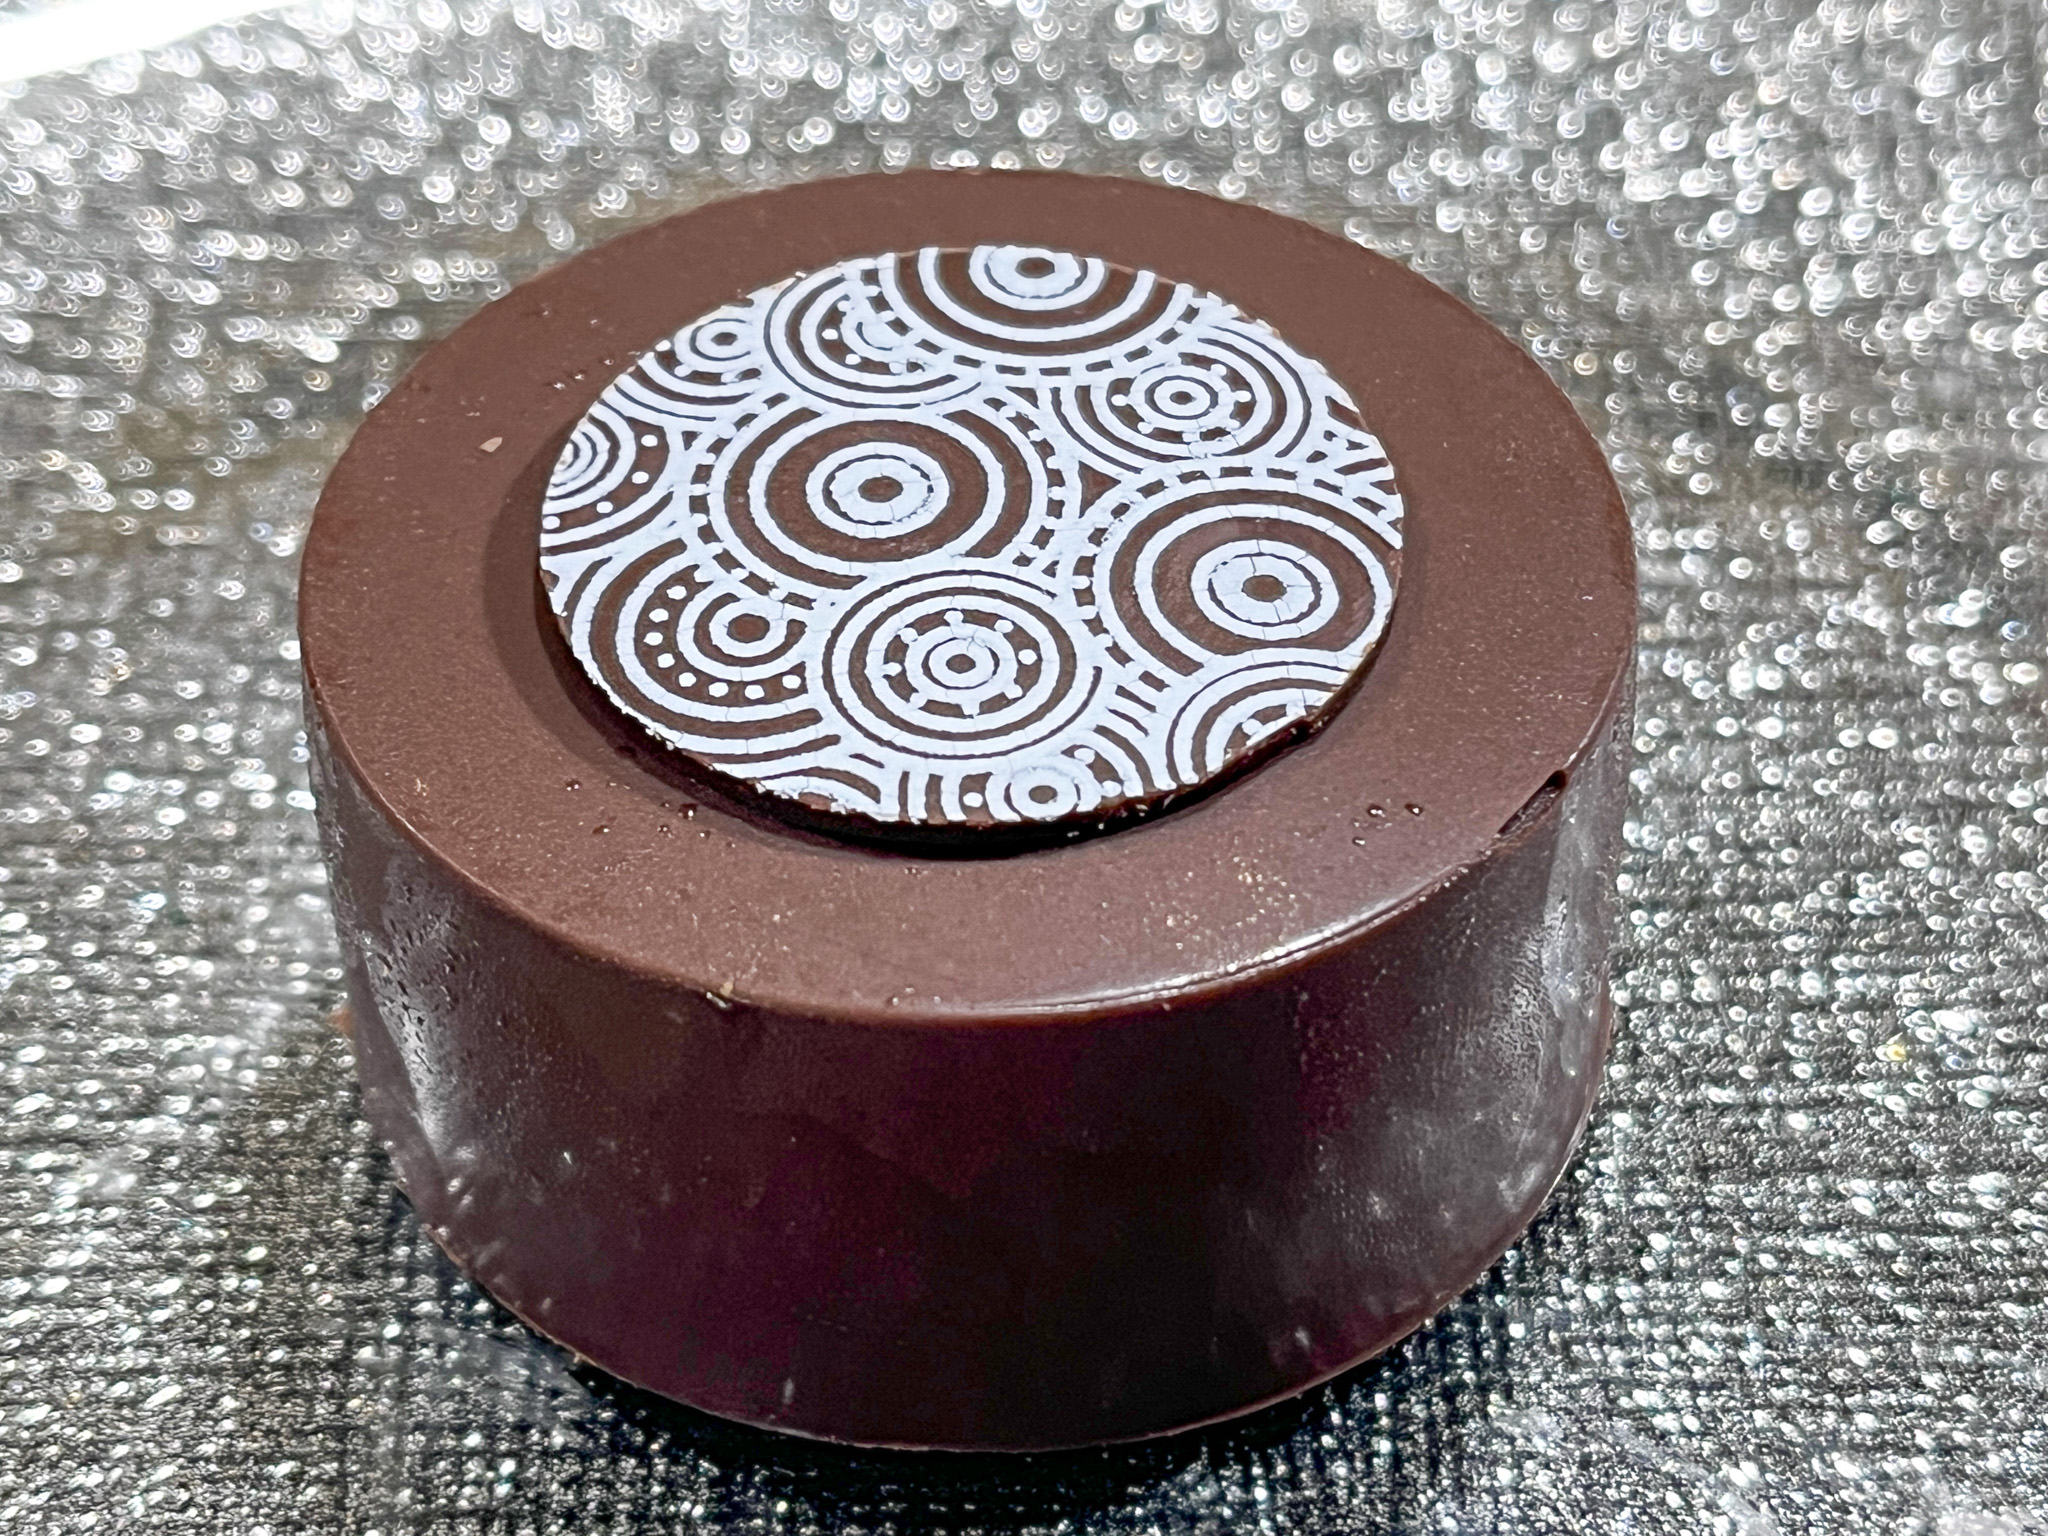
Comments: If you are a peanut butter lover in desserts these will blow your mind! The texture is creamy and luscious, and of course, the peanut butter with the chocolate around it is a perfect match. I will now show you mini-pucks, which I find even better than the original ones because they turn out as a two-bite thing, one is enough and not too much. You can order the set of molds by clicking here. Below, a comparison in size between this new version and the original.


This batch of minis was also made with the peanut butter fudge center…


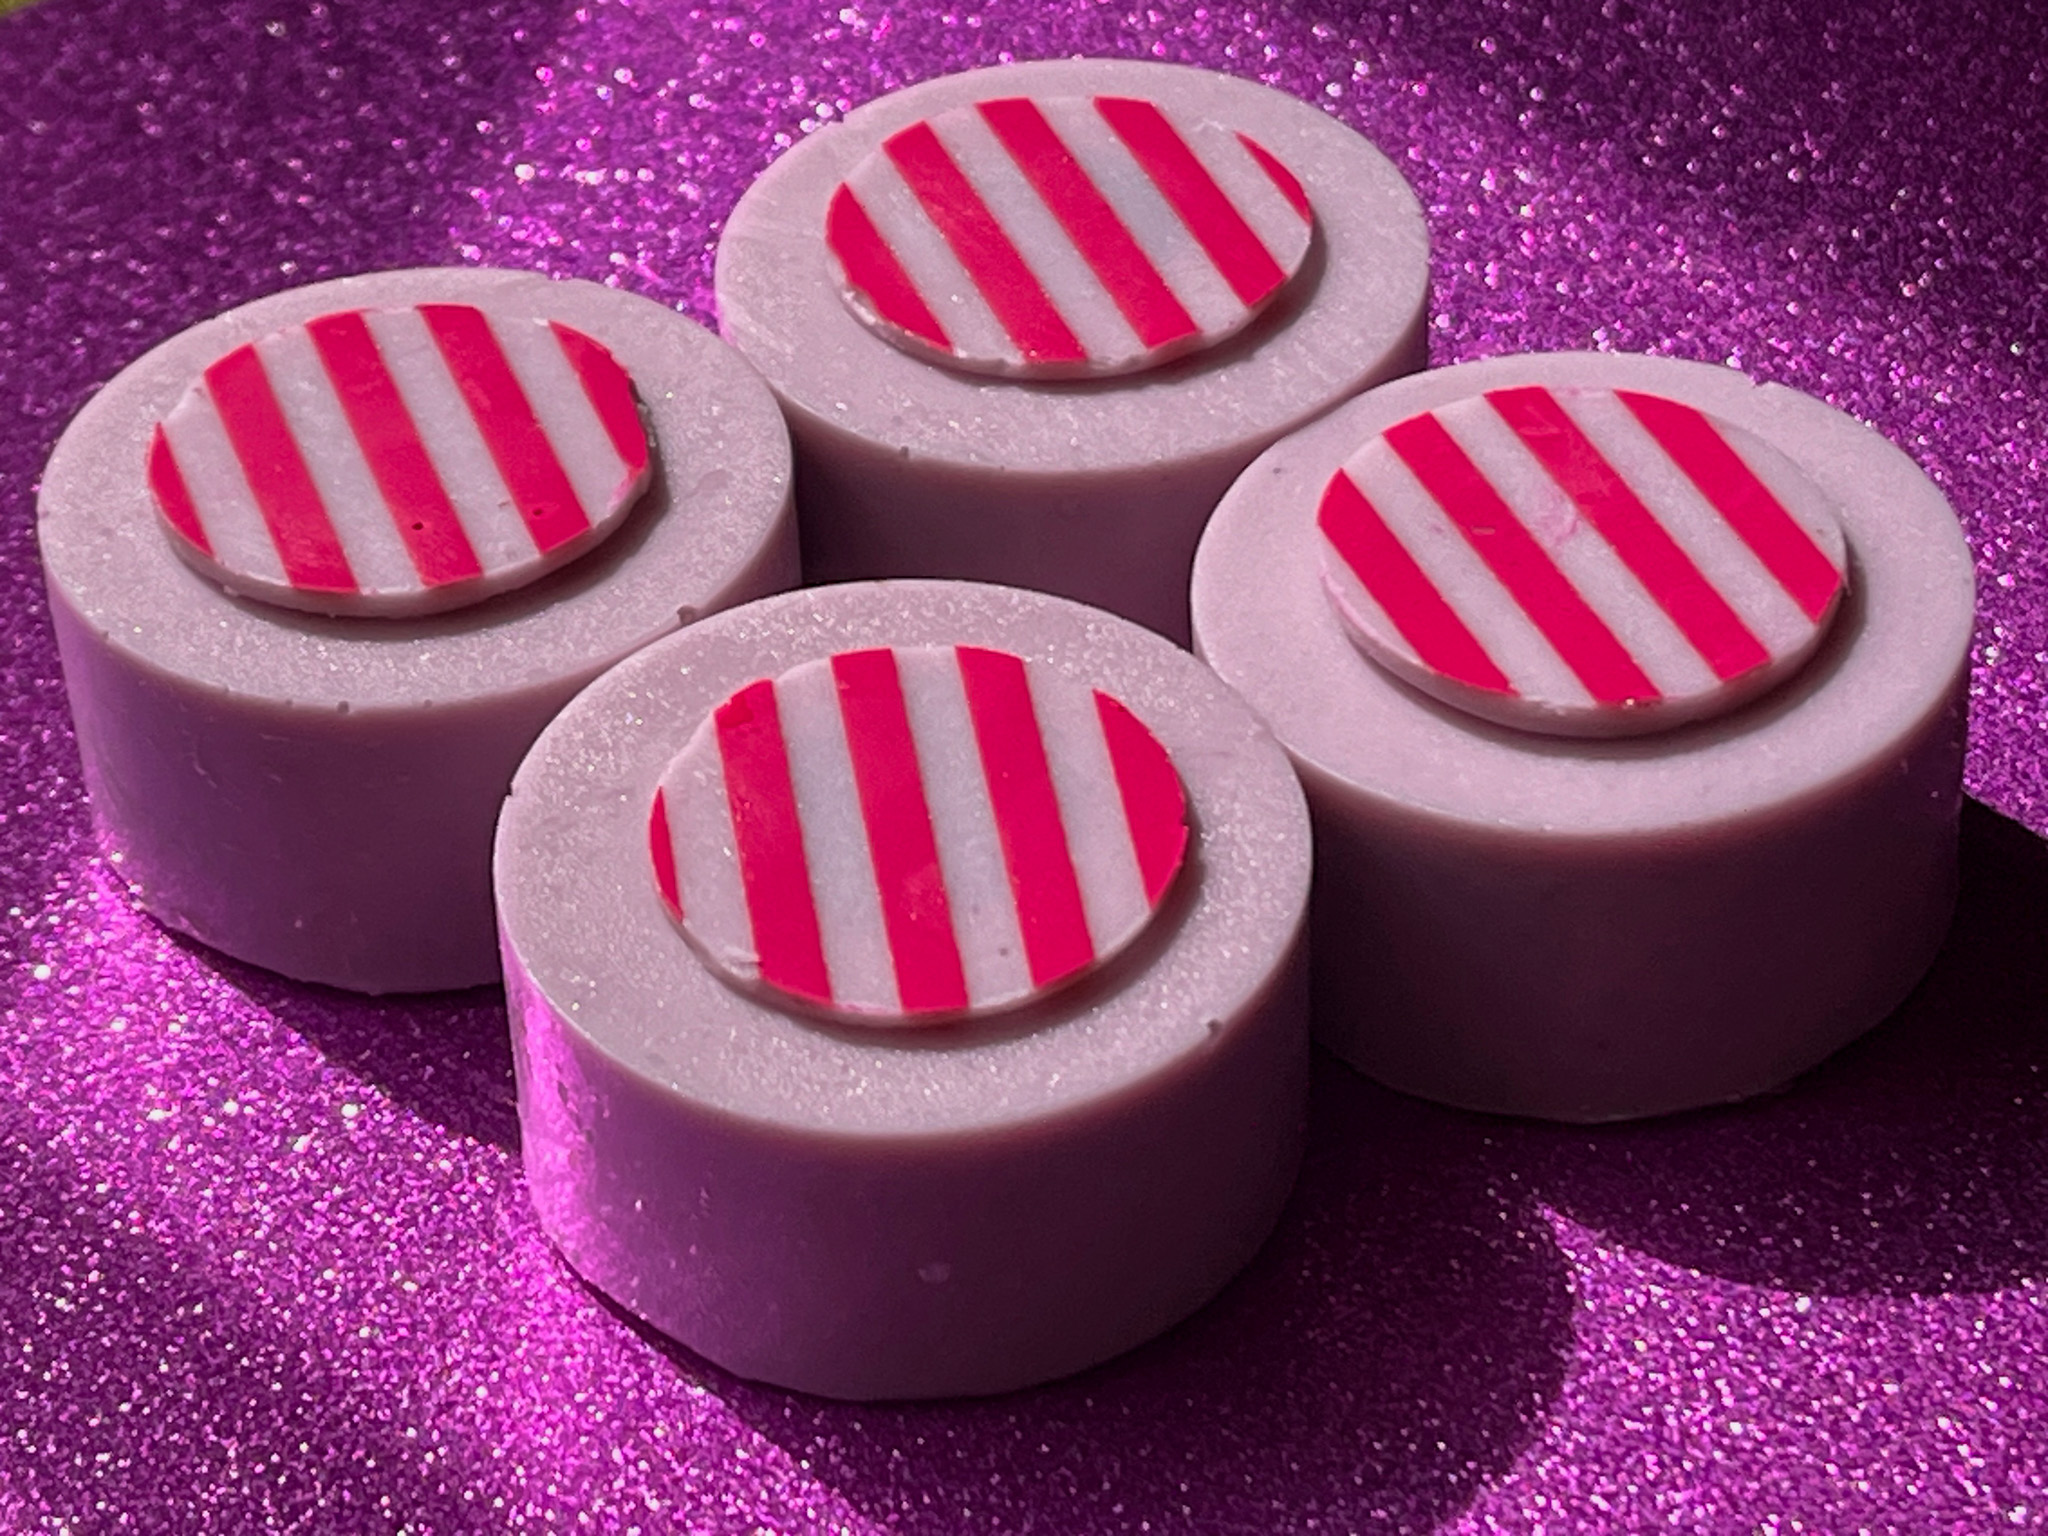
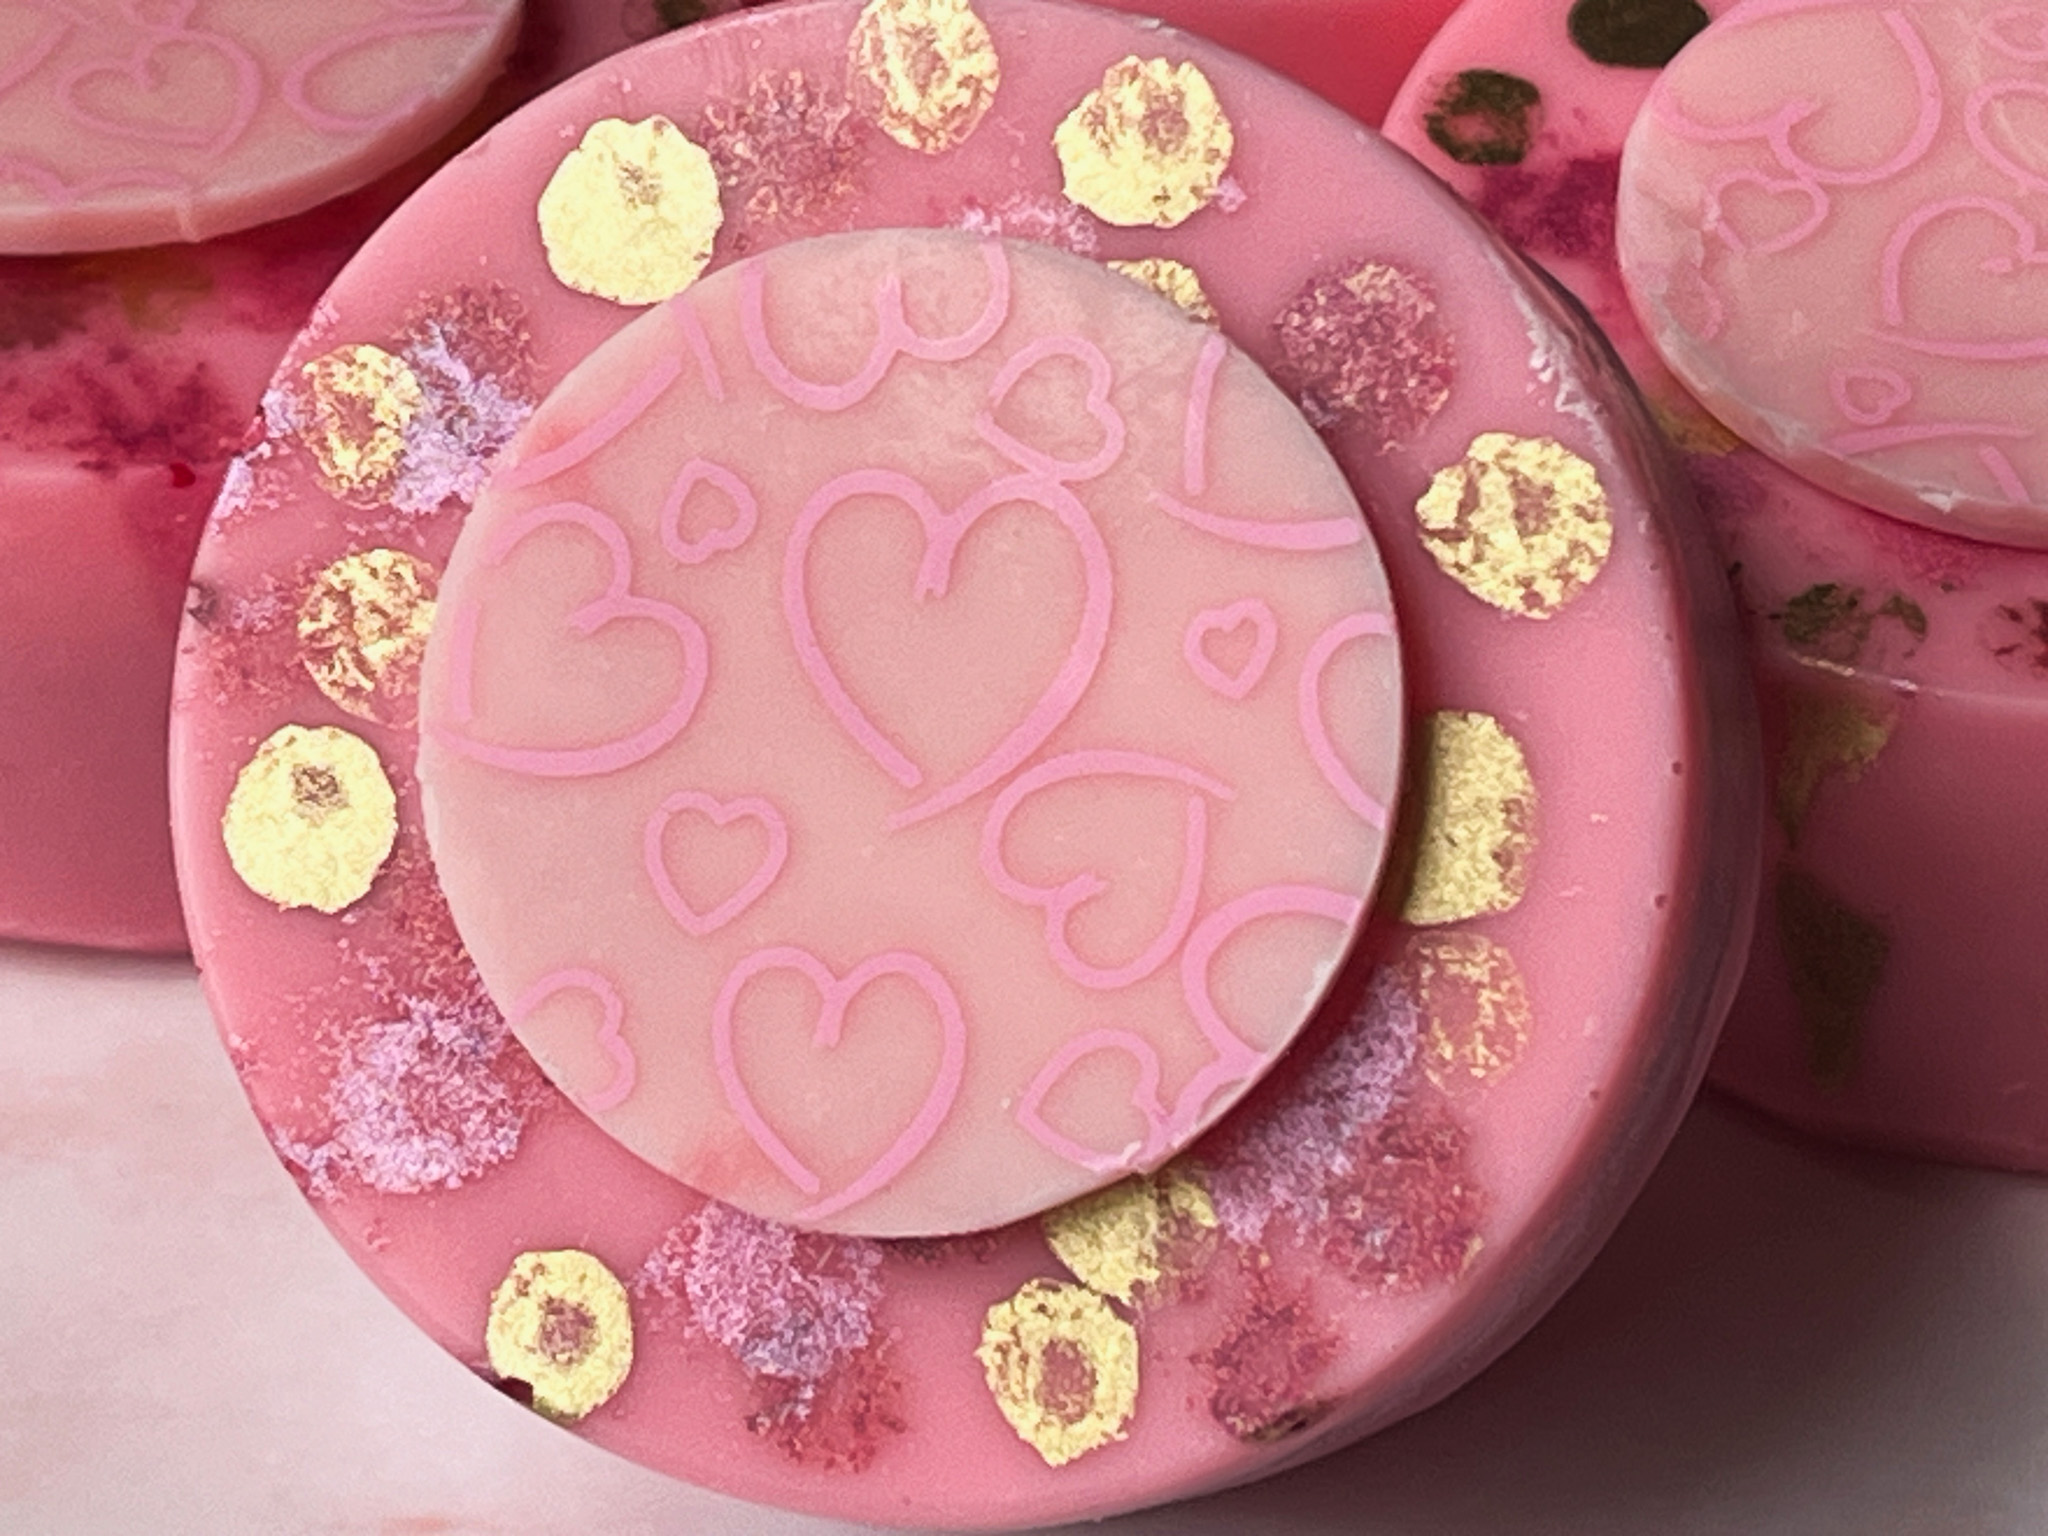
As to decorations, I’ve been using several different techniques, one of them which I really love is painting the bottom of the mold with luster colors, then adding the chocolate on top

I love the way the surface turns out…

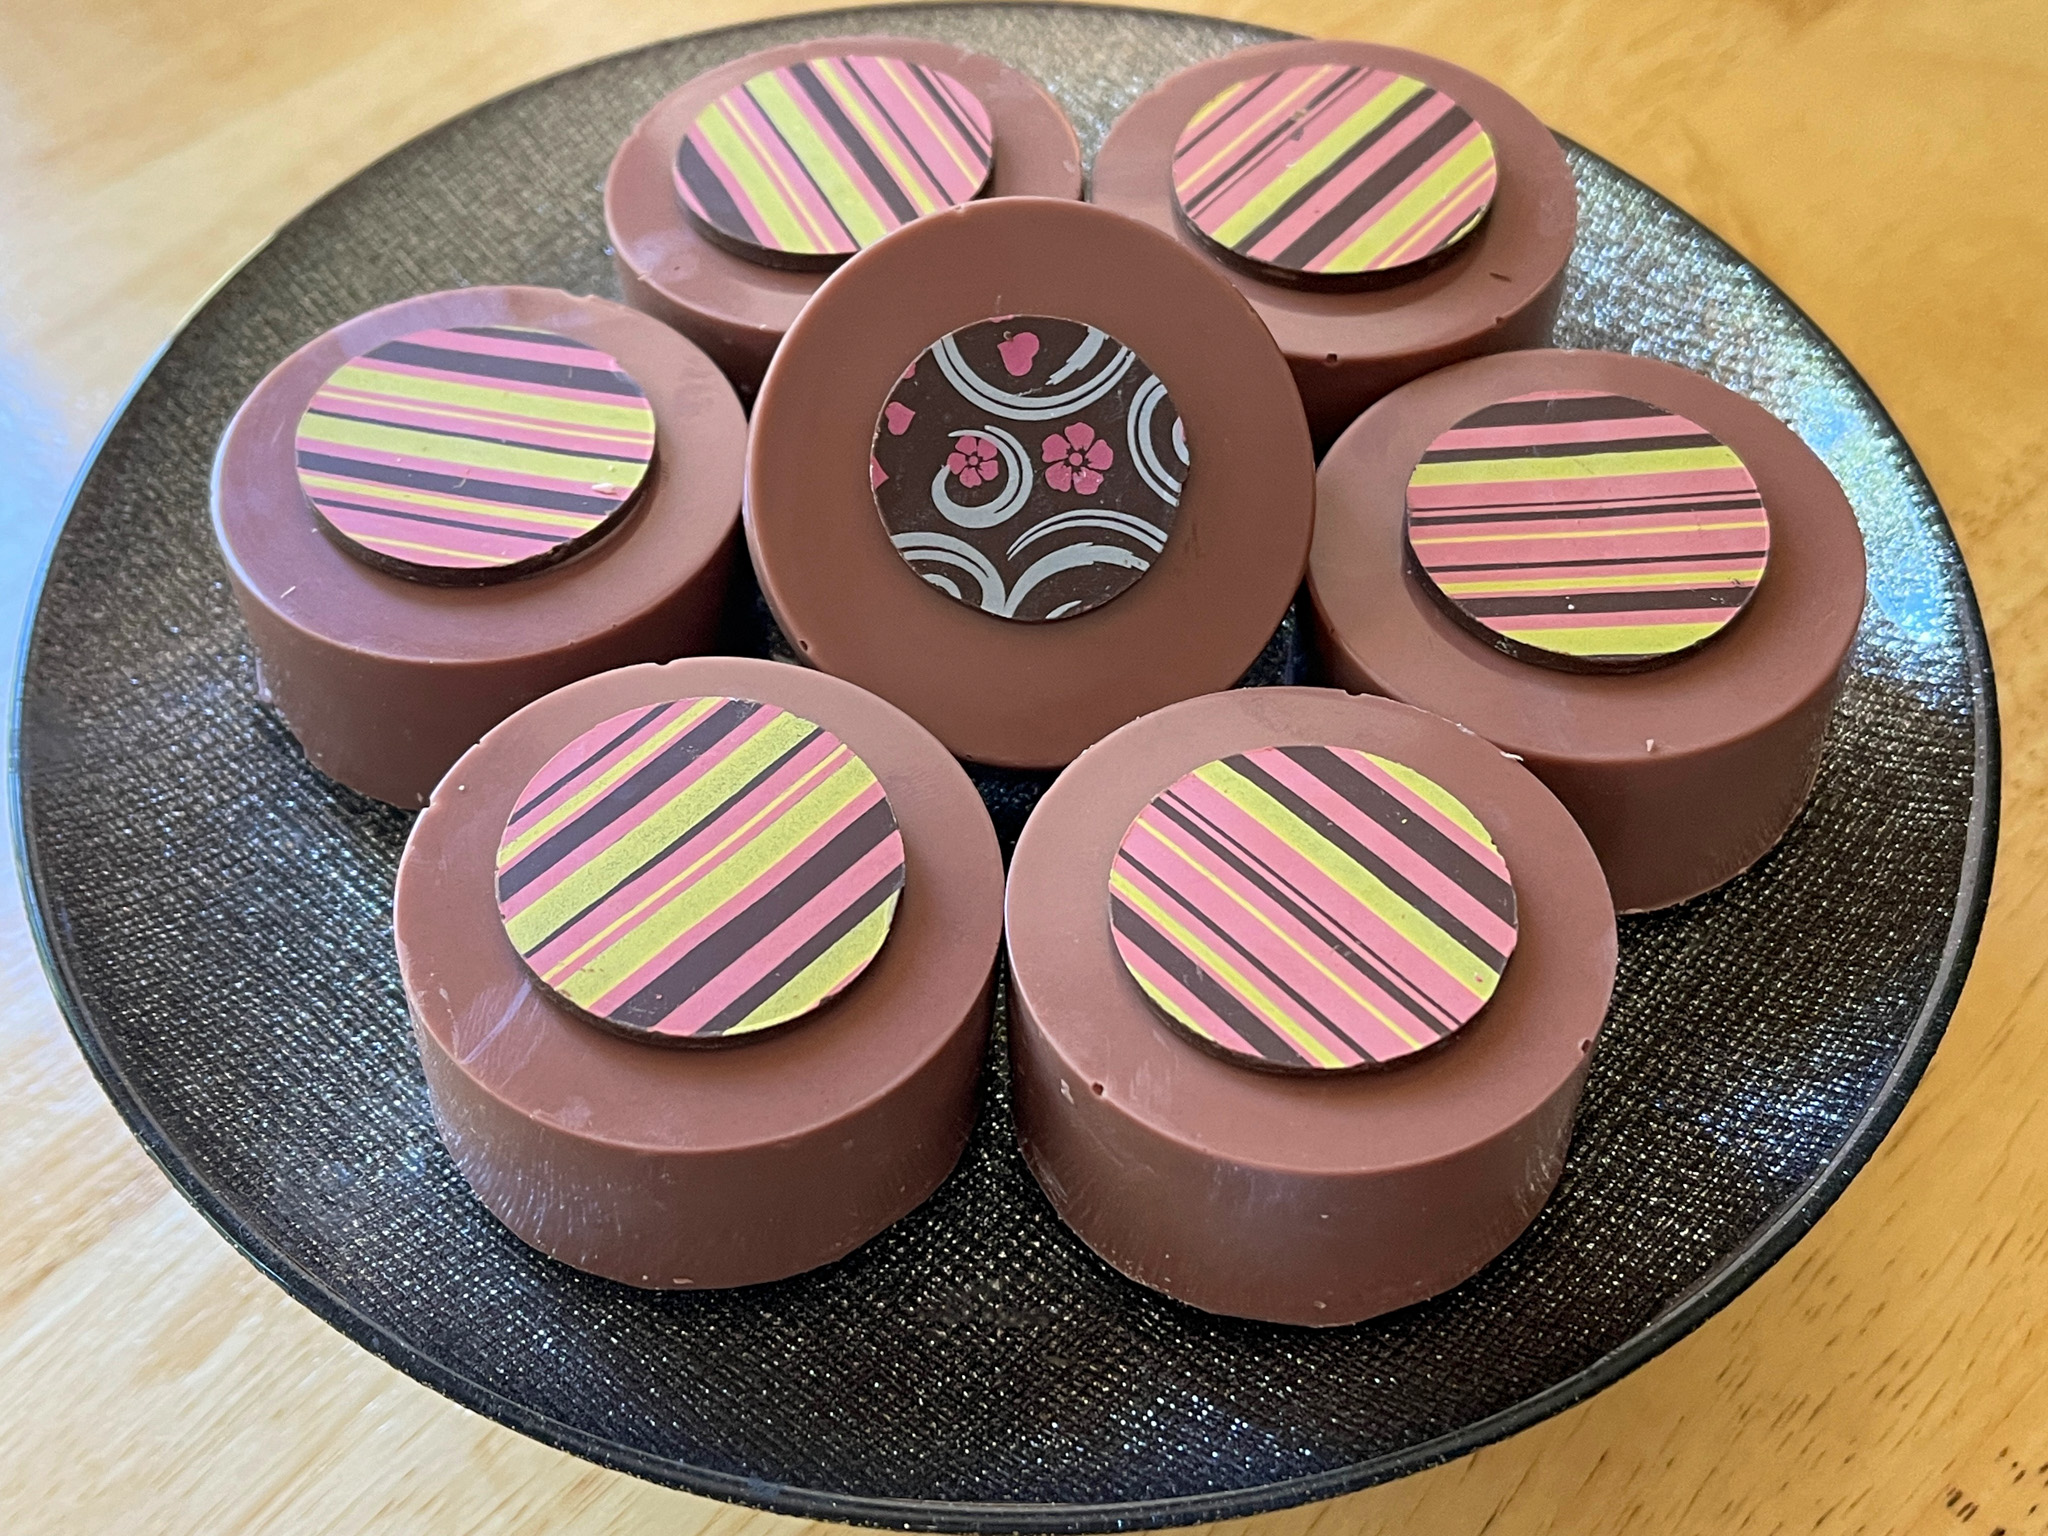
And using chocolate discs made with patterns using transfer sheets never gets old…

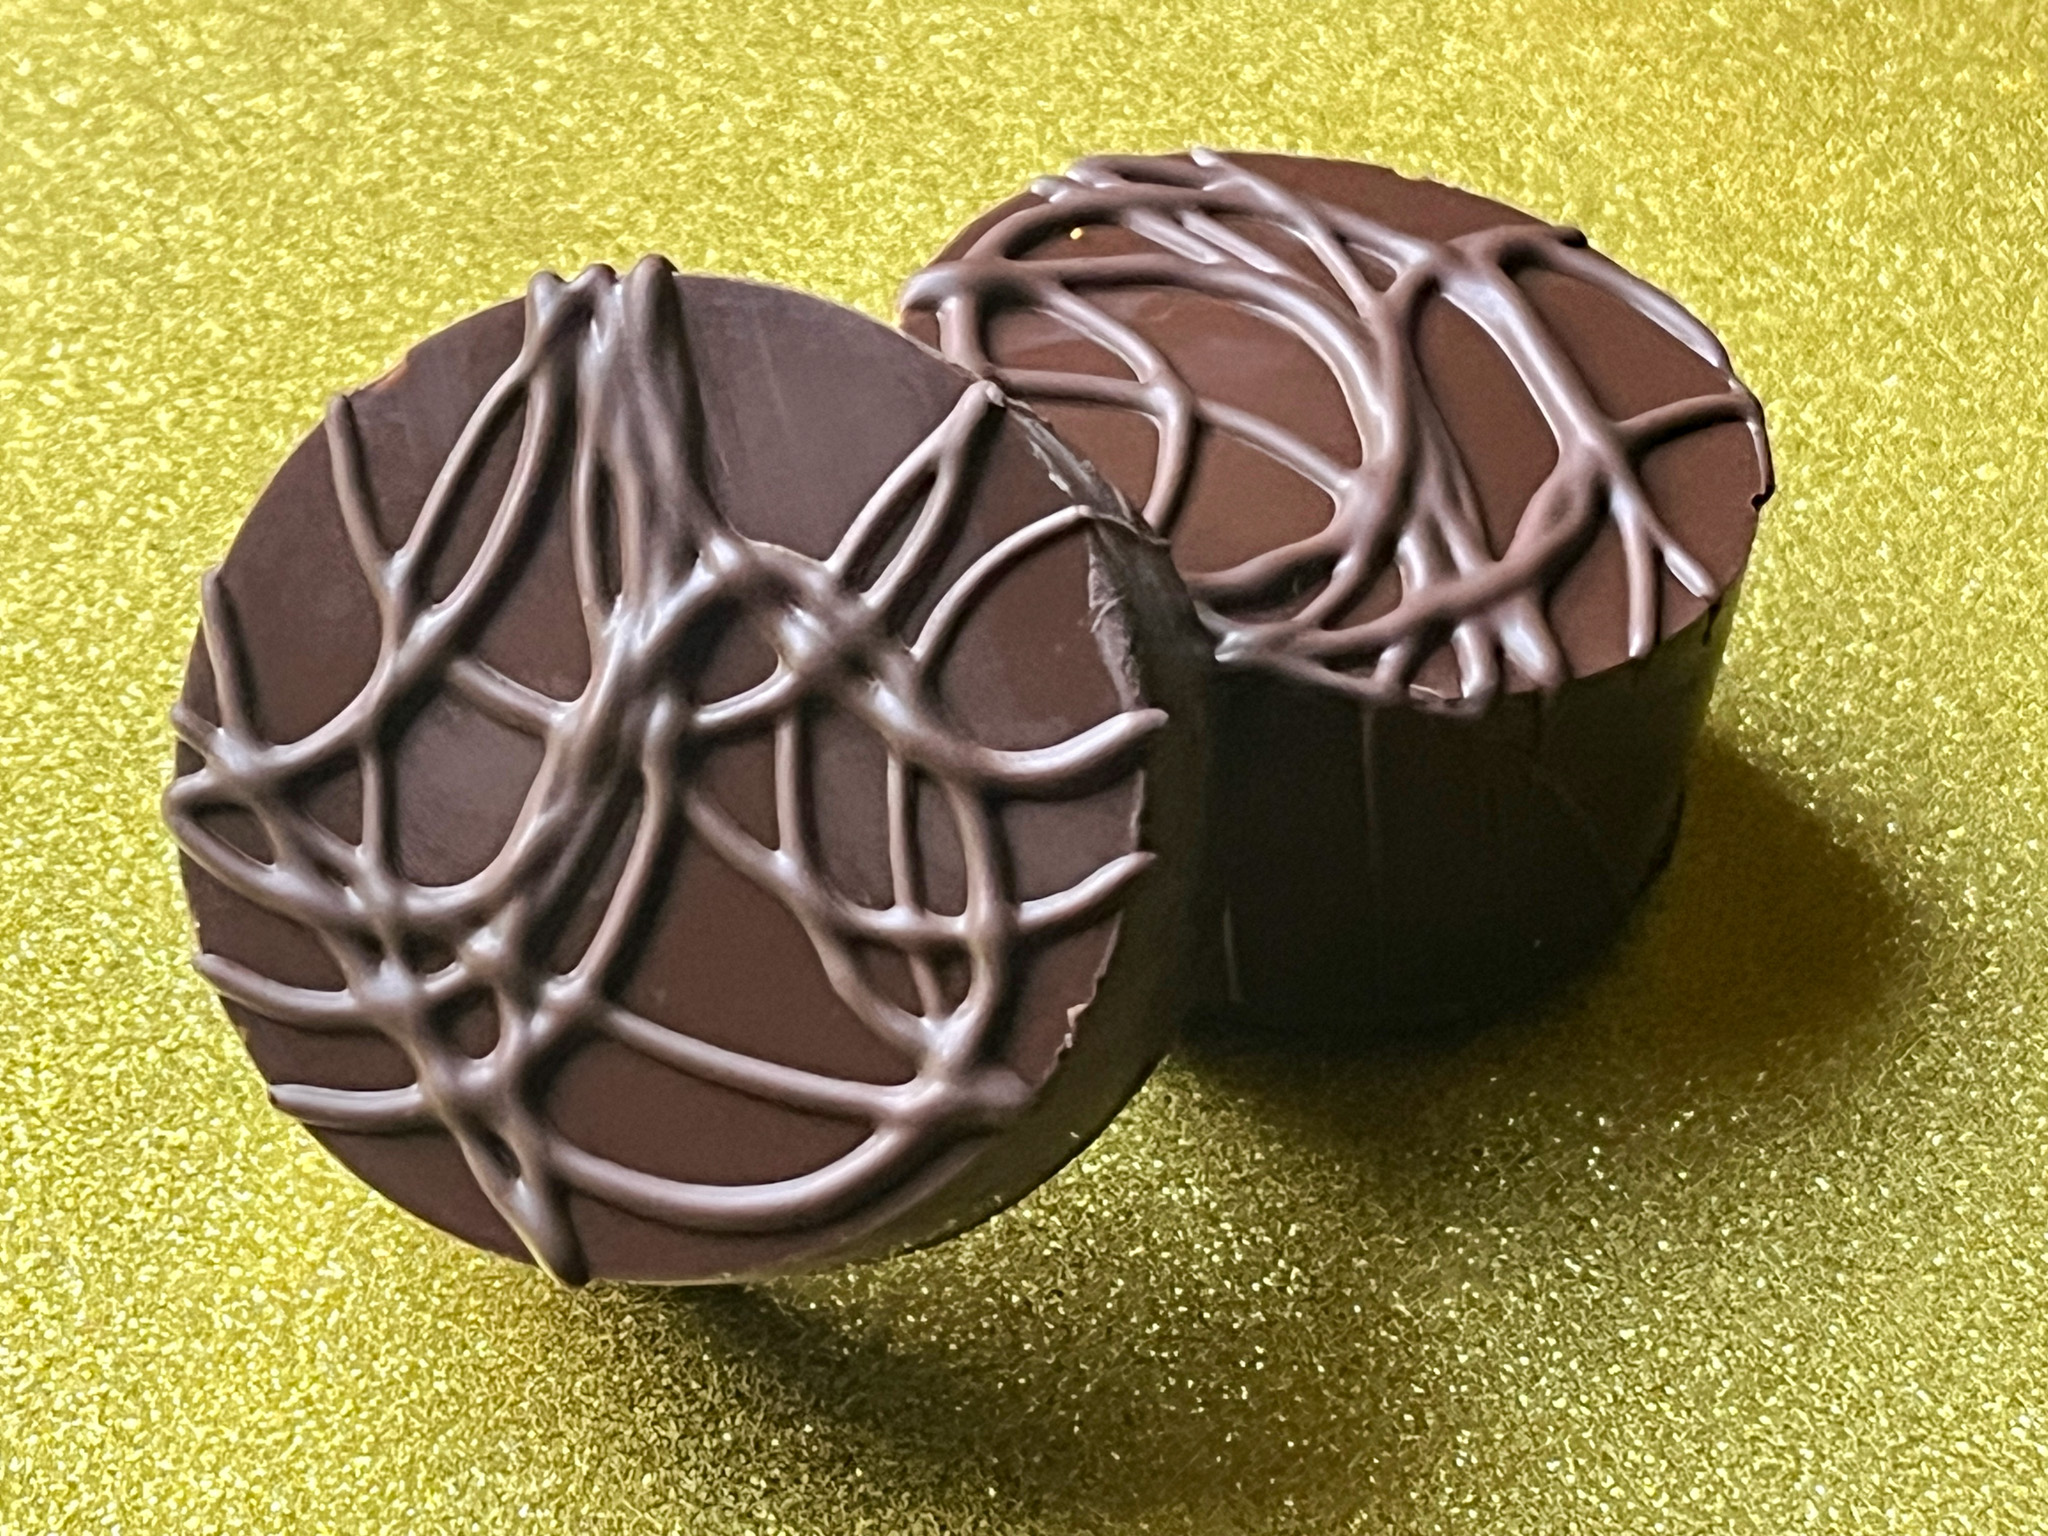
They also look pretty nice with just a drizzle of melted chocolate…

ONE YEAR AGO: Haniela’s Cheese Crackers

TWO YEARS AGO: Shrimp Tacos with Jicama-Mango Salsa

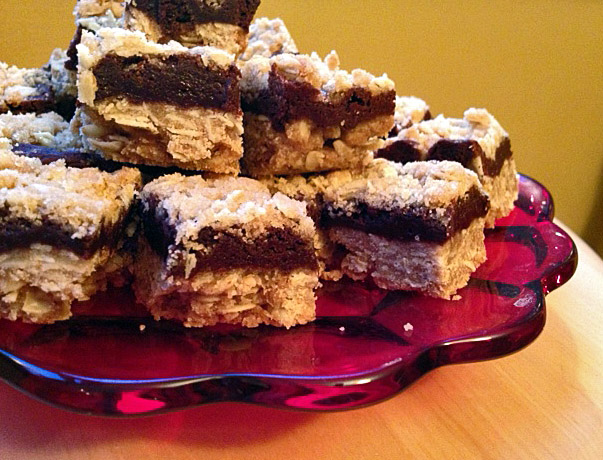
THREE YEARS AGO: Mini-Egg Brownies

FOUR YEARS AGO: The Luck of the Irish

FIVE YEARS AGO: When life gives you Eye-of-the-Round

SIX YEARS AGO: Carrot Cake Macarons

SEVEN YEARS AGO: Soup Saturday: Say Goodbye to Winter

EIGHT YEARS AGO: Manchego and Poblano Soup

NINE YEARS AGO: A Smashing Pair

TEN YEARS AGO: Spinach and Mushroom Stuffed Pork Tenderloin

ELEVEN YEARS AGO: Crispy Chickpea and Caper Spaghetti

TWELVE YEARS AGO: Spring has Sprung!

THIRTEEN YEARS AGO: Chickpea and Fire Roasted Tomato Soup

FOURTEEN YEARS AGO: Double Asparagus Delight

FIFTEEN YEARS AGO:  Sun-dried Tomato and Feta Cheese Torte

SECRET RECIPE CLUB: OATMEAL FUDGE BARS

platter2

Mondays keep coming, rushing over me, but the toughest day in the week is made brighter when it’s…. Reveal Day of The Secret Recipe Club!  This club is getting more and more interesting, as new food bloggers join in. I heard the waiting list is huge, so if you have any interest in this type of group event, get yourself in line!    This month I was paired with the blog Everyday Insanity. The name describes my days quite closely… 😉  I also love her tag line: Tackling life, one brownie recipe at a time!  Everyday Insanity is hosted by Cindy, and her choice of name for the blog might be due to her having 6 kids and 14 grandchildren!  My life all of a sudden feels like a walk at the park. Seriously.  Her blog is full of tasty recipes, not only sweets.  I was very tempted to make her Thai Coconut Chicken soup, but these bars won me over. Plus, the timing was perfect: I brought them to our department on Valentine’s Day!

OATMEAL FUDGE BARS
(from Everyday Insanity)

1 cup quick-cooking oats
1+1/4 cup light brown sugar, divided
1 cup all-purpose flour, divided
1/4 tsp baking powder
1/4 tsp baking soda
1/4 tsp salt + 1 pinch, divided
10 tbsp unsalted butter, divided
1 + 1/2 cups chocolate chips
1 egg

Heat your oven to 325 degrees. Line an 8 inch square baker with aluminum foil, allowing excess to hang over the edges of the pan.  Grease foil; set pan aside.

Combine the oats, 1 cup of brown sugar, ¾ cup of flour, baking powder, baking soda, and a pinch of salt.  Stir together in a bowl to combine.  Melt 8 Tbsp butter and stir into the oat mixture until combined.  Reserve ¾ cup of the mixture for the topping.  Sprinkle the remaining oat mixture over the bottom of the prepared pan and press into an even layer.  Bake until light golden brown, about 12 minutes.  Cool completely, about 1 hour.

Combine the remaining ¼ cup flour, the remaining ¼ cup brown sugar, and the remaining  ¼ tsp salt in a bowl.  Set aside.

Melt the chocolate chips and the remaining 2 Tbsp butter in a large bowl, microwaving at 50% power in 30 second intervals, stirring after each.  Let cool slightly.  Add the egg and whisk until combined.  Use a rubber spatula to fold in the flour mixture, stirring until just combined.

Pour the chocolate filling over the cooled crust and sprinkle with the remaining oatmeal mixture.  Bake until a toothpick inserted into the center comes out with a few moist crumbs attached, 25-30 minutes. Cool completely on a wire rack.  Using the foil overhang, lift the bars from the pan and cut into squares.  Store leftovers in an airtight container at room temperature.

ENJOY!

to print the recipe, click here

cutting
Comments:  Valentine’s Day this year fell on a Thursday, so I bravely decided to tackle this recipe the evening before. After work. After dinner. Not a smart move.  I completely overlooked the instruction to “reserve part of the mixture for the topping”, and of course got into full-blast panic mode when I noticed my mistake.  By then the base of the bar was already in the oven.   I rushed to make a little more topping, calculating proportions of all ingredients quickly in my mind, hoping for the best.  Probably due to my level of stress, the chocolate seized in the microwave, prompting me to throw one of those fits that brings Phil back into the kitchen, already holding a box of Kleenex.  To make a long story short, without him, there would be no bars.  Unbearable thought.

So, when you make these absolutely delicious bars, do yourself a favor and follow the recipe as written.  That way the base of your bar will the thinner, and the crumb topping will be lighter, as intended.

Cindy, it was wonderful to get to “meet” you through this baking adventure!  Thanks to you (and also to the imperturbable man I married), I could take a platter full of sweetness to work on the sweetest day of the year!

department

To see what others in my group prepared for Reveal Day, click on the funky little frog smiling at the end of the post. Do you want to know who got my blog and what she cook from it?   Jane, from The Healthy Beehive picked a favorite recipe of mine, check it out by clicking here

ONE  YEAR AGO: Cauliflower Steaks

TWO YEARS AGO: Soft Spot for Chevre

THREE YEARS AGO: Quick sun-dried Tomato Crostini