
No, my blog is not turning into a hairdressing site. Not that I don’t appreciate a well-made chignon, but I’ve never had the skill to do anything remotely fancy to my hair. Now, if we’re talking flour and yeast, I’m game.

THE CHIGNON
(adapted from Craftsy.com)
makes one loaf
270 g bread flour
30 g spelt flour
195 g water at room temperature
1.5 g instant yeast
6 g fine sea salt
Mix all the ingredients on low-speed in a mixer fitted with a dough hook for 4 minutes. Make sure no big clumps of flour are sticking on the sides, scrape the bowl if needed.
Increase speed to medium and mix for about 6 more minutes. Dough should be very smooth and elastic at this point. Take the dough from the mixer and place in a bowl lightly sprayed with oil. Leave the dough at ambient temperature for 20 minutes, then refrigerate the dough overnight. After two hours, punch the dough slightly down, cover it and let it stay in the fridge until next morning.
Remove the dough and allow it to sit at ambient temperature for 20 minutes.
Shape as desired. If doing the chignon, right after shaping coat the surface with flour, then allow it to proof for 90 minutes, covered with a cloth.
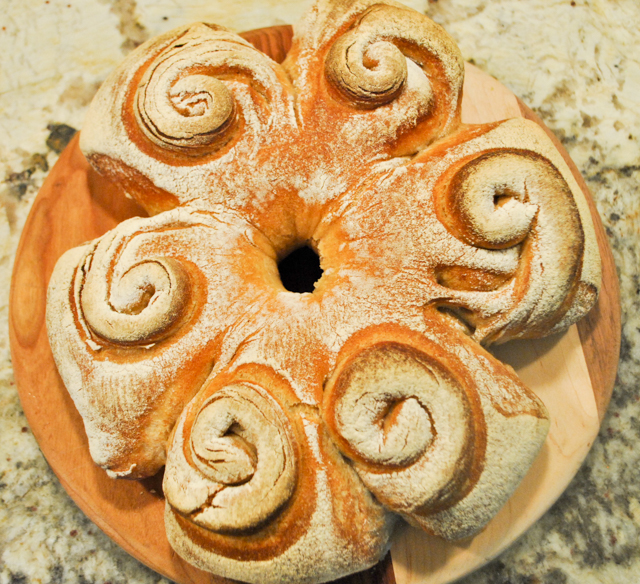
Bake at 470 F (245 C) in an oven with initial steam for 35 to 45 minutes, until golden brown.
Cool on a rack.
ENJOY!
to print the recipe, click here
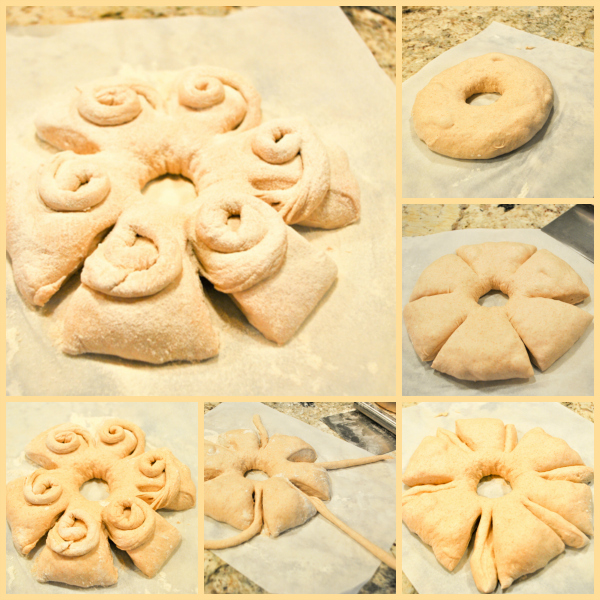
Comments: This bread shaping was part of the Craftsy class taught by Mr. Ciril Hitz , which I recommended in the past. His instructions are very clear and easy to follow, so don’t hesitate to get the lesson online for all the details and advice. The only tricky part of this shaping is rolling the little ropes without breaking their connection to the main dough. The dough has a natural tendency to resist shaping, so work slowly, do a little stretching one rope at a time, going around the bread. Once they get long enough to roll as a chignon, you are good to go. Immediately dust the whole shaped bread with flour, so that as the dough rises for the final 90 minutes, it exposes regions without the flour coating. That will ensure a nice double tone to the baked bread.
When I made this bread, I made the full batch as included in Craftsy class. Then I realized that Ciril shaped two loaves instead of one. So I divided the dough in two and did a simpler shaping with the second half. The recipe I included here, is for ONE chignon only.

Whenever I make one of the breads from Ciril’s class, I tell myself to try a higher hydration formula next time. And of course, I keep forgetting to do so. This recipe is at 65% hydration, I would like to go to 68-70% and see what effect it does on shaping and crumb. Note to self: try that. For real, not just in your imagination… (sigh).

ONE YEAR AGO: Rack of Lamb Sous-Vide with Couscous Salad
TWO YEARS AGO: Focaccia with Grapes, Roquefort and Truffled Honey
THREE YEARS AGO: Moroccan Carrot Dip over Cucumber Slices
FOUR YEARS AGO: White Chocolate Macadamia Nut Cookies
FIVE YEARS AGO: Cilantro-Jalapeno “Hummus”
NINE YEARS AGO: Shrimp Moqueca
