
Have you heard of it? In plain English it means Bird’s Milk, a very traditional Russian delicacy, also common in Ukraine and Romania. The name originates from Greek, bird’s milk implying a delicacy very hard to obtain, a rare pleasure. My encounter with this dessert deserves further explanation.

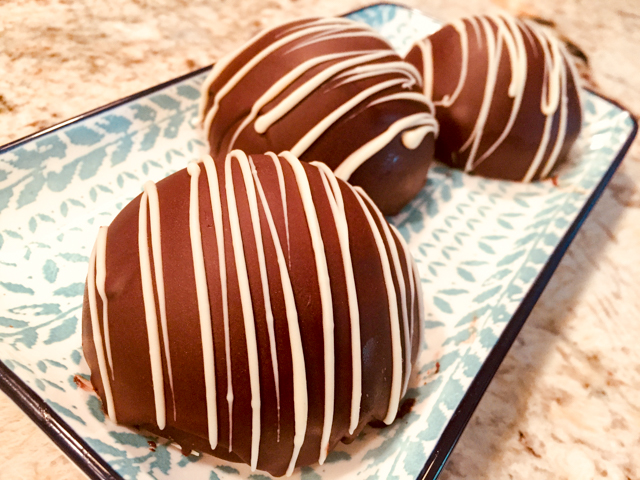
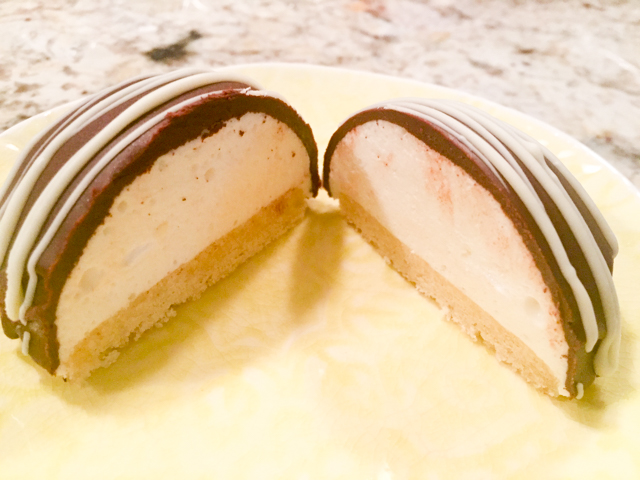
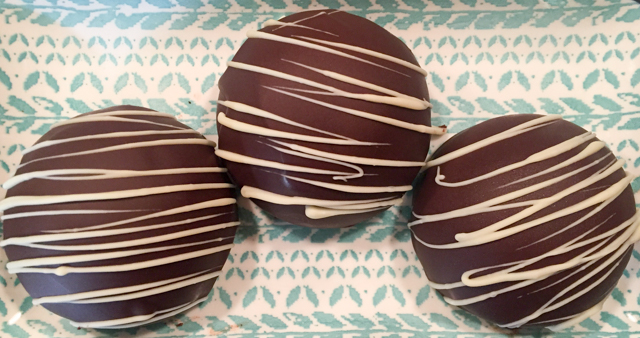
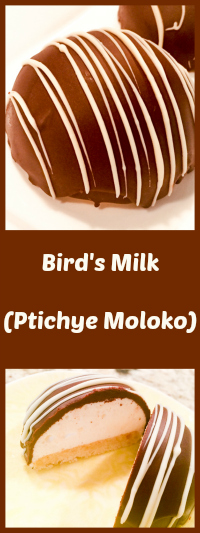
I’ve been seriously bitten by the dangerous Silikomart bug. Silikomart is an Italian company specialized in silicone molds for cakes, mousses, chocolates, anything your mind dreams, they might just make it. They can be pricey, but I found out that ebay is a delightful source to make this type of obsession even harder to control. Oh, well. The bottom line is that somehow I found myself with a couple of amazing molds and not that many recipes adapted for them. A cart-before-the-horse situation. I put google to work and next thing I knew, I stumbled upon a blog that blew my little mind away. The blog is written in Russian and… wait for it… Portuguese! I know, it was fate. The food blogger behind it, Ekaterina, is a fantastic professional patissière who trained with top chefs in Russia. I still have a hard time believing that I found one of the best desserts blogs out there, and she writes it in my native language. Reading her blog (Verdade de Sabor) became my routine late at night, indulging in her gorgeous dessert posts before falling asleep. That’s how I became acquainted with Bird’s Milk. A cookie base. A milk souffle-ish on top. A thin chocolate layer wrapping it all. And a big smile when you bring it to the table!
BIRD’S MILK (PTICHYE MOLOKO)
(very slightly modified from Verdade de Sabor)
for the cookie base:
80 g of softened butter
65 g powdered sugar
5 g sugar
1/8 teaspoon vanilla extract
2 egg yolks
90 g all purpose-flour
10 g almond flour
1/4 teaspoon of baking powder
for the milk filling:
100 g of egg whites
pinch of cream of tartar
180 g sugar
1/8 tsp vanilla extract
160 g water (divided in 60 and 100 g)
20 g gelatin powder
100 g of softened butter
100 g condensed milk
Chocolate cover:
400 g of chocolate 50-55%
100 g of oil (I used grapeseed)
Make the cookie base. Heat the oven to 350 F. In a bowl beat the butter and the powdered sugar and the vanilla until light and fluffy. Add the egg yolks, one by one, constantly beating. In another bowl sift the flour and baking powder and add to the previous mixture. Finally, add the almond flour. Stir very well. The dough does not get too thick or too liquid, the texture must be creamy.
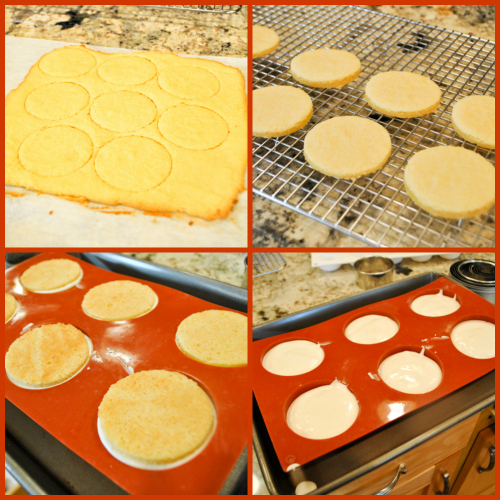
Spread the dough as a square, about 1/8 inch thick, smooth the surface with a spatula. Bake for about 15 minutes (depending on the oven) or until golden brown. Remove from oven and let cool slightly. Then, cut circles just slightly smaller than the diameter of your silicone mold. You can also make the dessert as a single rectangle or square, using a ring to assemble it. Your choice. Allow to cool completely.
Make the milk souffle: Hydrate the gelatin in 60 mL ice water. Then melt in a water bath (I placed it in the microwave for bursts of seconds, watching it very carefully). Reserve. In a bowl, beat the butter well with the condensed milk until you get a fluffy cream. Reserve.
Add the sugar and vanilla in a small saucepan, pour 100 mL cold water. Put a culinary thermometer in the mixture and bring to medium heat. Meanwhile, in the mixer, beat the egg whites until foamy. When the syrup boils, add the cream of tartar. When the syrup reaches 240 F (116 ° C), remove from the heat, and add the hot syrup to the egg whites gradually. Continue beating the meringue for a few more minutes or until it forms firm peaks. Then slowly add the melted gelatin, and continue to beat. Reduce the speed of the mixer to the minimum and gradually add the cream of butter and condensed milk.
Pour the souffle into the silicone molds (I made 6 individual serving ones, but had leftover filling that I added to a smaller mold and saved in the freezer for later). Place a cookie on top, and press it slightly into the mousse, but do not sink it in. Cover with plastic film and freeze. You can do that a couple of days in advance.
Make the chocolate coating: Melt the chocolate in a water bath or in the microwave. Add oil and stir well. Allow to cool at room temperature to 86 to 93 F (30-34 ° C). That is really pretty cold, below body temperature. You can also make that the day before and warm it up gently, without stirring with a whisk, as you don’t want bubbles to form.
Unmold the domes and cover with the glazing. Decorate with tempered chocolate if you desire. I used white chocolate drizzle.
ENJOY!
to print the recipe, click here
Comments: I used this mold for assembly of our dessert. It is not a Silikomart, but I like the quality and they are quite a bit cheaper. In Ekaterina’s blog, she used a different mold, in the “buche de Noel” shape, but you can assemble this dessert in a square format too. Whatever you do, the cookie base must be cut slightly smaller because the goal is to cover the dessert with chocolate and hide the base. Alternatively, you could cut it exactly the same size, coat the frozen milky filling with chocolate, let it set and then place it over the naked cookie. But it would have a totally different look. I like the way she did it, so that the cookie becomes a nice crunchy surprise as you cut into the dessert.
To un-mold the domes, I advise you to get a hairdryer and heat the surface of the dome just for a few seconds – that releases them very nicely, as you can see below. In fact, it’s amazing how often a hairdryer can come in handy when making more elaborate desserts. I rarely dry my hair, so it now lives in the kitchen… Go figure!
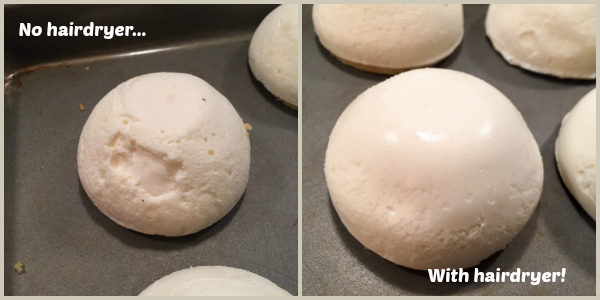
See the difference? I am so glad I thought about the hairdryer trick after un-molding the first one. In this type of dessert, any boo-boo makes the final product suffer. The trickiest part of the dessert is in fact the last one, the coating with the chocolate. It must be cold enough that it will settle right away instead of sliding down and not coating the surface. But that means you’ll have ONE SHOT at getting it right. I advise you to look at youtube videos to see how the pros do it, then cross your fingers and try it yourself. Keep in mind that you won’t be able to fix the surface with an offset spatula, or go at it again a second time. Both options will result in a wavy, not-attractive coating. I opted for a drizzle of white chocolate in the end not only because of the contrast of color, but to hide some of the imperfections I left as I poured the chocolate over the dome. What can I say? I am still learning and making mistakes in the process… Speaking of the drizzle (and mistakes), my virtual teacher Gary gave me a nice tip to make them better. Go passed the dome as the chocolate drizzle falls on it, so that you get a straight line all the way across. It will be more elegant that way. Lesson (hopefully) learned.
The dessert is truly delicious and worth the effort of the preparation. In fact, it’s not that hard if you make the components in advance and take your time. You can definitely make the filling a couple of days earlier, bake the cookie in the morning, and assemble it all before a dinner party. Leave it in the fridge for a couple of hours, and remove to room temperature about 15 minutes before you want to enjoy it. Then you’ll have a perfect texture in the filling.
I know that her blog being written in Russian and Portuguese makes it a bit hard to fully enjoy it, but I urge you to go there and marvel at her posts. She is also a delightful person, very responsive and helpful. She reads and writes in English, so comments in English are not a problem.
ONE YEAR AGO: Cheesy Low-Carb Zucchini Tarts
TWO YEARS AGO: Blogging Hiatus
THREE YEARS AGO: Apricots, Three Ways
FOUR YEARS AGO: Up Close and Personal with Kale
FIVE YEARS AGO: Black Berry Cherry Sorbet
SIX YEARS AGO: Asparagus Pesto
SEVEN YEARS AGO: Chocolate and Chestnut Terrine
EIGHT YEARS AGO: Under the spell of lemongrass
NINE YEARS AGO: Greens + Grapefruit + Shrimp = Great Salad!

Amazing work! Your attention to detail, your ability to take on a challenge and smash it every time, never ceases to amaze me!!! These are perfect xx
LikeLiked by 2 people
they were a ton of fun to make… still not boo=boo free, but I will get there eventually
LikeLiked by 1 person
You’re far too hard on yourself!!!!
LikeLike
I don’t think so – if you settle for less than your own expectation, what is the point of doing something? And I know you do exactly the same yourself (wink wink)
LikeLike
How exciting for you to have found that blog! They look beautiful and sound very delicious! I have that mold, so no excuse for me to try! Well done Sally xo
LikeLiked by 2 people
oh, if you have to mold, definitely go for it, it’s such a cool dessert!
LikeLiked by 1 person
Beautiful!
To the extent that I could follow the Portuguese, she seemed thrilled that you made these. I was surprised not to see a link in your comments back here.
LikeLiked by 1 person
SHe could not link back because I posted that comment when I first made the dessert, and only blogged today, not sure she even saw it. I might go back and tell her… 😉
LikeLike
Just told her in a comment… hope she stops by to see it! 😉
LikeLike
Sally, muito obrigada! Que delícia! Ficou perfeito! Adorei!😊😋👍👍👍👏👏👏💐
LikeLiked by 2 people
Honradissima com sua visita! tenho muito que aprender, mas devagar eu chego la’!
LikeLike
Wow, you nailed this one! These are so gorgeous! I am in awe.
LikeLiked by 2 people
Thank you!!!! I do hope you browsed through the Silikomart link – because I added it “just for you” (he he he)…
(Sally ducks fast)
LikeLike
Enabler! Bad influence!
LikeLiked by 1 person
can you hear my evil laughter???
LikeLiked by 1 person
This sounds like a fun, new obsession! I can’t wait to see what you make next. These little domes look so great, and that filling must be dreamy.
LikeLiked by 2 people
Indeed, a fun obsession! stay tuned for more…. 😉
LikeLike
These look great. The white topping recipe looks like marshmallow. The flavour profile and textures look the same as a childhood Wagonwheel treat – just a more elegant presentation. (Wikipedia say plain like yours is the original version of Wagonwheels, but I only remember the marshmallow stuck to the biscuit base with raspberry jam).
I mostly play around with sourdough and ice-cream, but bought same mould to experiment with making vegan Tartufo ice-cream. Now I have another recipe to try in it 🤪😅
https://en.m.wikipedia.org/wiki/Wagon_Wheels
LikeLike
Pingback: 30 Russian Desserts (Easy+Recipes)