
As you might imagine, I should stop buying cookbooks because I’d need to live to be 173 years old to go through the ones I already own. However, I am thrilled that I got the latest one from Emilie, pre-ordered the moment I saw it available: Artisan Sourdough Made Simple.
I’ve been following Emilie’s blog for a long time, and even reviewed her first cookbook a while ago (click here for a flashback). The salad I chose to feature in that post is one of those rare recipes that ended up in our regular rotation. You know how it goes in the kitchen of a food blogger. We are always trying new recipes, it’s a bit compulsive sometimes, but when a truly spectacular thing lands on our table, we go back to it. With this new book, Emilie does exactly what the title states: simplifies the making of artisan sourdough bread. She offers a very detailed explanation on how to make your first sourdough starter (that method that collects microorganisms from the environment), how to keep it healthy and use it to make all sorts of wonderful concoctions, going beyond bread baking. Formulas are simple, the timing is flexible, as exemplified in the recipe I share with you today. I was so fond of it that I made it four times in 5 weeks! Yes, talk about re-visiting something spectacular. I am not the only one smitten with Emilie’s book. Celia, the one and only blogger who lives in beautiful Australia, composed a wonderful review of Artisan Sourdough Made Simple, and I urge you to stop by and take a look… It might just be the push you need to take the book home with you (at least virtually, as I did with my Kindle version…). So, without further ado, my first sourdough bread from Emilie’s book…
HIGH-HYDRATION SOURDOUGH
(printed with permission from Emilie Raffa)
Tips from Emilie: The first step toward bigger holes is to add more water, or to increase the dough’s hydration. The second step is to expand your sourdough technique: Gently dimple the dough after the bulk rise and then shape it twice. Both techniques will help to open up the crumb and can be applied toward other doughs to achieve the same effect.
Suggested baker’s schedule: Thursday and Friday: Feed your starter until bubbly and active. Saturday Evening: Make the dough and let rise overnight. Sunday Morning: Shape the dough, let rise again, score and bake.
Bread formula
50 g (¼ cup) bubbly, active starter (mine was at 100% hydration)
375 g (1 ½ cups plus 1 tbsp) warm water
500 g (4 cups plus 2 tbsp) bread flour
9 g (1 ½ tsp) fine sea salt
Making the dough
In the evening, whisk the starter and water together in a large bowl with a fork. Add the flour and salt. Mix to combine, then finish by hand to form a rough dough. Cover with a damp towel and let rest for 1 hour. After the dough has rested, work it into a ball, about 15 to 20 seconds.
Bulk fermentation
Cover the bowl with a damp towel and let rise overnight at room temperature, about 8 to 10 hours at 70 ° F (21 ° C). The dough is ready when it has doubled in size, has a few bubbles on the surface, and jiggles when you move the bowl from side to side.
Shaping the dough
In the morning, coax the dough onto a floured surface. Dimple the dough all over with floured fingertips. Gently shape it into a round and let rest for 5 to 10 minutes. Meanwhile, line an 8-inch (20-cm) bowl or proofing basket with a towel and dust with flour. Using a bench scraper, scoop up the dough and flip it over so that the smooth side is facing down. Shape it again, and then flip it back over. Cup the dough and gently pull it toward you in a circular motion to tighten its shape. Place into your lined bowl, seam side up.
Final fermentation
Cover the dough and refrigerate for 1 hour to set its structure. Note: You can chill this dough for up to 6 hours or more. When ready to bake, let sit at room temperature while the oven heats up.
Baking the bread
Heat your oven to 500 ° F (260 ° C). Cut a piece of parchment to fit the size of your baking pot. Place the parchment over the dough and invert the bowl to release. Dust the surface with flour and rub with your hands to coat. Using the tip of a small knife or a razor blade, score the dough with the pattern of your choice. Use the parchment to transfer the dough into the baking pot. Place the pot on the center rack, and reduce the heat to 450 ° F (230 ° C). Bake the dough for 20 minutes, covered. Remove the lid, and continue to bake for 30 minutes. Lift the loaf out of the pot, and bake directly on the oven rack for the last 10 minutes. Cool on a wire rack for 1 hour before slicing.
ENJOY!
to print the recipe, click here
Comments: One of the advantages of a simple bread recipe is that you can concentrate on aspects other than the making of the dough, or its shaping, since it’s all so straightforward. This recipe was my gateway to practice different slashing patterns. My conclusion was that bread has a mind of its own. Almost every single time the final product was not exactly what I had in mind. But, isn’t that what life is all about? The more we try to control things, the more frustrated we might get. Until… until we learn to dance to the music and enjoy the unexpected, the stuff that does not go exactly as planned. No, I am not that wise yet, but working on it.
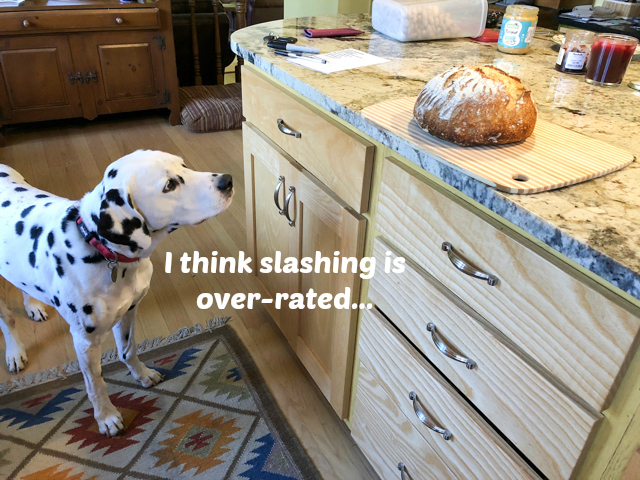
Indeed, for some members of our home, the way the bread looks is totally irrelevant…
Let me now show you my quartet of breads, all made with the same basic Emilie’s recipe, except that for the third loaf I increased the hydration even further (385 g water instead of 370g), and included one series of folds before the dough fermented at room temperature overnight. I did that after the dough had rested for one hour, then waited 45 minutes more to shape it into a ball and leave it alone at room temperature until next day. The more you push the hydration up, the more you’ll need some type of folding or kneading to make sure you have some structure in it. All things considered, I think Emilie’s formula as written is spot on, considerably simplifying the process.
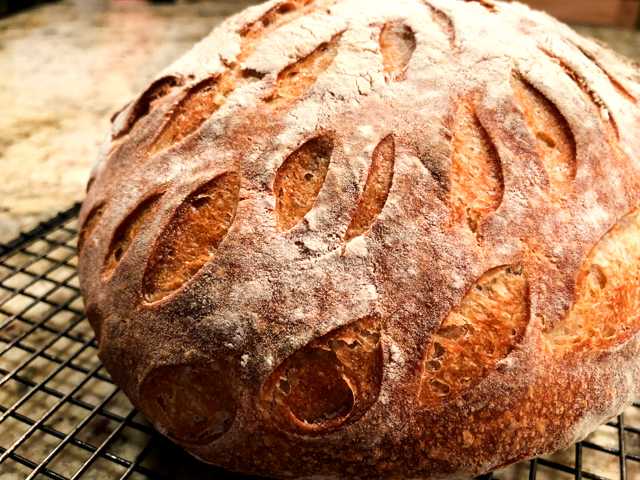
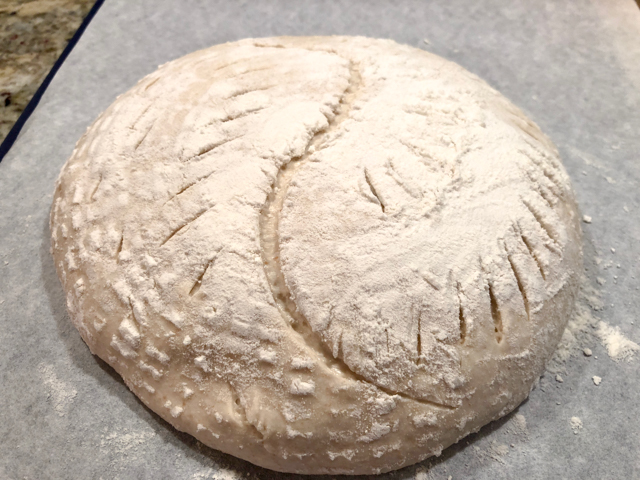
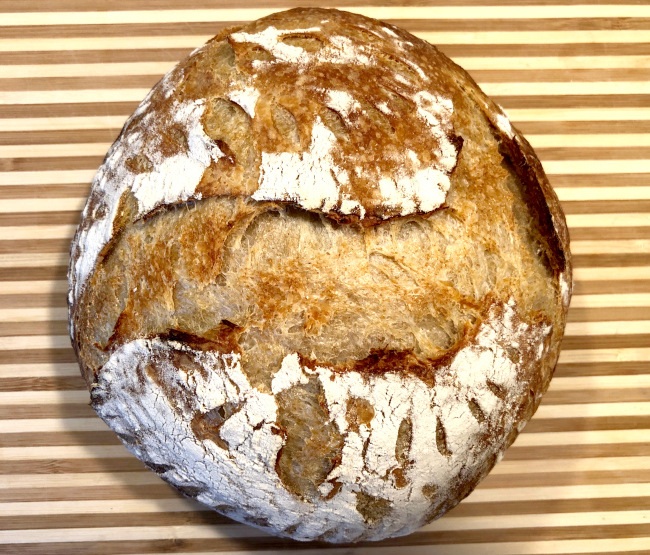
Slashing #1

That is the exact slashing that produced my featured bread. You probably did not see anything wrong with it, but that’s because I picked the best angle of the bread to take the picture. Full disclosure? Here we go:
The slash at the base of the circle was probably a bit too deep, and the thing lift off like a lid! Looked pretty funny, almost like a Trilobite fossil in search of food. And the crust got a tad too dark in that spot. Lesson to learn: be more gentle with the slashes at the base of the dough.
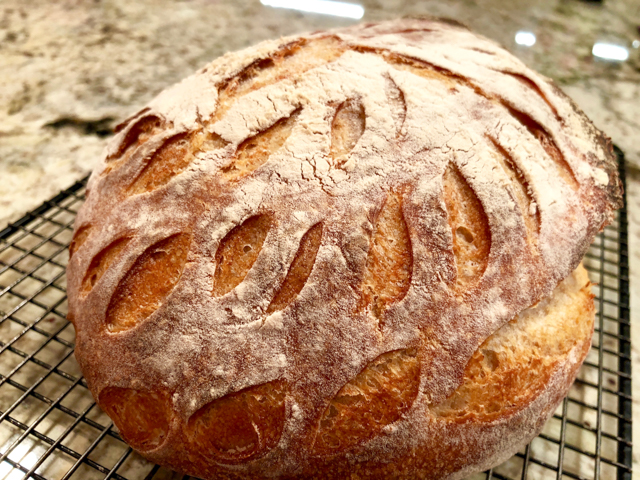
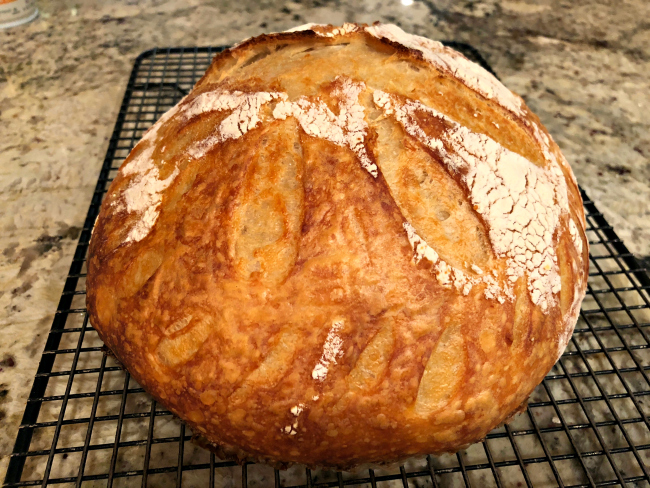
Slash #2
I was aiming for a yin-yang kind of thing. Here’s the result after baking…

Nice, open ears, but definitely not what I expected. Not sure if I had to be more delicate with the depth of the central slashing… but I liked the way the bread looked.
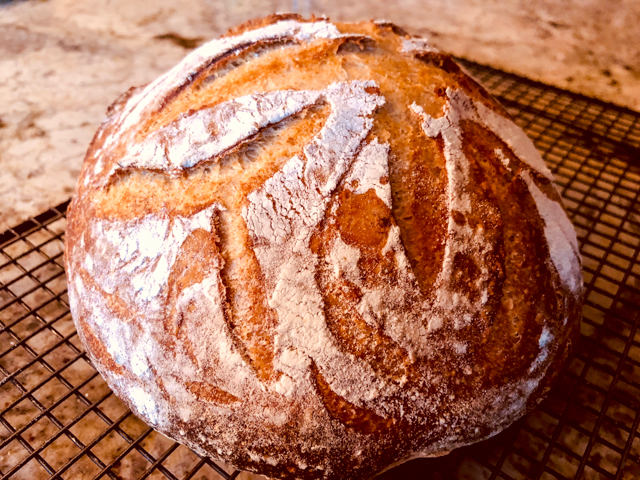
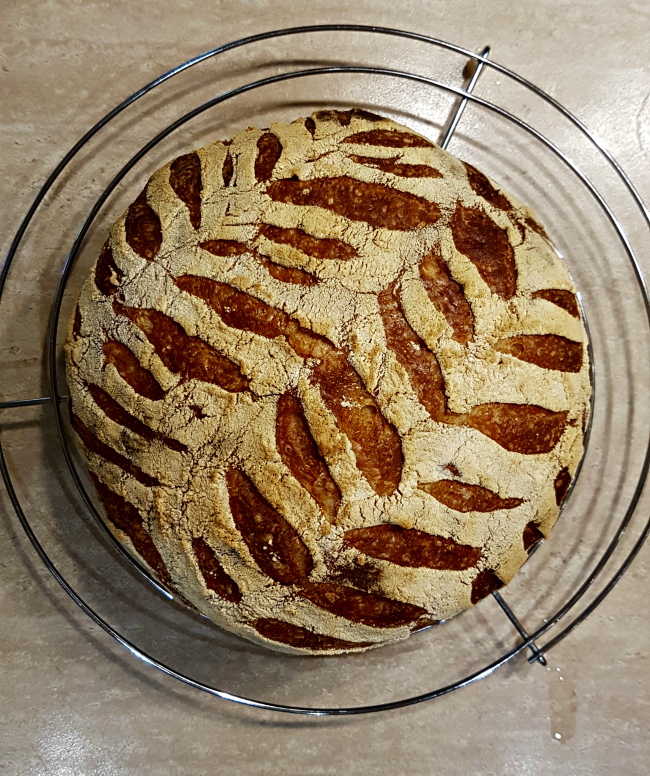
Slash #3

I went with a star-type pattern, and diagonal small slashes all around…. This time I had no particular expectations, just decided to accept whatever the Gods of the Yeasty Things rewarded me with…
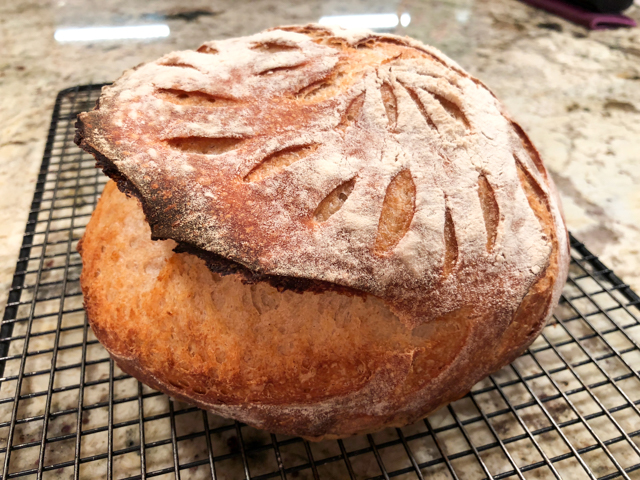
Slash #4

and the final, resulting loaf….
Probably my favorite… all plump and was singing out loud as it cooled…
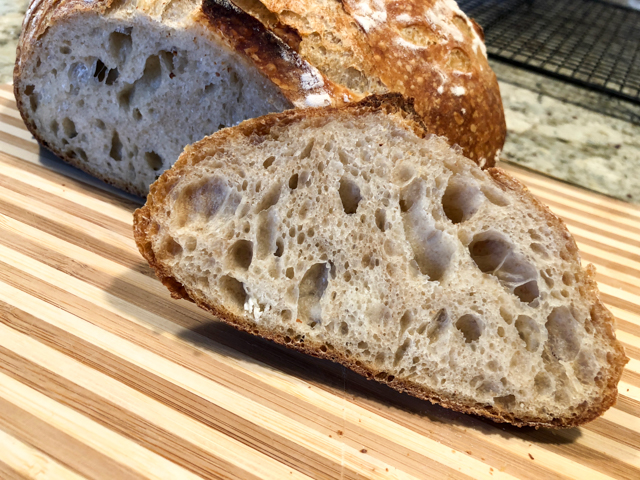
All breads made with the high-hydration sourdough tend to have open crumb,
very creamy texture, with a hard crust.
The kind of bread we really love!
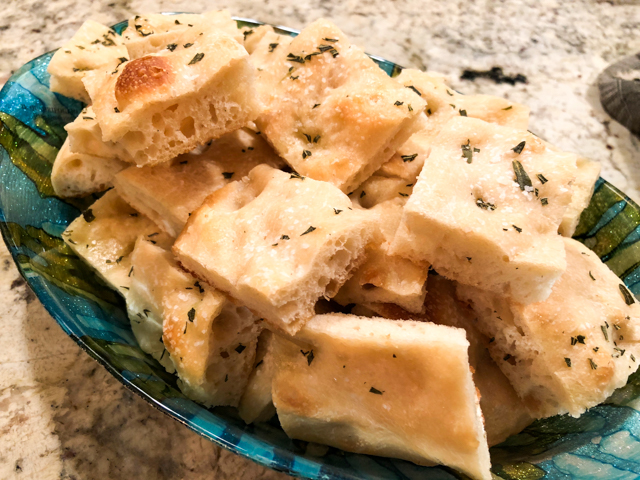
So there you have it, four loaves of bread made with a basic sourdough formula, according to Emilie’s Artisan Sourdough Made Simple. The same formula produces amazing – let me state that again – produces AMAZING focaccia…
It is really a lovely book, Celia did a great job reviewing it, so let me just tempt you with a very simple list of breads included in one of her chapters. I want to bake every single one of them. Period.
Decadent Chocolate Chip (O.M.G)
Dill and White Cheddar
Olive, Thyme, and Parmesan
Seeded Pumpkin Cranberry (O.M.G. #2)
Cinnamon Raisin Swirl
Chocolate Peanut Butter Chip
Pickled Jalapeno, Cheddar and Chive (O.M.G. #3)
Roasted Garlic and Rosemary
Sticky Date, Walnut and Orange (I rest my case)
Emilie, thanks for giving me permission to share one recipe from your lovely book… I am looking forward to baking more and more goodies from your tasty collection!
Note added after publication… I am thrilled to share with you a bread made by one of my followers, Sue (check her comment below). She used this recipe to make a real masterpiece in bread form!
 Great job, Sue! Thanks for sharing your bread with me!

ONE YEAR AGO: Short-Ribs with Chickpeas and Chard & London Cookbook Review
TWO YEARS AGO: Asian-Style Short Ribs
THREE YEARS AGO: Herbed Goat Cheese Souffles
FOUR YEARS AGO: Barley Risotto with Peas
FIVE YEARS AGO: Jammin’ Blueberry Sour Milk Pancakes
SIX YEARS AGO: Scallops with Black Pasta in Orange Cream Sauce
SEVEN YEARS AGO: Stir-fried Chicken with Creamed Corn
EIGHT YEARS AGO: Potato, Cheddar, and Chive Torpedo

Guess what? I already have the book even though I don’t need another cookbook either. It’s gorgeous, and I can’t wait to bake from it. I guess it’s cheaper than collecting designer purses, right? Your crumb is perfection, and I love the loaf with the blown out side! Bogey doesn’t care!
LikeLiked by 1 person
I knew I could count on you to own the same new bread book I do… 😉
LikeLike
Great post, hon! Emilie will be thrilled! Your loaves look magnificent!! xxx
LikeLiked by 2 people
So nice to “see” you here!
LikeLike
Wow, I’m struggling with extreme fatigue but I will fight through to give Emilie’s recipe a try. It looks gorgeous. Celia has taught me so much and now Emilie? We’re in for good bread.
LikeLiked by 1 person
Wonderful to have you stop by…. if you are dealing with fatigue, maybe this is the bread for you, don’t even need to fold it, you’ll have a gorgeous loaf!
LikeLike
Off subject – Maureen: delighted you are at least reading . . . think of you often and am sending wonderfully warm vibes northwards . . . love, Eha
LikeLike
A wonderful post! Emilia, her blog and her book are all fab, but most of all I love your loaves and all of your slashing!! I love the anticipation of not knowing exactly what the slashing will end up looking like…that moment of hope when you lift the lid on the baked loaf and just pray that it’s risen, and HOPEFULLY also looks good!!
LikeLiked by 1 person
isn’t that the coolest feeling? that heart beating a bit faster as you open the lid and see the result of your work? Love that… just love that
LikeLiked by 1 person
The best!!!
LikeLike
Another here who needs a new cookbook like a hole in the head – and the postman has just brought me Solo by Signe Johansen. It looks full of really great ideas to make interesting food for one. I am also a great fan of Celia’s blog and having read about Emilia’s book there I have got it on my kindle too. It may seem odd to bake my own bread when I live alone but I slice and freeze my loaves and that works well.
A home made loaf always makes a welcome gift too.
Might have known Bogey would be paying attention – but I don’t think it was the slashing he was interested in!
LikeLiked by 1 person
that Bogey is something, isn’t he? He is totally tuned into the noises around the kitchen – if we grab a knife from the storage place, even if we try to be as silent as possible, he might be deep asleep, his ears go up, and in one nanosecond he is right by our side!
LikeLike
I agree, your slashing is fantastic! I’m still scared of it ;P I bought Emilie’s book too thanks to the lovely Celia’s mention of it on her blog. I was lucky enough to have had sent some of the lovely starter “Priscilla” from her which I’ve had for some years now. She’s the perfectly behaved sourdough starter that I called “Eve” since I expected problems 🙂 I’ve even dehydrated her while in Europe the way Celia explained and she came back better than ever!!! I’ve made Emilie’s first recipe in the book, the everyday sourdough and wow it was probably the best loaf and easiest I’ve made so far. On to this one you are showing us today maybe next week. I have a black olive batard to attempt first in my new banneton but it’s not a sourdough. Please wish me luck!
LikeLiked by 1 person
Good luck! I will be holding your hand, virtually every step of the way……..
LikeLike
That is some incredible bread you got there! I loved the slashing comparison (and the comparison to trilobites, lol). But by far, my favorite is the focaccia. That may the thing that nudges me into finally trying this monstrocity of a loaf. But first…can I borrow a scale, a thermometer, a hydrometer, a hygrometer, and some starter? Thanks!
LikeLiked by 2 people
LOL … I had to pipe in. When I first started baking SD loaves, all I had was a DO. Since then I HAVE bought a really inexpensive digital scale ($12.99 at Canadian Tire) but that didn’t make all my problems go away. And I’m not going to throw money at the problems that I still have. 🙂
LikeLiked by 1 person
Forgive my ignorance, but what’s a “DO”?
LikeLiked by 1 person
Sorry, I’m so used to commenting in FB sourdough/bread baking groups that I forget the rest of the world isn’t as obsessive in their bread baking. 🙂
DO = dutch oven
I bought myself a cherry red Le Creuset enameled dutch oven in more affluent days. It’s used to help create a very hot steamy environment in the oven during baking so as to produce maximum oven spring … not that I’ve been overly successful in the pursuit of that so far.
LikeLiked by 1 person
Lol. Ah, you kids with your wacky internet abbreviations! (I *am* rather obsessive about my baking, but I’m not on Facebook or any other social media site. I’m an outcast. At least until I shower.)
I have a whole collection of Le Creuset pieces ( https://dangerdangerwordpresscom.wordpress.com/2016/08/29/porn/ ) and have made bread in several of them over the years, including the famous “no knead” bread that was all the rage a few years ago. Frankly, much as I love my enameled babies, I don’t see much advantage to baking yeast breads in them. I will say, though, that soda risen breads work fantastic in them (I have a pic in another post of a terrific Irish soda bread). 🙂
LikeLiked by 2 people
soda breads… huuummmmm…. I might have to try that in my D.O…..
LikeLiked by 1 person
Here’s a pic (just scroll past the stupid story): https://dangerdangerwordpresscom.wordpress.com/2017/03/17/oleftovers/ . I’m doing that again this year.
LikeLike
Kids … at 62 I haven’t been a kid in a LONG LONG time. Maybe a kid at heart. 🙂
I don’t bake soda breads often … maybe once a year in March when I try to come up with an Irish themed meal to switch things up for the season. I’ve been meaning to make colcannon (or colcannon light with shredded coleslaw mix) for a while now. I’ll have to try baking the soda bread in the dutch oven. Thank you for the idea.
Oh, I’ve tried making no knead bread … once. I don’t actually mind kneading though there’s a sourdough no knead that I’ve made about 10 times over the last year or so. I bake for just me and don’t usually eat that much bread … only when I try out new recipes when I get bored. Cause baking bread is inexpensive. And fun.
LikeLiked by 2 people
It IS fun, isn’t it?
And your avatar doesn’t look 62 at all. Growwwwwwwwwl! 😉
LikeLiked by 1 person
yes to scale. yes to thermometer, no to a hydrometer, no to a hygrometer, yes to starter… next question? (of course the NOs are for their non-existence in my kitchen OR lab… 😉
LikeLiked by 1 person
Duly noted. Will just have to lay toilet paper around my kitchen again and see when it looks damp (remind me to use UN-used toilet paper this time).
Next question? Ok: what the hell is going on with Lula?!
LikeLiked by 1 person
oh, man… Lula… I have to tell you that my mind is so upset with what we have in the US of A that I do not have the space or the intestinal fortitude to focus on what is going on back home. I can tell you hell is breaking lose, Rio de Janeiro’s violence is hitting unprecedented levels, everyone is upset, frustrated, and no light is seen at the end of the tunnel. We will be there next month…. I might be able to tell you more later..
LikeLiked by 1 person
I’ve actually been having to keep up with news out of Brazil as part of my job, and you’re right: very upsetting on many fronts. Such a beautiful place, such a rich culture. Such a shame. I hope things smooth out for everyone’s sake, and soon.
Glad to hear you’re going! Come back with wonderful pictures 🙂
LikeLike
No new cookbooks for me either but I DO appreciate having people cherry pick outstanding recipes like you have and sharing them. I haven’t had much luck with high hydration doughs in the past so I have pretty much stuck to one particular no knead and a tartine recipe for my SD baking but I’m going to save this one and give it a try. Thank you.
LikeLiked by 1 person
it is true that the higher the hydration the more you need a bit of practice to get used to handling the dough – some youtube videos show bakers pushing the envelope way way high, reaching 90% hydration, which is insane… they end up slapping the “dough” on the surface to promote gluten formation and structure… very cool to watch, I haven’t tried taking the hydration that far
LikeLiked by 1 person
I can’t get the hang of slap and fold. Stretch and fold is about as much as I can manage.
LikeLike
I sure as heck don’t need another cookbook, but since I was just thinking about getting into baking bread again using a short and simple recipe that I downloaded, I took a look at this book and bought it instead. Thanks for the heads up Sally.
LikeLiked by 1 person
wonderful! You will love the book, I am sure!
LikeLike
Gorgeous!! I’m with you on the cookbook and recipe collection… I need to live to 173 with you! 😉
LikeLiked by 1 person
now that’s a plan! Which color rocking chair would you prefer? I will go for purple and gold – you know, simple… subdued.. 😉
LikeLiked by 1 person
I’ll have a sparkly one! 😉
LikeLiked by 1 person
This post reminds of a book we just read for book club. Have you read Sourdough by Robin Sloan? If not, it’s a must read! Excellent and funny fictional book, but you’ll see a lot of truths about sourdough in there. 🙂
LikeLiked by 1 person
Haven’t read that! will investigate….
LikeLiked by 1 person
Beautiful bread!! All of them are! Slashing can be so tricky but I think yours is wonderful!
LikeLiked by 1 person
it’s such a lot of fun to try new ways to slash the bread… of course, stenciling is on my radar too, but I have not tried it yet
LikeLiked by 1 person
Sally I finally got around to making this loaf today and it came out great. I even attempted to do the bird wing slash pattern out of the book and I’m pretty darn proud of my first attempt!
LikeLiked by 1 person
THAT IS FANTASTIC!!!!! Thrilled for you, and thanks so much for letting me know! My Saturday starts even better for that!
LikeLike
I’d love to show you Sally. I took a photo. What is the best way?
LikeLiked by 1 person
If you send my by email, I would love to include it in this post at the end of it, if you give me permission… my email is sallybr2008 at gmail dot com
LikeLike
Thank you for putting my photo up 🙂
LikeLiked by 1 person
my pleasure!
LikeLike
Someone recommended this article to me to see Emilie’s recipe and now I’m going to buy the book! Thank you
LikeLike
Oh, that is so wonderful to know! You will LOVE her book, I am sure about it
thanks for letting me know you appreciated the article…
LikeLike
Hello Sally
Do you put the dough in a COLD baking pot?
LikeLike
yes, and it works like a charm! Plus you don’t risk getting burned, as I so often did, before using this method…
LikeLike
I am baking it now..
The only changes I made is I added chopped rosemary and some turmeric. BUT My dough can’t be shaped I’m so heart broken now.. it’s in the oven still… I suspected it may not work but as there’s no fold to work on gluten.. but I am curious to follow the steps can it really be that EASY.
Why would you think is my failure? It rises beautifully it just not strong to shape sloppy blob.
LikeLike
Sometimes the flour behaves differently, depending on brand, bag, it’s really pretty complex
If it is too too slack, incorporating one or more series of folds can help – but truth is, even if my loaves turn a bit “pancakey”, they still taste great, so I don’t beat myself up too much…. hope it turned out excellent! For some reason I only saw your comment today
LikeLike
Thank you ! The loaf surprisingly turn out not the best looking coz of not able to shape but it rises! But when I make another yesterday…. oh well that becomes a pancake 😂😅
LikeLiked by 1 person
I say if pancake tastes good, long live the pancake! 😉
LikeLike