
Many years ago, I baked a bread called “Cottage Loaf” for a wonderful friend of ours, who was born and raised in England. I had never heard about it, never seen or tasted this special bread that elicited fond memories in our friend. Come to think of it, pretty naive of me to try and bake a special loaf having zero knowledge about it. I was so nervous about the shaping – it involves dividing the dough in two unequal portions, balancing the smaller one on top of the bigger one, so I completely forgot to slash it before baking, as you can see with a jump to my old post. Seven and a half years went by (!!!), I never attempted it again. To my surprise, last week’s episode of The Great British Bake Off featured that very bread of my past as the technical challenge. I simply had to go for it, particularly after witnessing so many talented bakers having all sorts of issues with the challenge. Not because they lack skills, mind you. But because the instructions given in the show for every technical challenge are pretty minimal. One of the contestants had his top loaf collapse into the lower one, and in despair he said “my dough ate itself!” I could feel his pain… Anyway, without any more tangential talk, here is my Cottage Loaf. Too bad we now live 312 miles away from our friend Glenn. I suspect he would enjoy a slice or two…
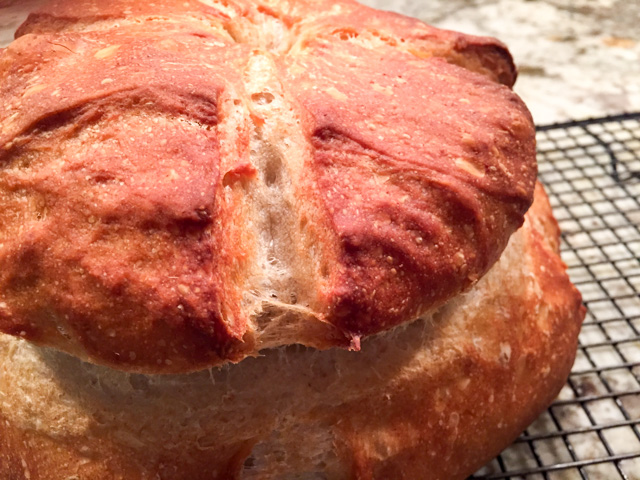
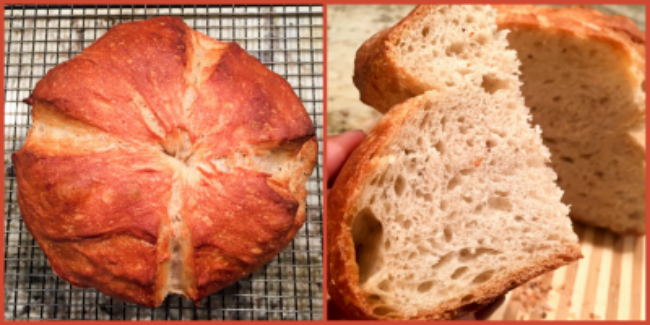
COTTAGE LOAF
(adapted from Celia’s blog)
(recipe in metrics at the end of the post)
Pre-ferment:
140g all-purpose flour
140g bread flour
1/2 tsp sea salt
1/2 tsp instant yeast
170g water
Mix the two kinds of flour, salt, and yeast in a bowl. Add the water, mix briefly and let it rest for 10 minutes. Knead the dough briefly, allow it to rise for 1 hour at room temperature, then stick it in the fridge overnight.
Final dough:
All the preferment
225g bread flour
45g rye flour
3/4 tsp sea salt
1 tsp instant yeast
170g water, at room temperature
Remove the pre-ferment from the fridge 1 hour before making the dough, cutting it into pieces to speed up warming up to room temperature. Place in a large bowl. Cut it into pieces with a knife or pastry cutter, and place them in a large mixing bowl.
Add the water and yeast, and stir together, then add the flours and salt. Combine everything into a shaggy mass, allow it to sit for 20 minutes undisturbed. Let the dough rise for 90 minutes, folding the dough at 20 and 45 minutes. Dough should rise not more than double its original size.
Weigh the dough (it should be around 900g), divide in two pieces (600g and 300g each), form each piece into a tight round. Allow them to sit for 15 minutes at room temperature, then coat the large ball with a little olive oil, cut a cross on top. Cut a cross on the bottom part of the smaller ball, and place it on top of the large one.
Now insert your finger or chopsticks in the center of the round, going almost all the way to the bottom, opening the whole outwards slightly to join both loaves. Allow them to rise for 10-15 minutes more before baking.
Slash the dough all around cutting through both levels. Place the bread in a the oven (430F), cover it with an inverted roasting pan moist with hot water, bake it for 30 minutes, uncover and allow it to bake for another 15 minutes (if top layer is browning too much, protect it with aluminum foil). If you don’t have a roasting pan large enough to cover the dough, follow the baking method explained here.
Allow to completely cool on a rack before slicing through.
ENJOY!
to print the recipe, click here

Comments: I was so happy with this baking adventure! I haven’t baked a loaf of bread in many months, my poor sourdough starter is totally neglected. This bread – that takes a simple pre-ferment made the day before – was a nice way to warm me up for more baking ahead. All things considered, it is not a difficult recipe. The bulk rise of 90 minutes is followed by simple shaping, less than 30 minutes more and into the oven it goes. Once again I used a 600 g to 300 g ratio of lower ball to upper ball, but I think that 650:250 could work even better, more stability for the upper component. Keep that in mind if you try it. Cutting a cross on top and bottom before joining the two balls is very important to ensure they will stay glued during baking, probably a step that was not included in the instructions for GBBO contestants.
I think my technical challenge went very well. At least our judge Paula Hollywood seemed pleased with it… If you are ready for some serious silliness, click on the video. At your own risk…
Please note Bogey circling around from the get go, and Buck getting up the moment he hears the knife in action… Oscar? He rather not have anything to do with so much non-sense going on in the kitchen. What a fun killer!
😉
Pinning is caring, go ahead and pin away!
NOTE ADDED AFTER PUBLICATION:
Measurements in cups:
For the pre-ferment, mix 1 cup all-purpose flour to
1 + 1/3 cup bread flour. To that add 3/4 cup water
For the final dough: 1 + 1/2 cups of regular flour, 3/8 cup rye flour, and 3/4 cup water
ONE YEAR AGO: Pork Ribs: Sticky, Spicy and Awesome
TWO YEARS AGO: Sobering Peach Sorbet
THREE YEARS AGO: Buttermilk-Blueberry Breakfast Cake
FOUR YEARS AGO: Silky Cauliflower Puree with Almond Milk
SEVEN YEARS AGO: Popeye-Pleasing Salad
.

Brilliant!!! You would definitely get the handshake 🤝🤝🤝🤝
And you know I love the video 😂😂
LikeLiked by 1 person
I kicked myself after, should have done the “well done” and offered a handshake – oh, well – there’s always next time, right?
LikeLiked by 1 person
Always!
LikeLiked by 1 person
Loved your awesome recipe 🙂
LikeLiked by 1 person
Thank you, unfortunately I cannot take credit for it… but it turned out really good, the little amount of rye does a superb job with the taste, always
LikeLiked by 1 person
that looks incredible, and i think you need to include more videos! i love seeing and hearing you! ❤
LikeLiked by 1 person
but, but, but, that was Paula Hollywood! I don’t talk like that AT ALL… (wink, wink)
LikeLiked by 1 person
I love this!! After reading this, I googled The Great British Bake Off and Cottage loaf, and found lots of fodder for double entendres!
Your loaf looks perfect and your video is so adorable!!! I love it!
LikeLiked by 1 person
Glad you enjoyed it… the video was a spur of the moment kind of thing, ready set go, no real planning… oh, well – it was fun…. the bread is great, we have 3/4 of it in the freezer for future pleasure…
LikeLike
What a lovely loaf.
I also just made a few of these, also with a preferment (you cannot beat a preferment for flavour, can you?). I am such a technical challenge fan on Bake Off.
LikeLiked by 1 person
Me too, it is a favorite part for me, because everyone gets to make the exact same recipe, with limited instructions. I just think for this bread a little more time would have helped. Two and a half hours is barely enough
LikeLike
Hi Sally! I’ve finally ventured into using live starters, and thanks to you were able to revive a refrigerated one that was slowly dying! This bread looks like a lot of fun and have learned a lot looking through your recipes!
LikeLiked by 1 person
So wonderful to “see” you here! I am doing a happy dance, wish you could see it… ooops, on second thought, maybe not. Maybe you should just imagine it!
I hope you will have a ton of fun with sourdough baking – in fact, my next post is a sourdough bread I made recently… stay tuned, coming up on Friday
LikeLiked by 1 person
Whoah! Look so amazing. What about the taste? Do you recommend it?)
LikeLike
BIG YESSSSSSSS!!!!! 👍
LikeLike
Okay, try to do it later. Of course, if I find a rye flour. I don’t see it in stores.
LikeLiked by 1 person
It is such a great flour to add to breads, really worth ordering online if you must
LikeLike
Okay, thanks)
I will be really grateful if you will visit our blog, thanks for help)
LikeLike
Did you use medium rye flour here, or whole rye flour?
LikeLiked by 1 person
I used DARK, which I think is the same as whole rye?
LikeLike