“LIFE IS A MATTER OF TASTE…”

That was David Rosengarten’s closing line in his wonderful show “Taste,” years ago on FoodTV. Each episode centered around one dish, prepared by David while he talked about its origins, variations, and ultimately, his method to flawlessly reproduce it in your own kitchen. It was a simple format, but it delivered everything I expected from a cooking show. He almost always remained true to the classics. For instance, his shows on quiche Lorraine, cheese souffle and croissants were all based on recipes from Julia Child’s Mastering the Art of French Cooking. But sometimes he would wander off in new directions: his interesting show on “Compromise Clam Chowder” was an example of his gastronomic rebellion. After explaining the differences between the New England and Manhattan methods for chowder, he offered his own version, borrowing a little bit from each. Similarly, his macaroni and cheese included a few “extras” to make the dish less monotonous, and it was absolutely delicious.

Through his show I learned about many exotic dishes such as laarb, before I even had a chance to try it in a restaurant. And, I stopped twisting my nose at offal, because David Rosengarten’s recipes were perfect for any palate. From him I learned how to cook pork ribs in a stove-top smoker, mimicking as closely as possible the best ribs of Memphis, one of the homes of barbecue. I loved watching him prepare Brazilian moqueca, even if his pronunciation of the state of its origin (Bahia) was a little off ;-). His show was classy, informative and fun, and I was sad to see it end.

So, I guess you can imagine how I felt when I received an email from Daniel Boneville, who just produced a video with David, and sent me the link. If you’ve also been suffering from Rosengarten-withdrawal syndrome, allow me to ease your pain, and I cross my fingers that this is just the first of a very long series!

Click here for the one and only David Rosengarten, on a quest to re-create his favorite tomato sauce…

With many thanks to Daniel Boneville….

Add to FacebookAdd to DiggAdd to Del.icio.usAdd to StumbleuponAdd to RedditAdd to BlinklistAdd to TwitterAdd to TechnoratiAdd to Yahoo BuzzAdd to Newsvine

MELLOW BAKERS: CORN BREAD

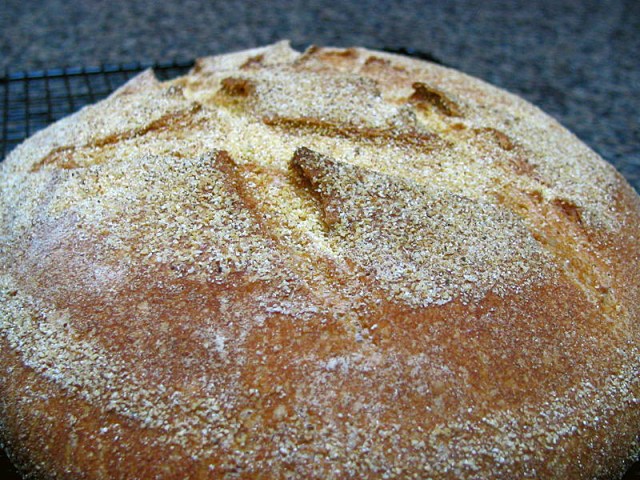
Have you ever had to run from one side of the airport to another to catch a flight, and managed to enter the plane just before they shut the doors?    That’s how I’m feeling about this bread – the last one to complete the May series of Mellow Bakers!   With only one day to spare,  here I am, bringing you corn bread…

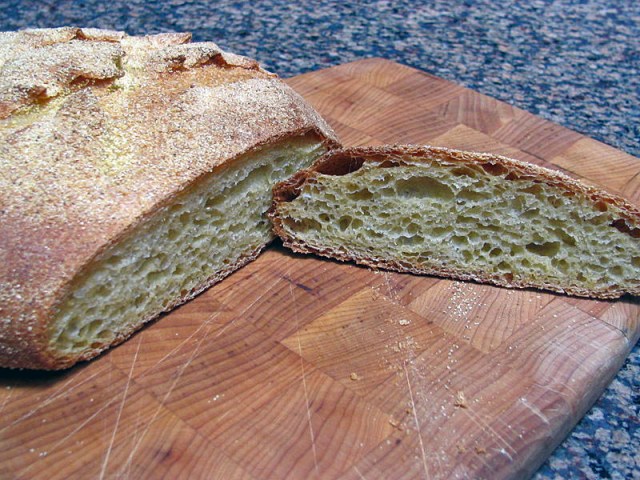
When thinking about corn bread my mind floats towards iron skillets and bacon.    However, Hamelman’s corn bread has nothing to do with that American classic. It is in fact a “regular”, yeast-leavened bread, with corn meal in the dough.   The dough is also leavened with a poolish, a mixture of flour, water, and yeast that pre-ferments for 12 hours.   In typical Hamelman’s fashion, the dough is mixed very briefly, then folded once before the final shaping.    The corn meal imparts a nice yellow tone to the dough, but also makes it feel a little rough.

This is a very nice bread, open crumb, delicate flavor… Two thumbs up!

If you want to see all other bakers’ take on Hamelman’s corn bread, click on this link

For those following the Mellow Bakers adventures,  the month of June brings Vermont Sourdough (my default bread),  pizza (I definitely look forward to comparing Hamelman’s dough with my favorite),  and a bread made with beer and roasted sprouted barley (no idea where I’m going to find that :-(). Stay tuned, or… join the fun and bake with us!

ICE CREAM MELTS FOR MANGO

I grew up watching my family members eating mangos and making a huge mess in the process.  Some varieties of Brazilian mango are so fibrous that the “correct” way to eat them is to cut a small hole in the top and suck out the juices while compressing the fruit, which leaves your mouth, face, hands, and possibly even your clothes covered with juice and sticky mango bits.  Some people view this process as part of the fun, but both me and my Dad had nothing to do with it, and only enjoyed a mango if it was laying on a pristine plate, dissected by a knife and fork, with a napkin alongside.

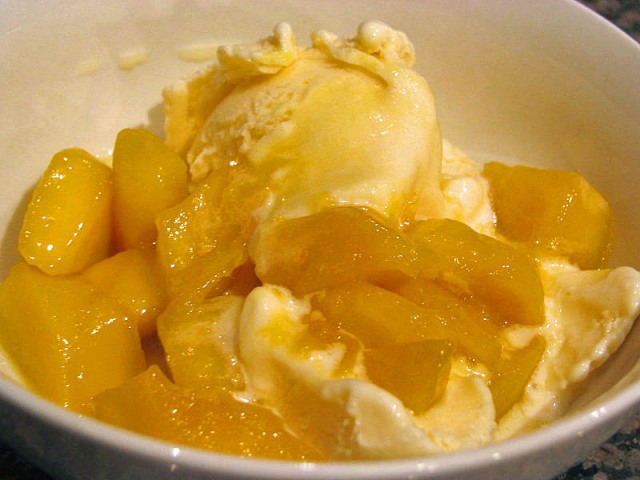
This simple dessert would certainly receive the seal of  approval from my Dad.

MANGOS FLAMBE  (MANGAS FLAMBADAS)
(inspired by my friend Vanda)

4 ripe mangos
1 Tbs butter
2 Tbs granulated sugar (or more)
pinch of salt
1/4 cup rum (or Cointreau or a mix of both)
2 tsp fresh lemon juice

Cut the mango in medium-sized pieces.  Go take a quick shower (optional).  Come back and melt the butter in a large skillet over medium heat.   Add the diced mango, sprinkle sugar all over it, add the salt, and cook gently until the mango starts to get soft.   Taste a piece and decide if you need more sugar.

Carefully add the rum, heat it for a few seconds, and ignite with a match.  Wait until the flames die down, sprinkle a little lemon juice, taste again.   Serve over vanilla ice cream.

ENJOY!

to print the recipe, click here

Comments: You can change this basic recipe in many ways.  For example, you may first caramelize the sugar, and then add the fruit on top.  But, I prefer this preparation I’m posting because it’s simpler and the taste of the fruit is more pronounced.  You may also skip the alcohol with no major harm, but I like the extra flavor it imparts.   If you have leftovers (highly unlikely), they are delicious in the morning with yogurt and a little granola sprinkled on top.   You can prepare bananas in almost exactly the same way, or even along with the mango, but when making bananas flambe, I like to caramelize the sugar first.     My friend Vanda,  who makes risottos and souffles with her eyes closed and one hand tied behind her back, loves to prepare mangos this way.  After dicing the fruit, she usually grabs the pit and takes great pleasure in sucking all the mango-goodness clinging to it, standing next to the sink.   Unfortunately, I never seem to have my camera ready when that happens.  😉

Add to FacebookAdd to DiggAdd to Del.icio.usAdd to StumbleuponAdd to RedditAdd to BlinklistAdd to TwitterAdd to TechnoratiAdd to Yahoo BuzzAdd to Newsvine

GRILLED LETTUCE SALAD

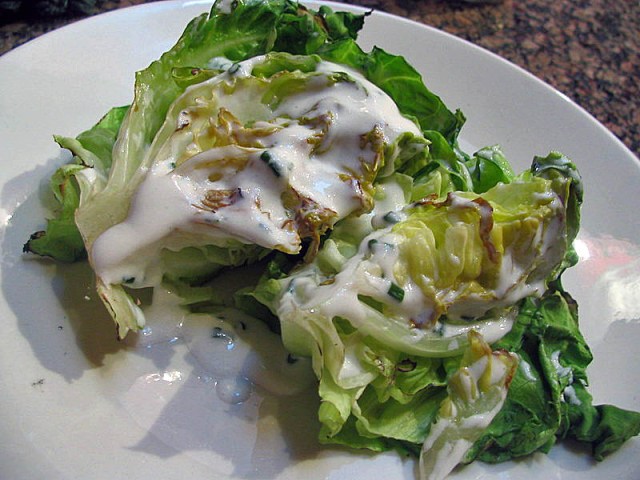
The slightly unusual food preparations continue to take place in our kitchen… After frying a boiled egg and roasting greens, I grilled some lettuce . This  3-minute preparation delivers a punch of flavor, leading the humble butter lettuce to its best performance. From the latest Fine Cooking magazine  which, by the way, is an awesome issue, I’d love to make almost every recipe from it!

GRILLED BUTTER LETTUCE SALAD WITH BUTTERMILK-CHIVE DRESSING
(adapted from Fine Cooking #105)

1 butter lettuce, cut in half lengthwise
1/4 cup buttermilk
1/8 cup creme fraiche (I substituted sour cream)
1 Tbs olive oil
1 Tbs thinly sliced chives
1/2 Tbs freshly squeezed lemon juice
salt and pepper to taste
vegetable oil for the grill

Prepare a gas or charcoal grill at medium-high heat.

Whisk the buttermilk, creme fraiche, olive oil in a bowl. Add the chives, lemon juice and mix well. Season with salt and pepper. Reserve.

Brush the grill with a light coating of vegetable oil, place the lettuce, cut side down, and grill for 2 to 3 minutes. Transfer the grilled lettuce to a serving plate, cut side up, and drizzle the dressing over it. Sprinkle with a little more salt and pepper, and serve.

ENJOY!

to print the recipe, click here


Comments: Sometimes the idea of washing, drying, slicing…  the whole “prep work” associated with making a good salad makes me a bit tired.   However, this recipe delivers a delicious, and quite elegant salad in – literally – 6 minutes.  All you need is the most gorgeous, preferably organic butter lettuce available, and a few ingredients for the dressing. My beloved suggested adding a little blue cheese  – “it will make it perfect”! – so, keep this in mind if you make it.

Grilling the lettuce intensifies its flavor, and changes the texture ever so slightly, making each bite have its own character: closer to the edge a bit smokey, a crisper and brighter taste as you indulge deeper. The buttermilk dressing is very flavorful – it will certainly go well over other roasted or steamed veggies. I can see myself grilling lettuce during the whole Summer!

FARFALLE, FARFALLE

“Fahr-fah-lee.”  I love this word! So uplifting, it makes me smile… In my next life I want to be Italian. 😉

This recipe comes from The Splendid Table, from which I recently posted another recipe .  I don’t know about you, but even though I own a big collection of cookbooks, when I pick a recipe from one of them the chances are that I’ll make two or three in a row.

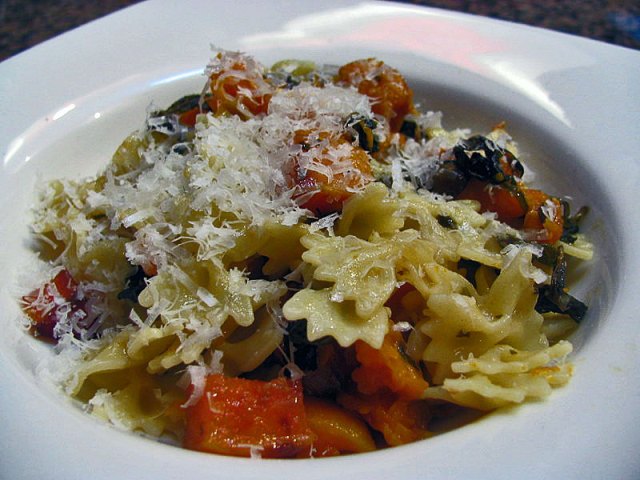
SWEET ROASTED BUTTERNUT SQUASH AND GREENS OVER BOW-TIE PASTA
(from The Splendid Table)

5 qt salted water

For the roasted veggies
3 pounds butternut squash, peeled, seeded, and cut into bite-sized chunks
1 medium onion, cut into chunks
2 big handfuls of escarole or spring mix of your choice
1/3 cup basil leaves, torn
16 large sage leaves, torn
2 garlic cloves, chopped
1/3 cup olive oil
1/4 tsp red pepper flakes
1 Tbs brown sugar
salt and freshly ground black pepper

For pasta finish
1 pound bow-tie (farfalle) pasta
1/2 cup half and half
6 ounces asiago cheese

Turn the oven to 450F and bring water to boil.  Toss all the ingredients for the roasted veggies in a big bowl, place them in a shallow roasting pan (preferably in a single layer), and place in the oven for 25 minutes, or until the squash is tender.  Toss the veggies around a couple of times during roasting.

Cook the pasta until al dente, drain in a colander.  Once the squash is tender, turn the broiler on for a few minutes if you want to brown it slightly. The greens will be fully wilted, and almost crisp.

Scrape everything into a serving bowl, add the half and half, hot pasta and 1 cup of the cheese.  Toss to blend, adjust seasoning, and serve, adding more cheese on top if you want.

ENJOY!

to print the recipe, click here

receita em portugues ao final da segunda pagina

Comments: This preparation perked my interest for two reasons. First, anything that joins pasta and butternut squash turns me on, gastronomically speaking. 😉 Secondly, I was curious about roasting greens together with the squash, something I’d never done before.  Since the same book had me frying a boiled egg with a happy ending, why not roast a few pieces of frisee?

We both loved this pasta – even leftovers next day were still tasty.  To speed things up, I peeled and cut the squash early in the morning, so when we arrived from work all I had to do was put the pasta water to boil, turn on the oven and dinner was ready in 35 minutes. I gave myself a pat on the back!

Add to FacebookAdd to DiggAdd to Del.icio.usAdd to StumbleuponAdd to RedditAdd to BlinklistAdd to TwitterAdd to TechnoratiAdd to Yahoo BuzzAdd to Newsvine

Jump to the next page for a little story about butternut squash and the North Shore of Oahu….

Continue reading